Ir para o conteúdo principal

PlayStation 3 Slim Thermal Paste Replacement

O que você precisa

  1. PlayStation 3 Slim Thermal Paste Replacement, Thermal Paste: passo 1, imagem 1 %32 PlayStation 3 Slim Thermal Paste Replacement, Thermal Paste: passo 1, imagem 2 %32 PlayStation 3 Slim Thermal Paste Replacement, Thermal Paste: passo 1, imagem 3 %32
    • Flip the console over to remove each screw from the console's underside casing.

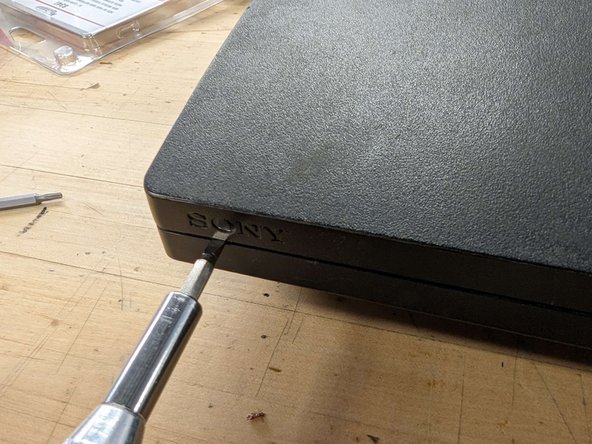
    • Use a spudger to gently pry open and remove the screw covers. Use a Phillips #0 screwdriver to remove the screws underneath the screw covers.

    • Use a Phillips #0 screwdriver to remove the screw underneath the console's void warranty sticker.

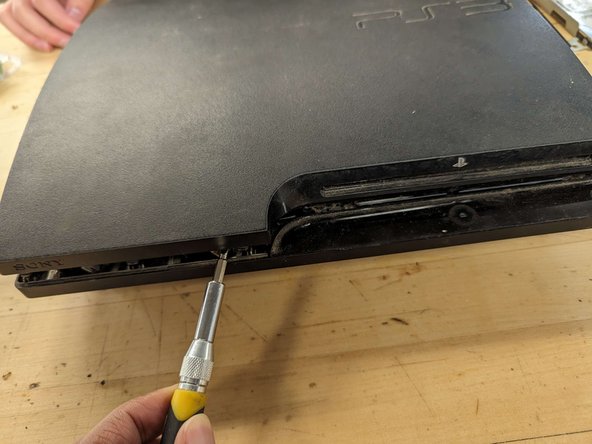
    • Use a Torx #8 screwdriver to remove the four screws along the edge of the console.

  2. PlayStation 3 Slim Thermal Paste Replacement: passo 2, imagem 1 %32 PlayStation 3 Slim Thermal Paste Replacement: passo 2, imagem 2 %32 PlayStation 3 Slim Thermal Paste Replacement: passo 2, imagem 3 %32
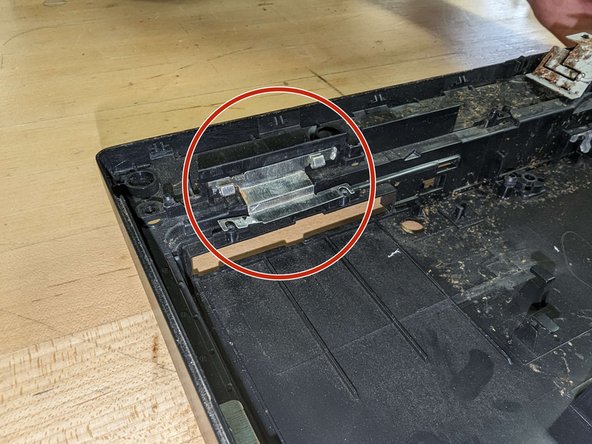
    • A rectangular panel near the warranty sticker can be lifted by hand. It is fixed to the console's outer cover, and will rotate once lifted, so be careful when opening it. This panel covers a blue-headed screw shown in the image.

    • You should have twelve screws in total. Put them aside in a safe place to use for reassembly.

  3. PlayStation 3 Slim Thermal Paste Replacement, Hard drive cover: passo 3, imagem 1 %32 PlayStation 3 Slim Thermal Paste Replacement, Hard drive cover: passo 3, imagem 2 %32 PlayStation 3 Slim Thermal Paste Replacement, Hard drive cover: passo 3, imagem 3 %32
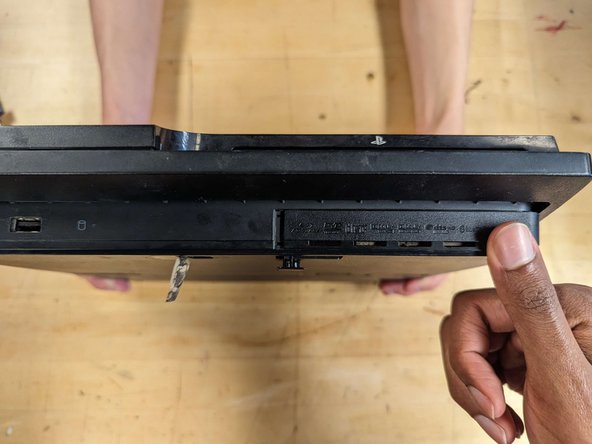
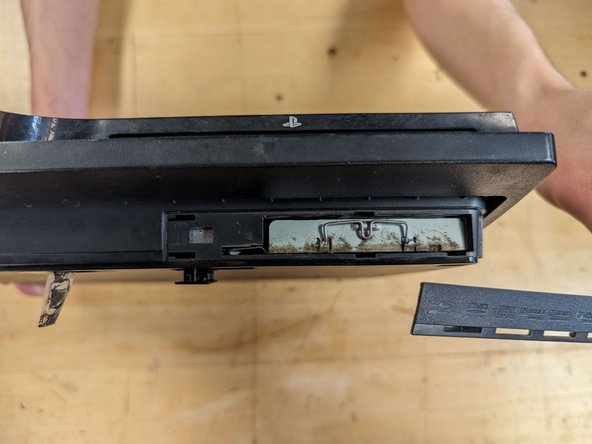
    • Flip the console over and remove the console's hard drive panel. Press firmly on it with your thumb and slide it to the right to unlatch it.

    • This panel has a few vents directly under it.

  4. PlayStation 3 Slim Thermal Paste Replacement, Hard drive removal: passo 4, imagem 1 %32 PlayStation 3 Slim Thermal Paste Replacement, Hard drive removal: passo 4, imagem 2 %32 PlayStation 3 Slim Thermal Paste Replacement, Hard drive removal: passo 4, imagem 3 %32
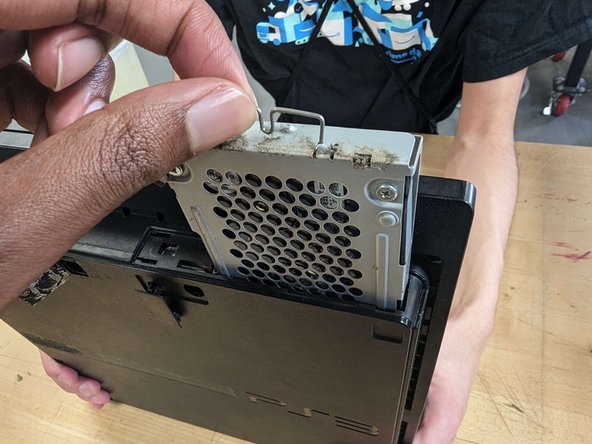
    • Use your thumb and index finger to angle the latch of the hard drive away from the console.

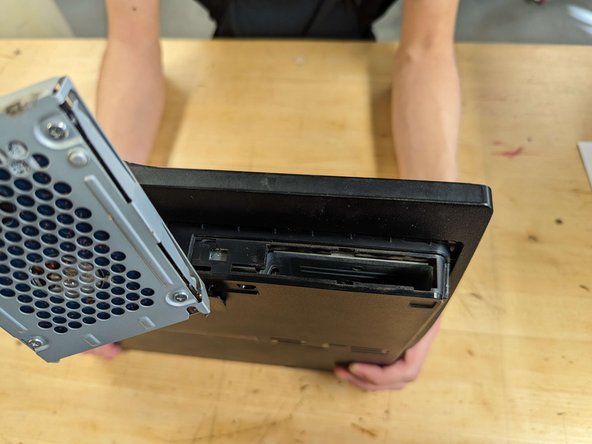
    • Pull the entire drive out of the slot.

    • You may initially feel some resistance.

  5. PlayStation 3 Slim Thermal Paste Replacement, Separating the casing: passo 5, imagem 1 %32 PlayStation 3 Slim Thermal Paste Replacement, Separating the casing: passo 5, imagem 2 %32 PlayStation 3 Slim Thermal Paste Replacement, Separating the casing: passo 5, imagem 3 %32
    • Place the console down. Use a spudger to gently pry open the left side of the console while lifting the right side with your hands.

    • The cover will come loose with a pop.

    • The top cover may not immediately be loose, and this will be most noticeable with its left side. Do not immediately try to pry off the cover. Doing so may damage the casing.

  6. PlayStation 3 Slim Thermal Paste Replacement: passo 6, imagem 1 %32 PlayStation 3 Slim Thermal Paste Replacement: passo 6, imagem 2 %32
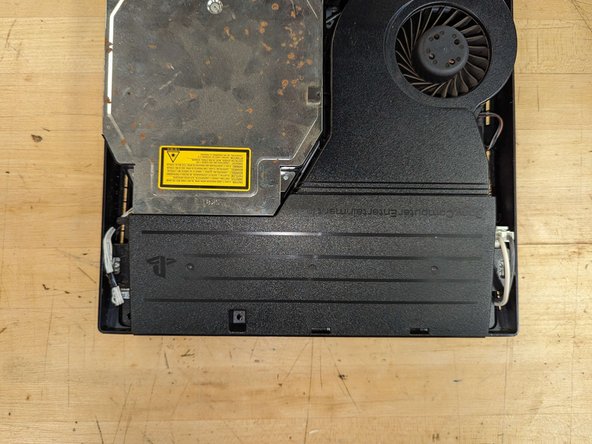
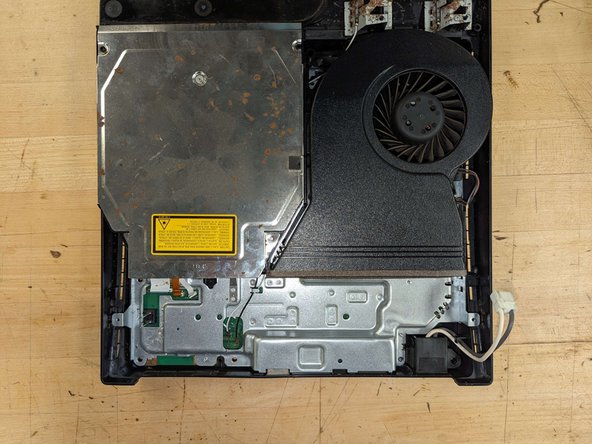
    • Remove the cover and rotate the console as shown.

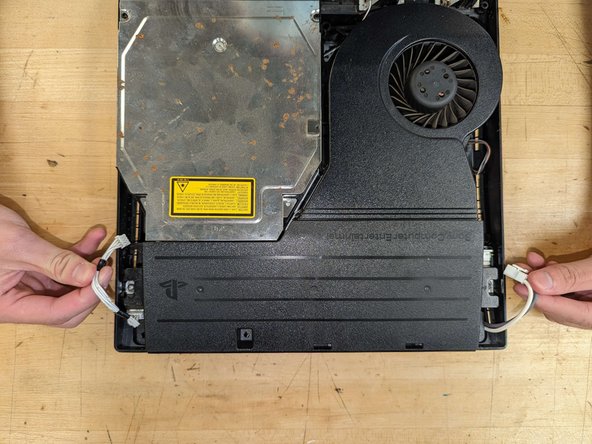
  7. PlayStation 3 Slim Thermal Paste Replacement, Power supply removal: passo 7, imagem 1 %32 PlayStation 3 Slim Thermal Paste Replacement, Power supply removal: passo 7, imagem 2 %32 PlayStation 3 Slim Thermal Paste Replacement, Power supply removal: passo 7, imagem 3 %32
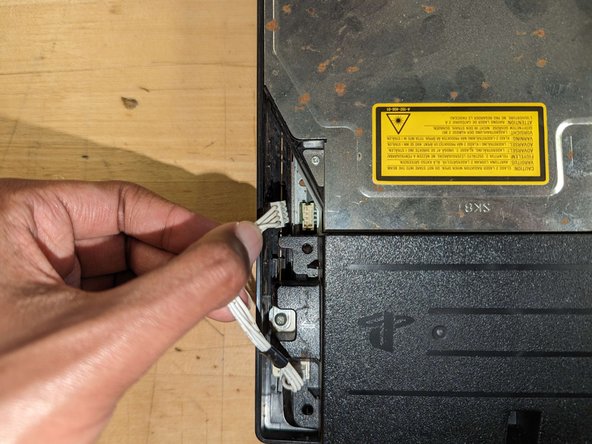
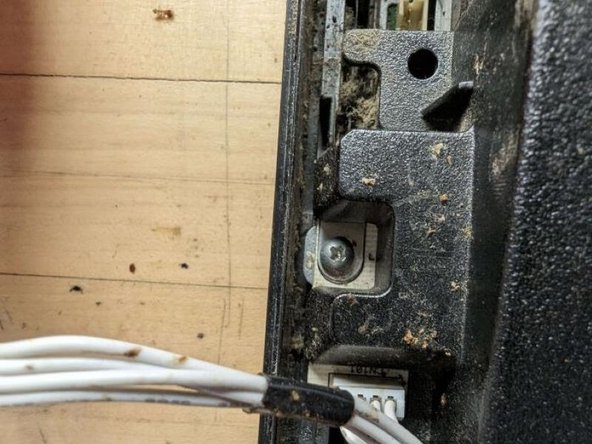
    • Disconnect the two wires beside the power supply.

  8. PlayStation 3 Slim Thermal Paste Replacement: passo 8, imagem 1 %32 PlayStation 3 Slim Thermal Paste Replacement: passo 8, imagem 2 %32 PlayStation 3 Slim Thermal Paste Replacement: passo 8, imagem 3 %32
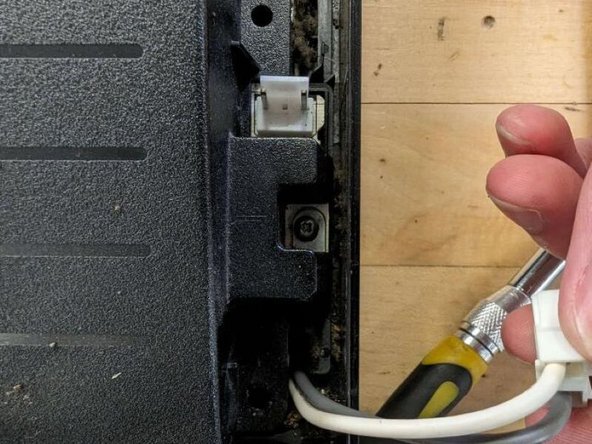
    • Remove the two Phillips #0 screws hidden beneath the wires beside the power supply.

  9. PlayStation 3 Slim Thermal Paste Replacement: passo 9, imagem 1 %32 PlayStation 3 Slim Thermal Paste Replacement: passo 9, imagem 2 %32 PlayStation 3 Slim Thermal Paste Replacement: passo 9, imagem 3 %32
    • With both hands, firmly grasp and gently lift the power supply from both sides.

    • Be careful when lifting the power supply, as two long metallic prongs run through it, locking it in place. This will cause resistance while lifting. Lift the power supply vertically until it is completely clear of these prongs to avoid damaging them or the power supply.

  10. PlayStation 3 Slim Thermal Paste Replacement, Disconnect WiFi antenna & Blu-ray: passo 10, imagem 1 %32 PlayStation 3 Slim Thermal Paste Replacement, Disconnect WiFi antenna & Blu-ray: passo 10, imagem 2 %32
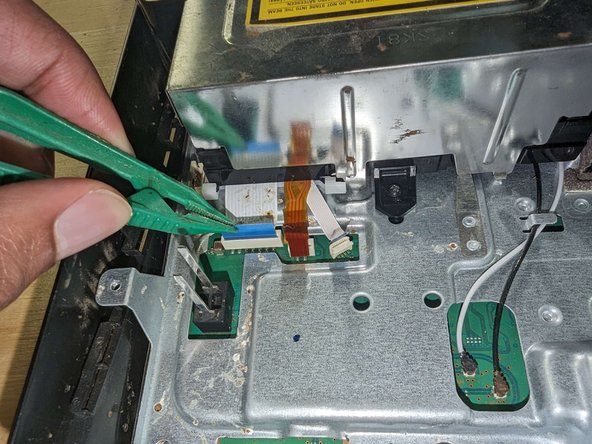
    • Disconnect the three ribbon cables and two coaxial cables just under the Blu-ray player.

    • To remove the ribbon cables, gently remove them from each of their sockets by pulling them up by the vertical flap. For additional help disconnecting various types of cables, refer to Recognizing and Disconnecting Cable Connectors.

    • When reconnecting the ribbon cables, it is best to use tweezers to avoid bending them.

  11. PlayStation 3 Slim Thermal Paste Replacement: passo 11, imagem 1 %32 PlayStation 3 Slim Thermal Paste Replacement: passo 11, imagem 2 %32
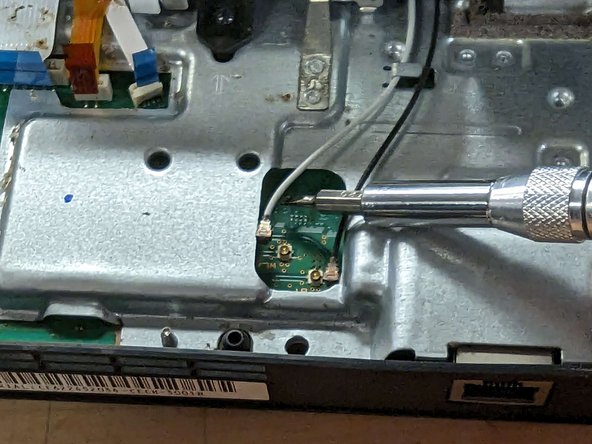
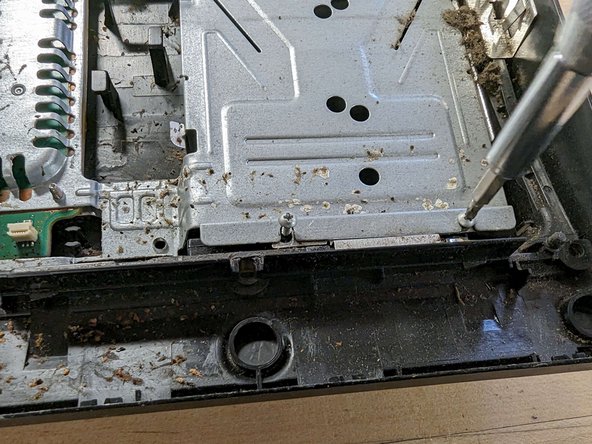
    • Use a spudger to unsnap the black and white coaxial cables from their sockets on the motherboard. Pry them off by lifting them close to the point they are attached, applying little force.

    • Avoid using a screwdriver as shown in the photo. It is not ESD-safe and could damage the motherboard.

    • To reaffix the wires, line the ends up with the pins, then firmly press down with your finger, snapping it into place.

  12. PlayStation 3 Slim Thermal Paste Replacement, Removing Blu-ray drive: passo 12, imagem 1 %32 PlayStation 3 Slim Thermal Paste Replacement, Removing Blu-ray drive: passo 12, imagem 2 %32 PlayStation 3 Slim Thermal Paste Replacement, Removing Blu-ray drive: passo 12, imagem 3 %32
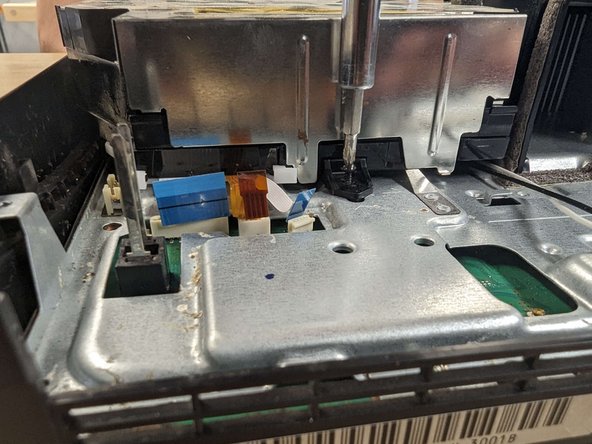
    • Remove the black Phillips #0 screw securing the blu-ray player.

  13. PlayStation 3 Slim Thermal Paste Replacement, Removing the power button board: passo 13, imagem 1 %32 PlayStation 3 Slim Thermal Paste Replacement, Removing the power button board: passo 13, imagem 2 %32 PlayStation 3 Slim Thermal Paste Replacement, Removing the power button board: passo 13, imagem 3 %32
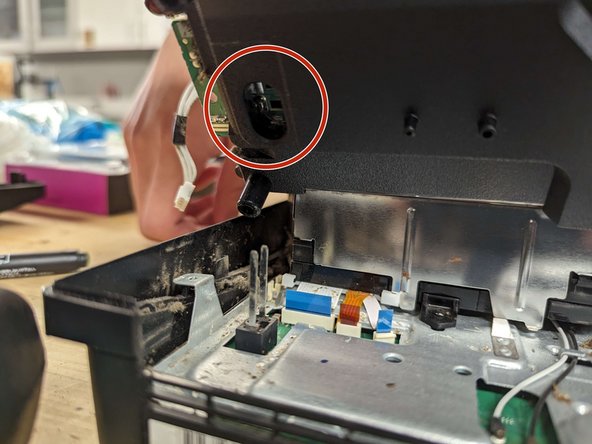
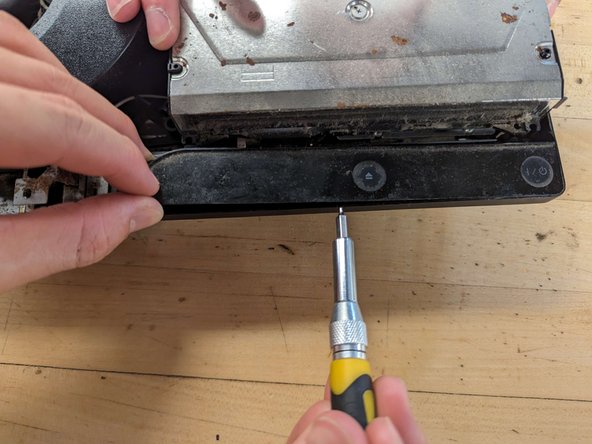
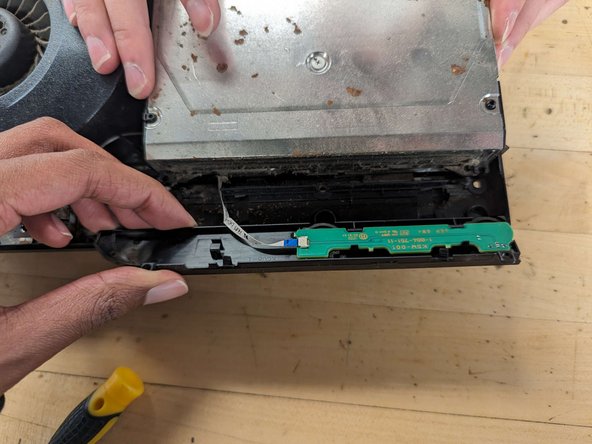
    • Rotate the console 180°. Lift the console's button tray by its curved edge and use a spudger under it to pry it out. It will pop off this way.

    • Using only your hands may damage this piece, due to the Blu-ray player partially covering it.

    • The button tray has a cable that is still attached to the console, so it cannot be moved very far. For now, lay the piece upside down as shown in the third image. This cable connects to a plug underneath the blu-ray player.

  14. PlayStation 3 Slim Thermal Paste Replacement: passo 14, imagem 1 %32 PlayStation 3 Slim Thermal Paste Replacement: passo 14, imagem 2 %32 PlayStation 3 Slim Thermal Paste Replacement: passo 14, imagem 3 %32
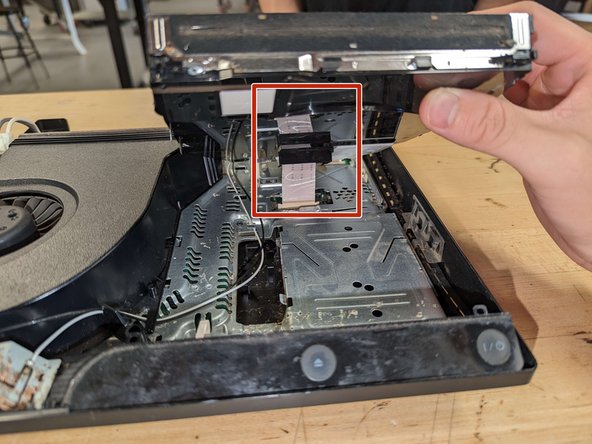
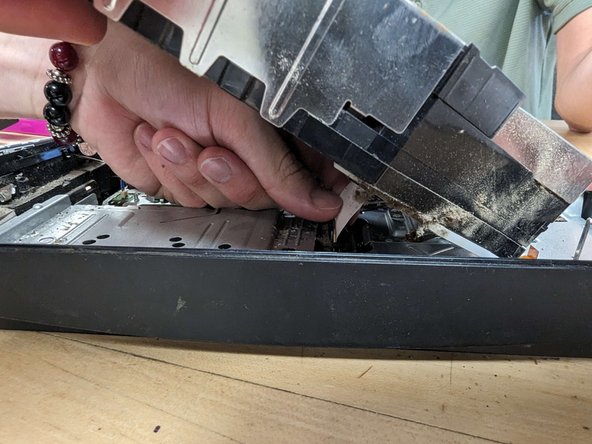
    • DO NOT lift the blu-ray disk reader too high or you will break the ribbon cable underneath it.

    • Gently lift the disk reader.

    • Carefully reach underneath to detach the cable from the motherboard.

  15. PlayStation 3 Slim Thermal Paste Replacement: passo 15, imagem 1 %32 PlayStation 3 Slim Thermal Paste Replacement: passo 15, imagem 2 %32
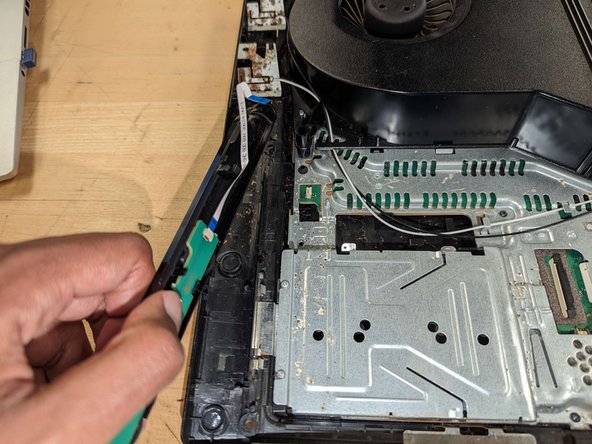
    • Disconnect the small cable connecting the button tray to the motherboard.

  16. PlayStation 3 Slim Thermal Paste Replacement: passo 16, imagem 1 %32 PlayStation 3 Slim Thermal Paste Replacement: passo 16, imagem 2 %32 PlayStation 3 Slim Thermal Paste Replacement: passo 16, imagem 3 %32
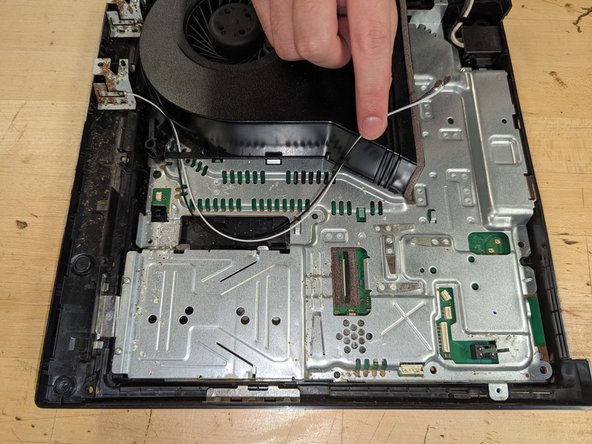
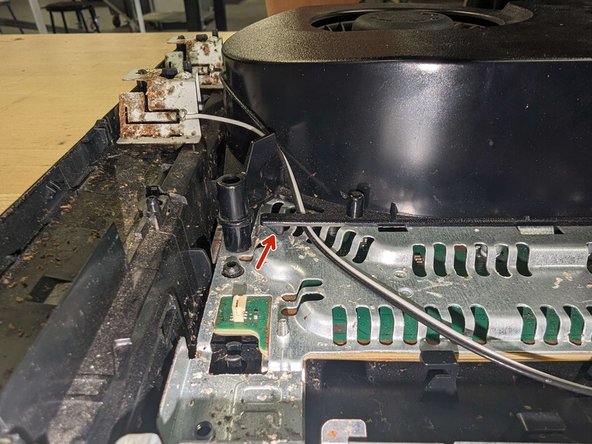
    • Move the black and white cables away from the motherboard.

    • The cables are kept in place by hooks in the motherboard panel. Be careful to pull them around the hooks so that they do not snag.

  17. PlayStation 3 Slim Thermal Paste Replacement, Remove motherboard case: passo 17, imagem 1 %32 PlayStation 3 Slim Thermal Paste Replacement, Remove motherboard case: passo 17, imagem 2 %32 PlayStation 3 Slim Thermal Paste Replacement, Remove motherboard case: passo 17, imagem 3 %32
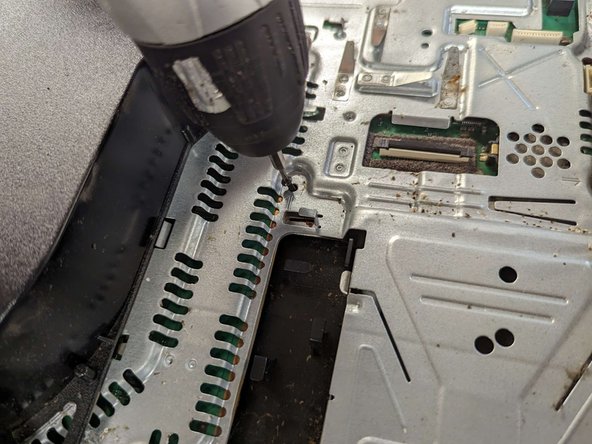
    • Remove the five Phillips #0 screws on the motherboard case.

    • There are two different color of screws used here, so keep track of them when storing.

  18. PlayStation 3 Slim Thermal Paste Replacement, Extract motherboard assembly: passo 18, imagem 1 %32 PlayStation 3 Slim Thermal Paste Replacement, Extract motherboard assembly: passo 18, imagem 2 %32 PlayStation 3 Slim Thermal Paste Replacement, Extract motherboard assembly: passo 18, imagem 3 %32
    • Lift up the motherboard panel from the console's case.

    • You can safely lift the assembly by holding the fan.

    • The metal piece indicated may become loose after removing the assembly from the case. Note its placement and orientation for when it's time to reassemble.

  19. PlayStation 3 Slim Thermal Paste Replacement, Disconnecting the fan: passo 19, imagem 1 %32 PlayStation 3 Slim Thermal Paste Replacement, Disconnecting the fan: passo 19, imagem 2 %32 PlayStation 3 Slim Thermal Paste Replacement, Disconnecting the fan: passo 19, imagem 3 %32
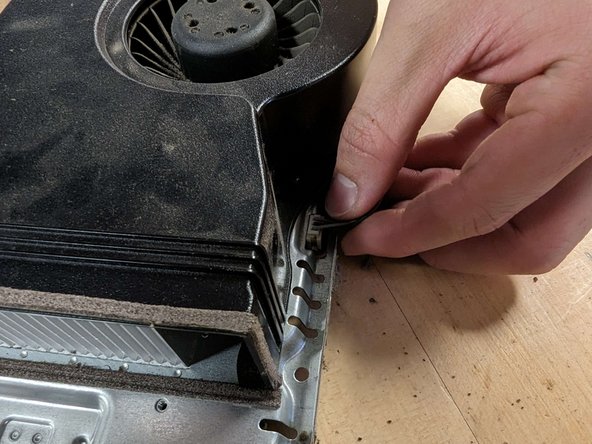
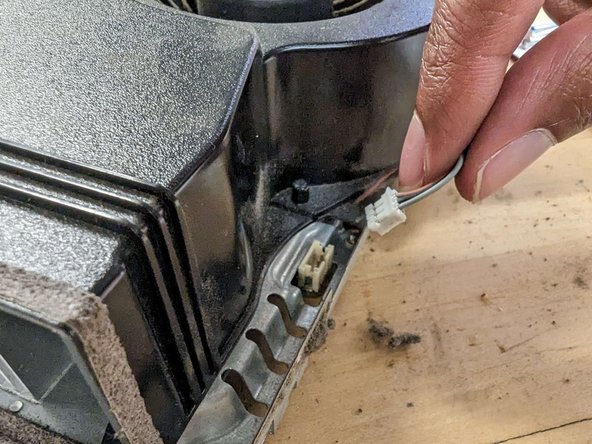
    • Unplug the cable connecting the fan to the motherboard.

  20. PlayStation 3 Slim Thermal Paste Replacement: passo 20, imagem 1 %32 PlayStation 3 Slim Thermal Paste Replacement: passo 20, imagem 2 %32
    • Flip the motherboard assembly over.

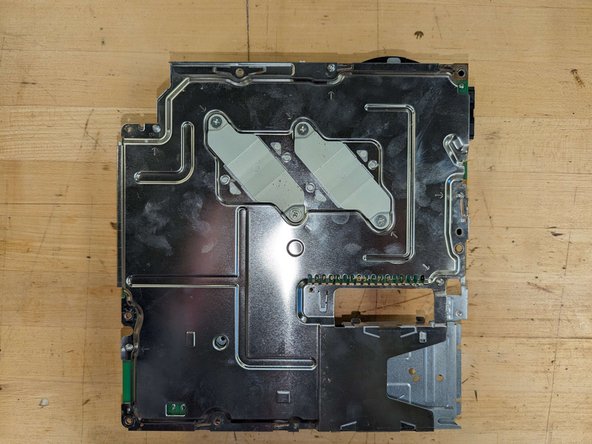
  21. PlayStation 3 Slim Thermal Paste Replacement, Remove the heat sink: passo 21, imagem 1 %32 PlayStation 3 Slim Thermal Paste Replacement, Remove the heat sink: passo 21, imagem 2 %32 PlayStation 3 Slim Thermal Paste Replacement, Remove the heat sink: passo 21, imagem 3 %32
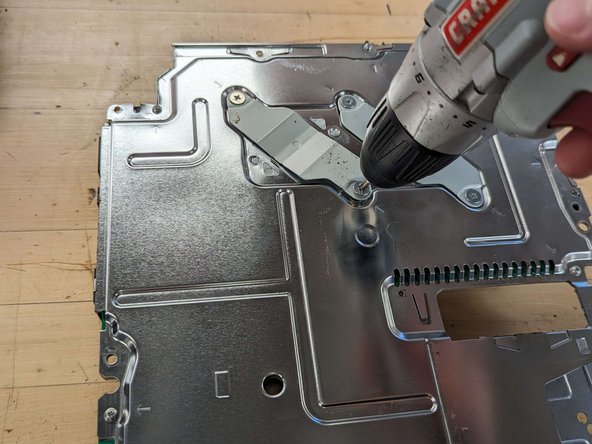
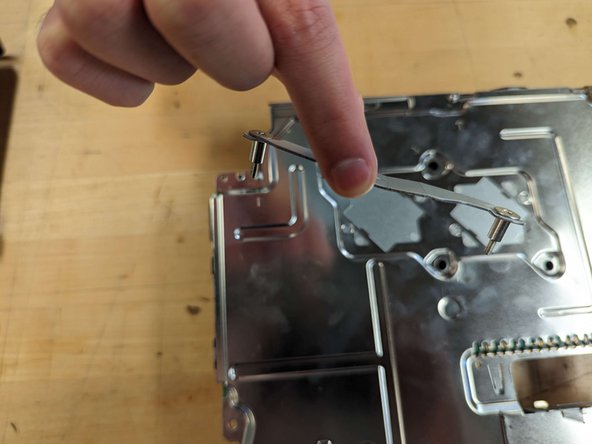
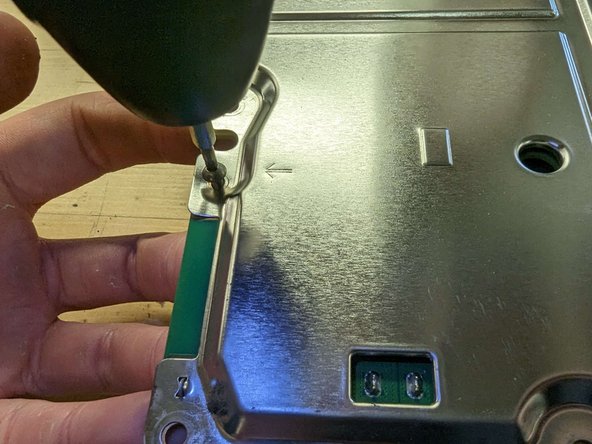
    • Remove the screws holding the heat sink clamps in place using a Phillips #0 screwdriver.

    • When screwing the heat sink clamps back onto the motherboard assembly, follow an alternating pattern by partially screwing each side of a clamp at a time. Do this for both clamps. This ensures that the thermal paste spreads evenly.

  22. PlayStation 3 Slim Thermal Paste Replacement: passo 22, imagem 1 %32 PlayStation 3 Slim Thermal Paste Replacement: passo 22, imagem 2 %32 PlayStation 3 Slim Thermal Paste Replacement: passo 22, imagem 3 %32
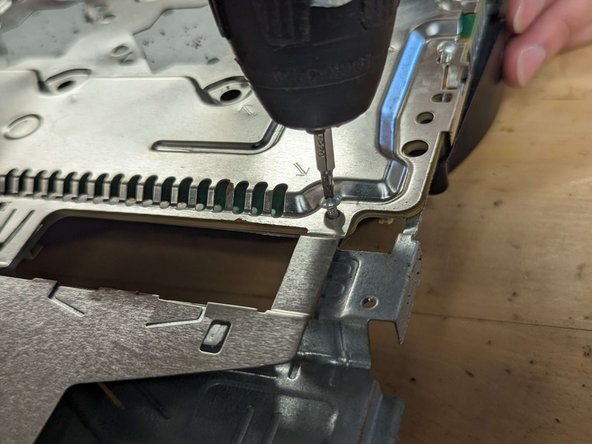
    • Remove the remaining screws on the assembly.

  23. PlayStation 3 Slim Thermal Paste Replacement: passo 23, imagem 1 %32 PlayStation 3 Slim Thermal Paste Replacement: passo 23, imagem 2 %32
    • Remove the back plate from the motherboard.

  24. PlayStation 3 Slim Thermal Paste Replacement, Remove motherboard: passo 24, imagem 1 %32 PlayStation 3 Slim Thermal Paste Replacement, Remove motherboard: passo 24, imagem 2 %32 PlayStation 3 Slim Thermal Paste Replacement, Remove motherboard: passo 24, imagem 3 %32
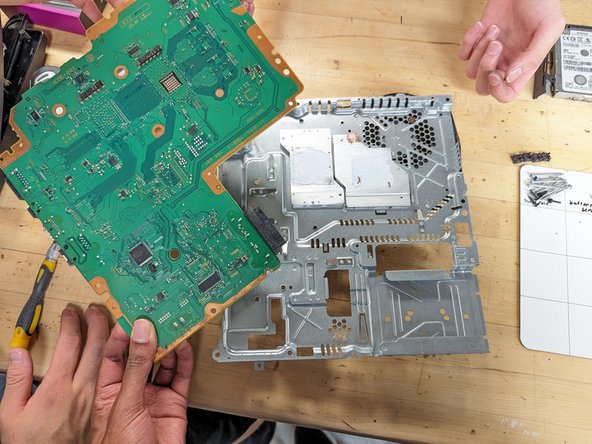
    • Separate the motherboard from the rear portion of the assembly case.

    • Watch out for the curved portion of the rear assembly indicated. This has slots for various ports on the motherboard. When lifting the motherboard, you may need to move it away from this piece for it to freely come loose.

    • When lifting the motherboard, the thermal paste may make it difficult to remove. If so, carefully pry from two sides near the center.

    • Be cautious when prying the motherboard. Excessive force WILL break the motherboard.

  25. PlayStation 3 Slim Thermal Paste Replacement, Clean off the old thermal paste: passo 25, imagem 1 %32 PlayStation 3 Slim Thermal Paste Replacement, Clean off the old thermal paste: passo 25, imagem 2 %32 PlayStation 3 Slim Thermal Paste Replacement, Clean off the old thermal paste: passo 25, imagem 3 %32
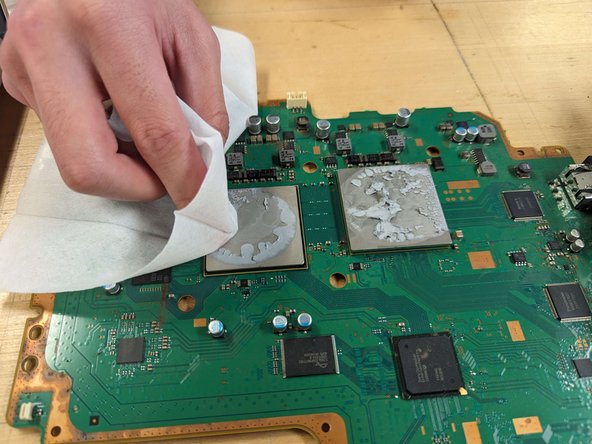
    • Use Isopropyl Alcohol with napkins or Alcohol wipes to gently clean off the old thermal paste on the heat sinks, Central Processing Unit (CPU), and Graphics Processing Unit (GPU).

    • You may need to use multiple Alcohol dampened napkins/wipes to fully clean the old thermal paste off.

    • DO NOT use water to clean any of these parts, only alcohol. Additionally, avoid soaking the napkin to prevent excessive liquid on the console. Be sure to let the console dry after cleaning it with the alcohol wipes.

  26. PlayStation 3 Slim Thermal Paste Replacement, Apply thermal paste: passo 26, imagem 1 %32 PlayStation 3 Slim Thermal Paste Replacement, Apply thermal paste: passo 26, imagem 2 %32 PlayStation 3 Slim Thermal Paste Replacement, Apply thermal paste: passo 26, imagem 3 %32
    • Apply about half a gram of Thermal Paste onto the center of the Central Processing Unit (CPU) and another half a gram on the Graphics Processing Unit (GPU).

    • The paste can be applied in any pattern.

    • Applying more than the specified amount of Thermal Paste may render its application useless.

    • DO NOT apply Thermal Paste to the heat sink.

  27. PlayStation 3 Slim Thermal Paste Replacement: passo 27, imagem 1 %32 PlayStation 3 Slim Thermal Paste Replacement: passo 27, imagem 2 %32
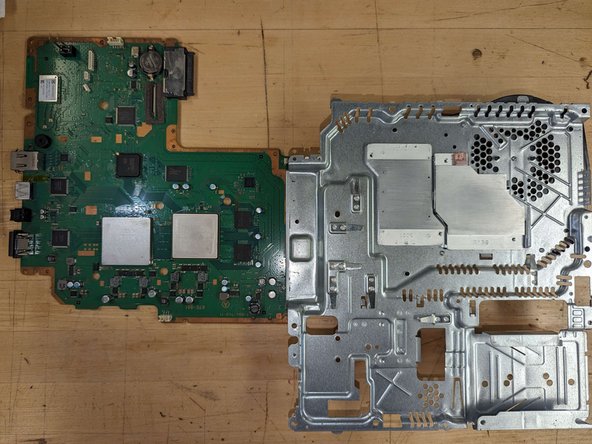
    • Place the motherboard back into the case. Line up the processing units to the heat sink as shown.

    • You do not need to press down firmly. Screwing the heat sink clamps back on will ensure the paste spreads evenly.

    • Starting from step 22, follow this guide's steps in reverse order all the way to step 1 to reassemble the PS3.

    • Be sure to refer to step 21 when screwing the heat-sink clamps.

Conclusão

To reassemble your device, follow these instructions in reverse order, starting from Step 22.

Theodore Brooks

Membro desde: 10/24/23

385 Reputação

Autoria de 1 guia

Equipe

CSU Los Angeles, Team 12-1, Ribeiro Fall 2023 Membro de CSU Los Angeles, Team 12-1, Ribeiro Fall 2023

CSULA-RIBEIRO-F23S12G1

Membros da 3

Autoria de 4 guias

Um comentário

Hola podria aclarar donde van los termal pads!? Exelente información!

Marcos J. Sanchez - Responder

Adicione um comentário

Exibir estatísticas:

Últimas 24 horas: 47

Últimos 7 dias: 352

Últimos 30 dias: 1,382

Duração total: 4,531