Esta versão pode conter edições incorretas. Mude para o último instantâneo verificado.
O que você precisa
-
Este passo não foi traduzido. Ajude a traduzi-lo
-
Disconnect all cables from the console and flip the unit over to reveal its base.
-
-
Este passo não foi traduzido. Ajude a traduzi-lo
-
Locate the 6 feet on the base of the unit. Pry them off using a spudger to reveal the screws.
-
-
Este passo não foi traduzido. Ajude a traduzi-lo
-
Remove all six 4.0 mm screws from the base of the unit using a #1 Phillips screwdriver.
-
-
-
Este passo não foi traduzido. Ajude a traduzi-lo
-
Starting at the corner at which the power and Ethernet ports are located, pry open the outer shell using a spudger and continue around the entire unit.
-
-
Este passo não foi traduzido. Ajude a traduzi-lo
-
Locate the fan at the front, left section of the unit.
-
-
Este passo não foi traduzido. Ajude a traduzi-lo
-
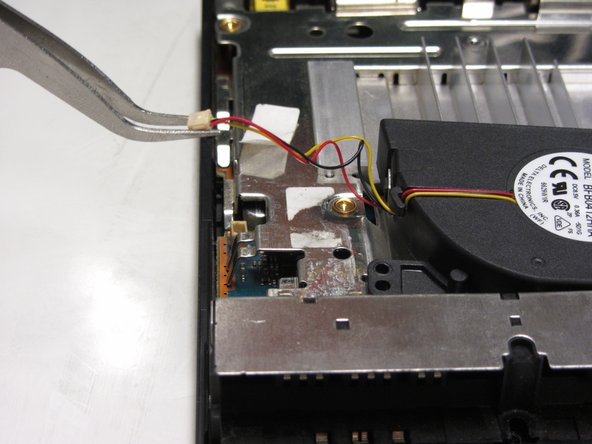
Peel off the sticker holding the power cords to the unit.
-
-
Este passo não foi traduzido. Ajude a traduzi-lo
-
Lift the connector from the motherboard with a pair of tweezers using a firm, upward force.
-
-
Este passo não foi traduzido. Ajude a traduzi-lo
-
Remove all three 1.6 mm screws fastening the fan to the unit using a #1 Phillips screwdriver.
-
Gently lift and remove the fan from its compartment.
-


Cancelar: não concluí este guia.
10 outras pessoas executaram este guia.