Ir para o conteúdo principal

Philips PD9000 37 Internal Speakers Replacement

O que você precisa

  1. Philips PD9000 37 Internal Speakers Replacement, White Outer Housing: passo 1, imagem 1 %32 Philips PD9000 37 Internal Speakers Replacement, White Outer Housing: passo 1, imagem 2 %32 Philips PD9000 37 Internal Speakers Replacement, White Outer Housing: passo 1, imagem 3 %32
    • Lay the player flat so the bottom outside is showing. Using the Phillips #0 screwdriver, unscrew all the housing screws on the bottom of the player.

    • Have the player sitting upright, remove the rubber stoppers in order to get to the screw. Unscrew the inside screws by the screen using the Philips #0 screwdriver.

    • Remove the rubber stoppers for the bottom two screws as well. Unscrew the middle two screws.

  2. Philips PD9000 37 Internal Speakers Replacement: passo 2, imagem 1 %32 Philips PD9000 37 Internal Speakers Replacement: passo 2, imagem 2 %32
    • Open the disc flap and remove the screws inside with the Phillips #0 screwdriver. There will be three screws.

  3. Philips PD9000 37 Internal Speakers Replacement: passo 3, imagem 1 %32 Philips PD9000 37 Internal Speakers Replacement: passo 3, imagem 2 %32 Philips PD9000 37 Internal Speakers Replacement: passo 3, imagem 3 %32
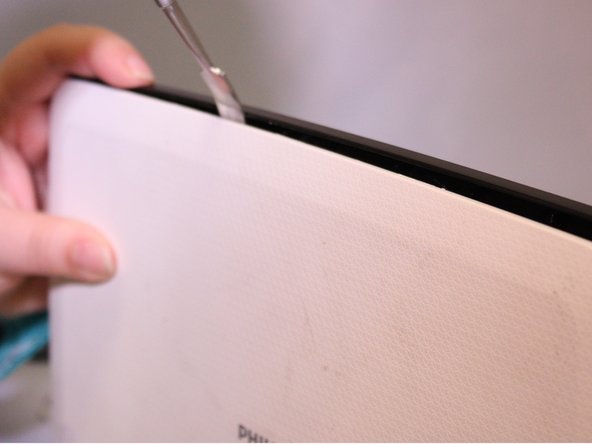
    • Start removing the inside black face plate of the player by using a prying method between the white outer housing and the black face plate with a metal spudger.

    • Pull the black face plate off once you have pried it from the white housing. The bottom inside layer should pop off.

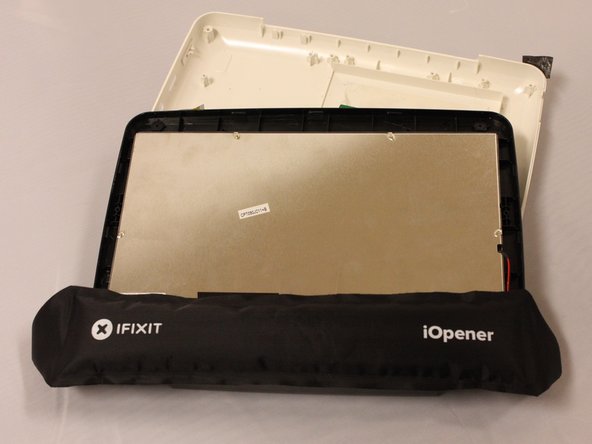
    • Using the same prying method with the metal spudger, start prying off the screens white outer housing.

  4. Philips PD9000 37 Internal Speakers Replacement: passo 4, imagem 1 %32 Philips PD9000 37 Internal Speakers Replacement: passo 4, imagem 2 %32 Philips PD9000 37 Internal Speakers Replacement: passo 4, imagem 3 %32
    • The light panel on the front can just pop right off.

    • To remove the metal bar against the battery, unscrew the screws with the phillips #0 screwdriver.

    • After unscrewing you can just lift the metal bar off.

  5. Philips PD9000 37 Internal Speakers Replacement, Internal Speakers: passo 5, imagem 1 %32
    • Desolder the wires connected to the round speakers.

  6. Philips PD9000 37 Internal Speakers Replacement: passo 6, imagem 1 %32 Philips PD9000 37 Internal Speakers Replacement: passo 6, imagem 2 %32
    • Place the iOpener over the entire speaker panel to warm the glue.

  7. Philips PD9000 37 Internal Speakers Replacement: passo 7, imagem 1 %32
    • After the glue is softened, use the metal spudger to scrape the glue away.

    • You may need to use the iOpener more than once per speaker, but be sure to follow the instructions for the iOpener so as not to overheat it.

  8. Philips PD9000 37 Internal Speakers Replacement: passo 8, imagem 1 %32
    • Use the spudger to pry the speaker out of it's setting.

Conclusão

To reassemble your device, follow these instructions in reverse order.

0 comentários

Adicione um comentário

Exibir estatísticas:

Últimas 24 horas: 0

Últimos 7 dias: 0

Últimos 30 dias: 3

Duração total: 549