Introdução
This project will involve working around delicate electrical components so it is important to be very careful that you not damage any of these components as it may cause your DVD player to not work properly.
O que você precisa
-
-
Remove the three 6.4 mm Phillips #1 screws on the back of the device with a Phillips head screwdriver.
-
Remove the 6.4 mm Phillips #1 screws on each side of the device.
-
-
-
-
Unplug the bundled cable connector that attaches the screen to the motherboard.
-
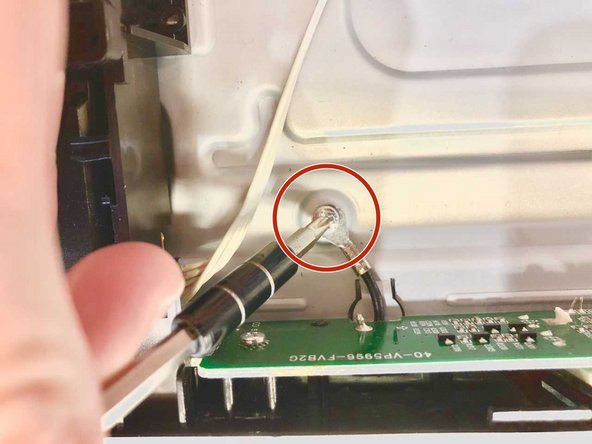
Remove the 3.175 mm Phillips #1 screw that connects the screen's ground wire to the shell of the DVD player.
-
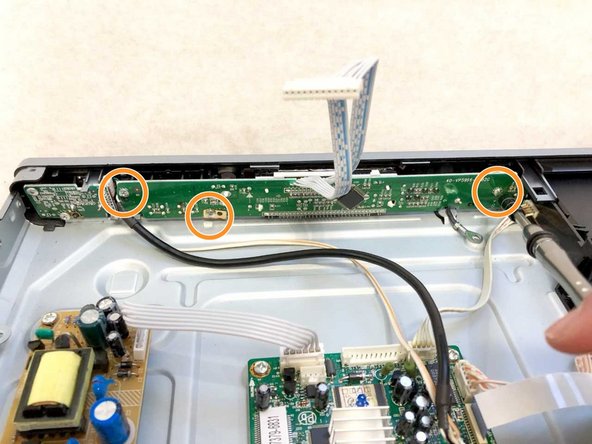
Remove the three 6.35 mm Phillips #1 screws that attach the screen to the front cover of the DVD player.
-


To reassemble your device, follow these instructions in reverse order.
To reassemble your device, follow these instructions in reverse order.
Equipe

Western Carolina University, Team S1-G6, Virtue Fall 2018 Membro de Western Carolina University, Team S1-G6, Virtue Fall 2018
WCU-VIRTUE-F18S1G6
Membros da 3
Autoria de 9 guias