Esta versão pode conter edições incorretas. Mude para o último instantâneo verificado.
O que você precisa
-
Este passo não foi traduzido. Ajude a traduzi-lo
-
Eject the SmartBowl by pressing the button located at the front of the SmartFeeder base.
-
-
Este passo não foi traduzido. Ajude a traduzi-lo
-
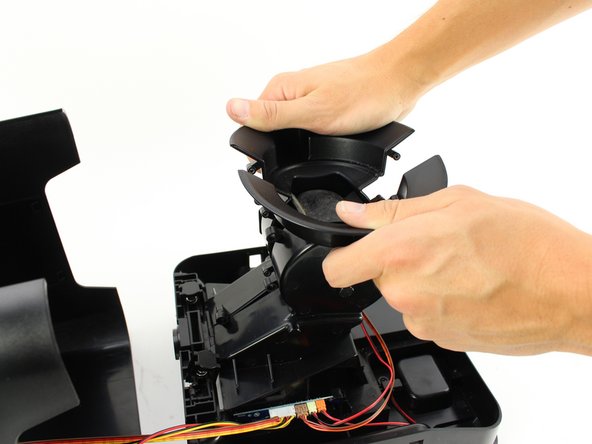
Remove the food tub by twisting it counter-clockwise with both hands and lifting it up.
-
-
Este passo não foi traduzido. Ajude a traduzi-lo
-
Remove the black plastic gasket from the top of the SmartFeeder by placing your fingers on the side of it and lifting up.
-
-
-
Este passo não foi traduzido. Ajude a traduzi-lo
-
Flip over the SmartFeeder by using both hands.
-
Partially open the outer case of the SmartFeeder by wedging an iFixit Opening Tool on each side.
-
-
Este passo não foi traduzido. Ajude a traduzi-lo
-
Turn the SmartFeeder on its side and with one hand on the base, carefully pull out the central section.
-
Place the bottom piece of the device right-side up.
-
-
Este passo não foi traduzido. Ajude a traduzi-lo
-
Remove the eight 11mm screws from the central pillar using a Phillips #1 screwdriver.
-
-
Este passo não foi traduzido. Ajude a traduzi-lo
-
Pull apart the two sides of the central pillar at the top by using both hands.
-
With the two halves partially separated, pull out the rubber wheel with your hand.
-


Cancelar: não concluí este guia.
Uma outra pessoa concluiu este guia.
Equipe

Cal Poly, Team S13-G7, White Fall 2018 Membro de Cal Poly, Team S13-G7, White Fall 2018
CPSU-WHITE-F18S13G7
Membros da 4
Autoria de 5 guias