Introdução
I needed to convert my camera to full spectrum so I went about it. Since most of the camera needs to be disassembled to reach the filter, I posted this as a disassembly guide, which can be developed further by other community members. The stabilization unit removal is also shown even though it is not needed for the filter removal.
O que você precisa
-
-
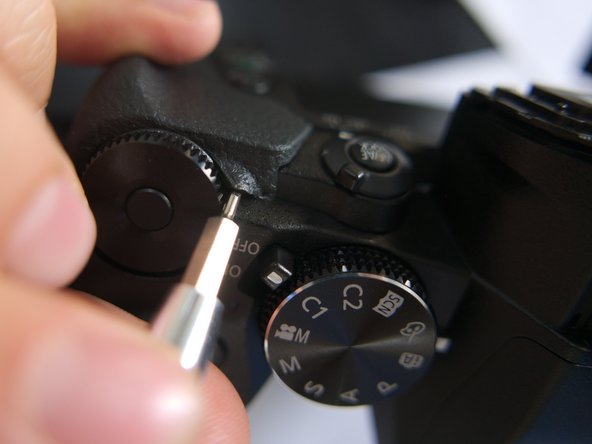
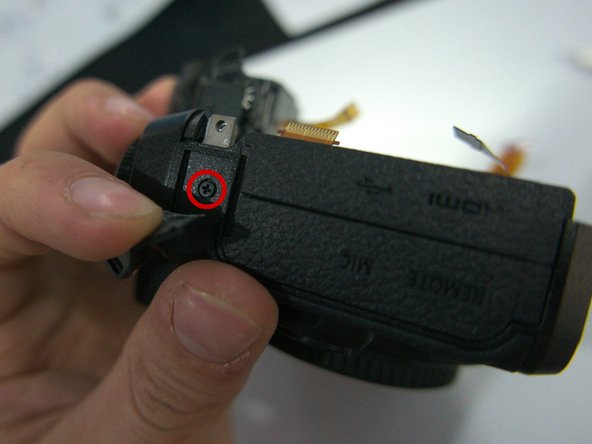
Photo 1: Remove the 7 mm screw (red) on the right side of the grip, as well as the 4 mm screw (orange) below the SD compartment door.
-
Photo 2: Remove the 4mm screw on the left side of the camera (red) above the LCD hinge, as well as the 4mm screw above the USB port (orange)
-
Photo 3: Remove all 5 mm screws circled in red, as well as the 4 mm screw (orange) and another 5 mm screw with a wider thread (yellow)
-
-
-
Photo 1: Remove the two 2 mm screws below the viewfinder eyecup
-
Then, remove the viewfinder cup with a heavy duty spudger from below.
-
Photo 2: Remove the two 6 mm screws (red) and the two 4 mm screws of the metal plate that is holding the back panel against the viewfinder.
-
-
-
Photo 1: You can start lifting the rubber corner of the thumb rest close to the back control dial.
-
Photo 2: Lift the thumb rest with your nails or a spudger.
-
-
-
Photo 1: remove 5mm screw marked in red square
-
Photo 2: a last 5 mm screw sits under the rubber grip near the base of the camera
-
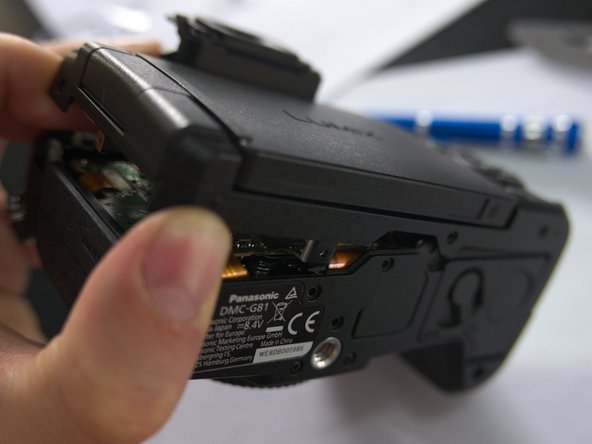
Photo 3: now the back panel can be removed
-
-
-
-
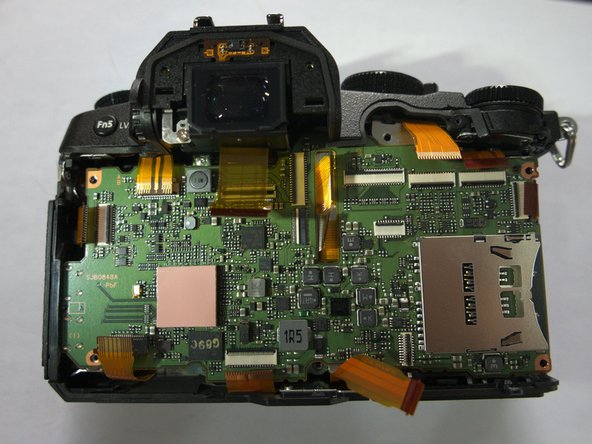
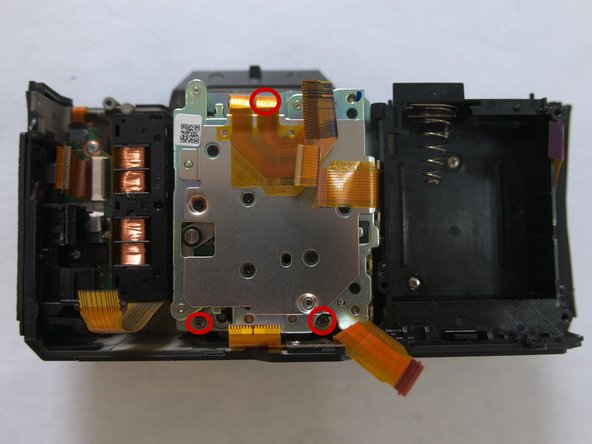
Photo 1: Disconnect all visible ribbon cables, remove two 3 mm screws (red) at the left side of the PCB and two 5 mm screws (orange) at the right side of the PCB
-
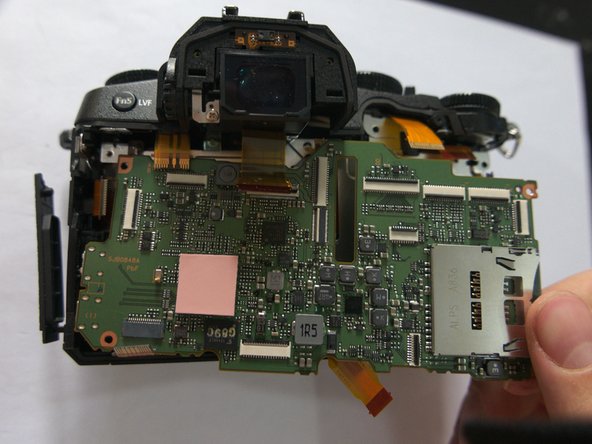
Photo 2: View with all four screws and 11 ribbon cables disconnected
-
Photo 3: Pull the main PCB out to the lower right corner
-
-
-
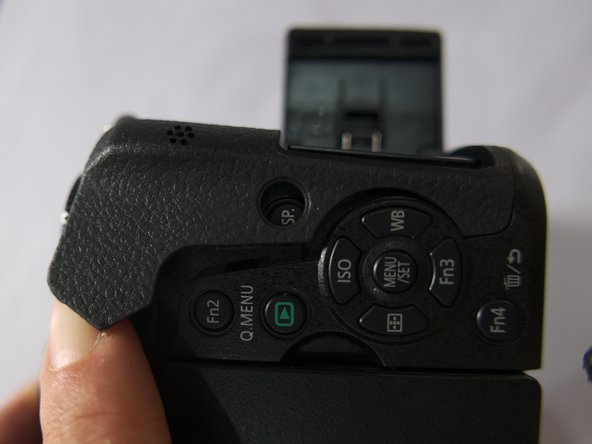
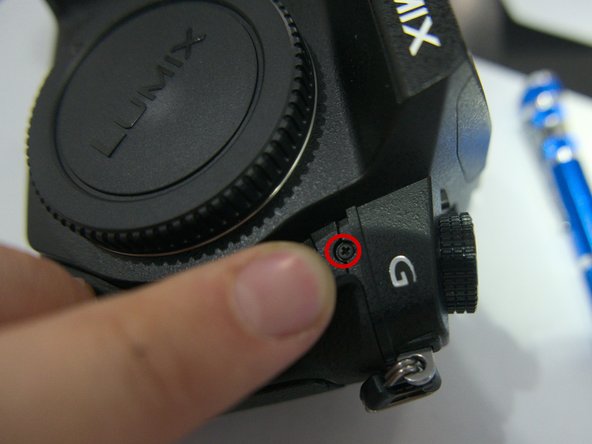
Photo 1: Remove the 4 mm screw beneath the rubber below the left strap lug
-
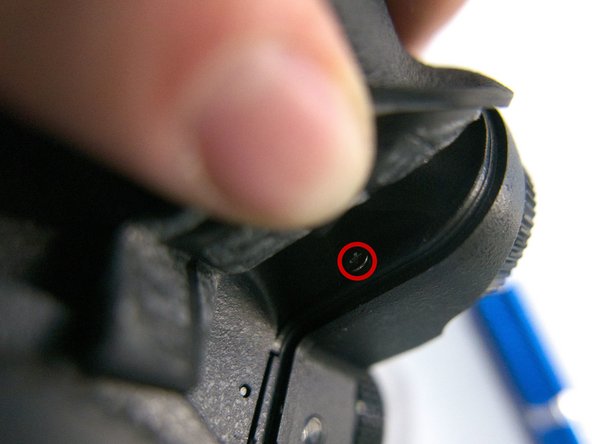
Photo 2: Remove the other 4 mm screw beneath the rubber below the G logo
-
Photo 3: Remove the 7 mm screw beneath the rubber below the shutter release
-
-
-
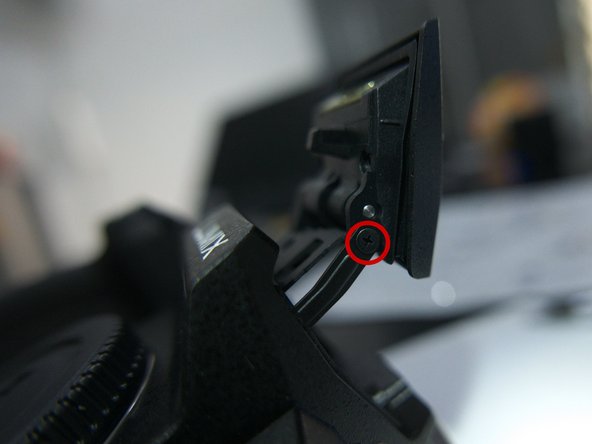
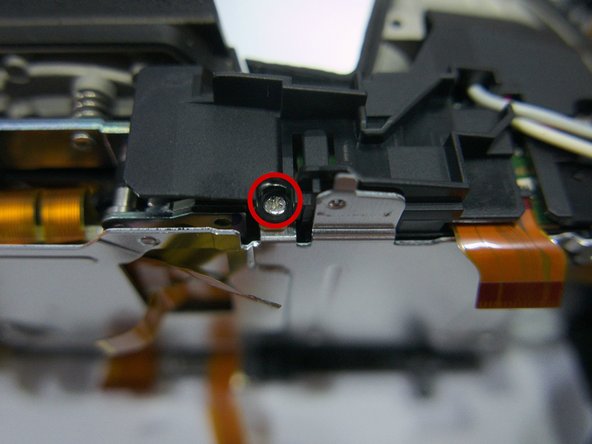
Photo 1: Remove the 3 mm screw that is constraining the flash hinge movement.
-
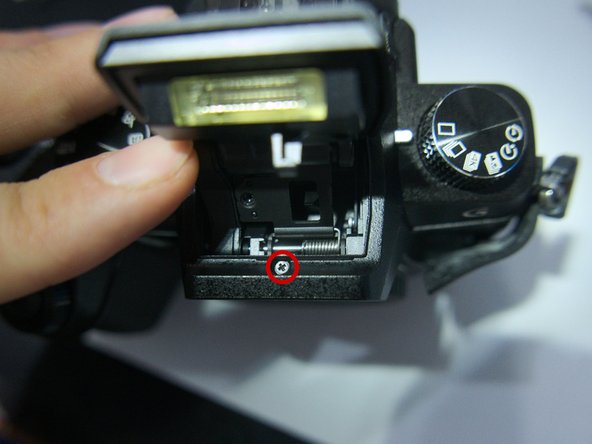
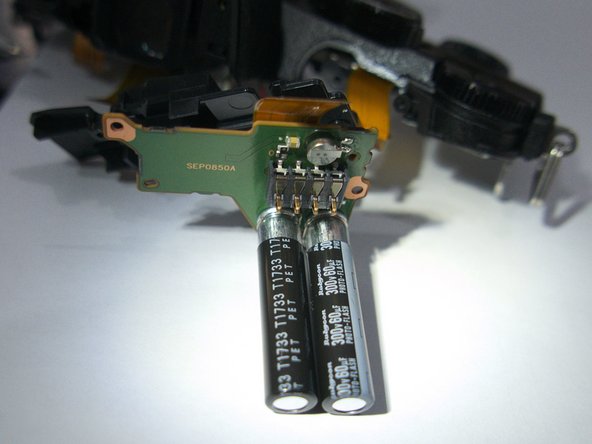
Photo 2: Now hold the flash back to access a screw within the flash housing.
-
Photo 3: The top panel can now be removed by pulling it up.
-
-
-
Photo 1: Remove 4 mm screw holding the plastic plate above the flash batteries
-
Photo 2: Remove a 5 mm screw holding the plastic plate
-
Photo 3: the rest of the flash assembly can come off now
-
-
-
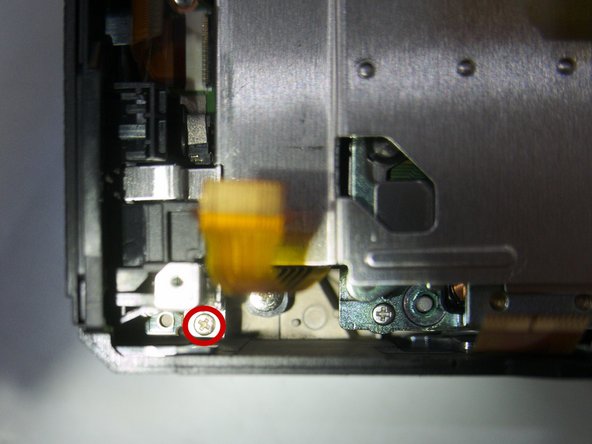
Photo 1: Remove the 3 mm screw in the lower left corner
-
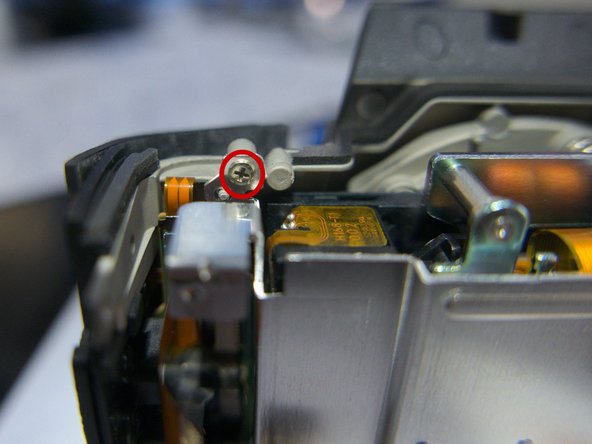
Photo 2: Remove the 2 mm screw in the upper left corner
-
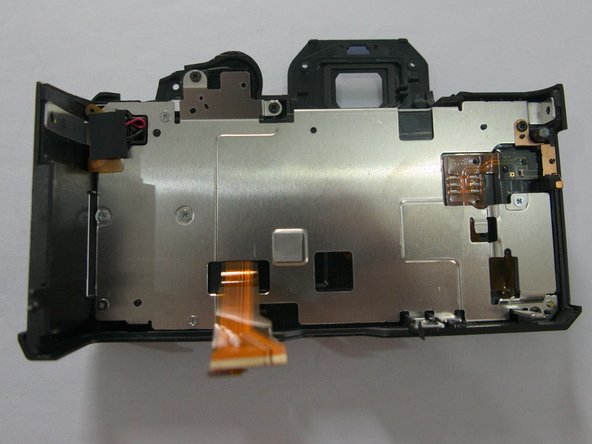
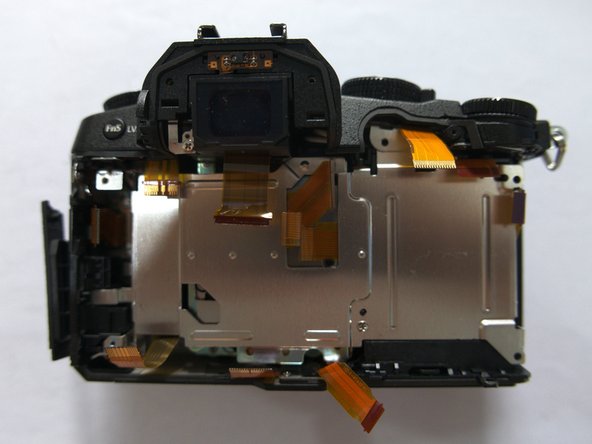
Photo 3: The metal plate can now be pulled out
-
-
-
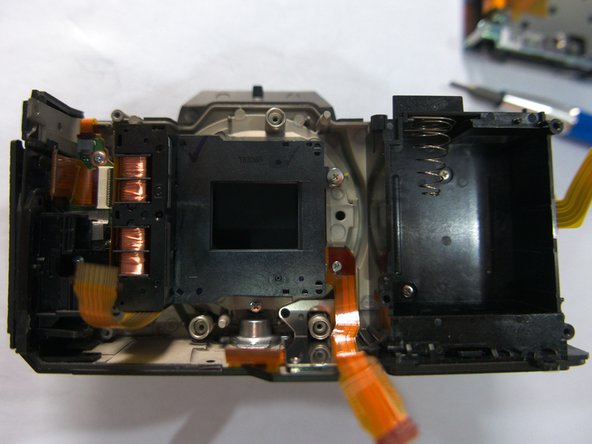
Photo 1: Take a picture of the position of the sensor assembly relative to the metal nub
-
Photo 2: remove three 7 mm screws that are holding the sensor assembly to the magnesium alloy front plate (one is hidden behind the ribbon cable)
-
Finally, pull out the sensor assembly
-
-
-
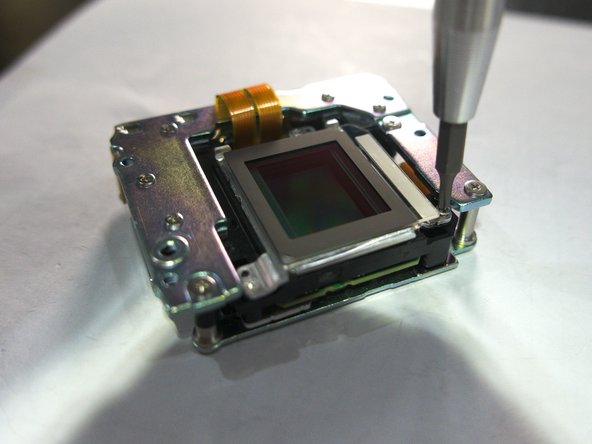
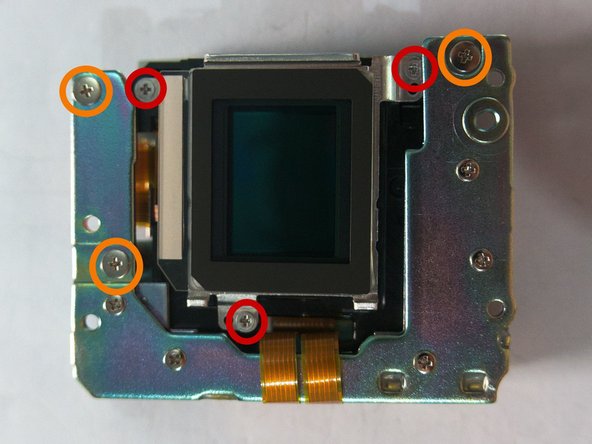
Photo 1: Remove the three screws marked in red
-
Photo 3: lift the metal cage holding the filters.
-
-
-
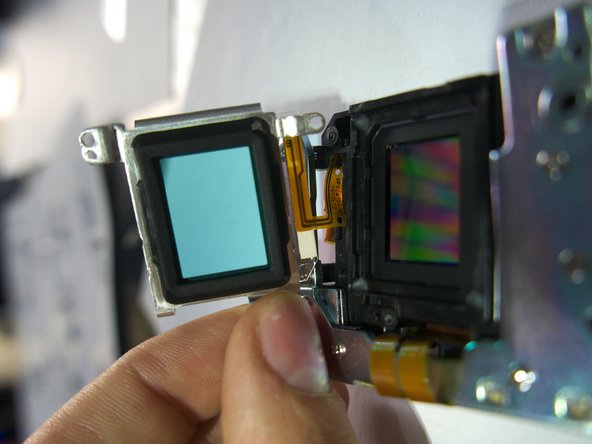
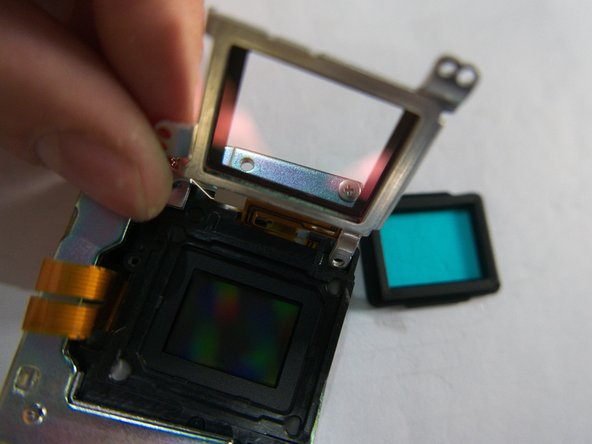
Photo 1: There is a thin glass plate with a red tint glued tightly onto the metal frame. Below it is a thick bluish glass plate held within a rubber frame
-
Both glass elements filter infrared. Removing the reddish glass plate resulted in some infrared sensitivity, and removing the second one gives most infrared sensitivity
-
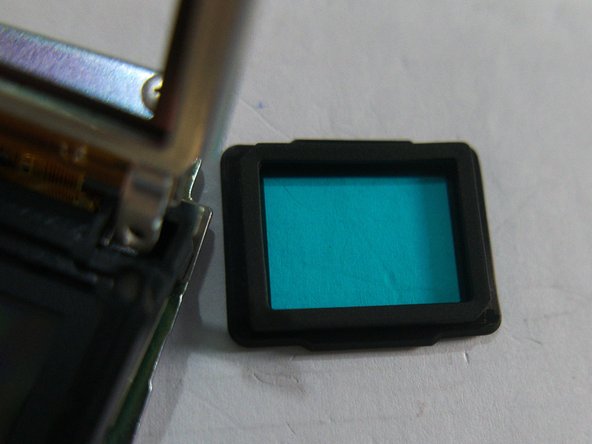
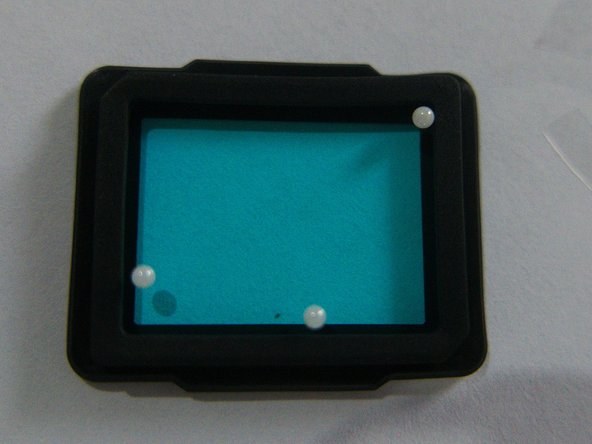
Photo 2: close-up of the bluish filter
-
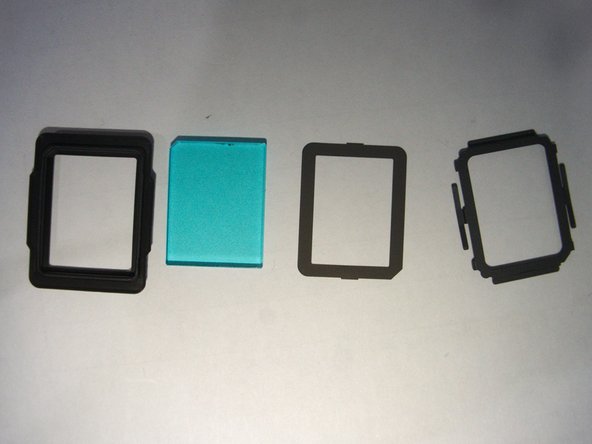
Photo 3: breakdown of the blue filter assembly in layering order
-
-
-
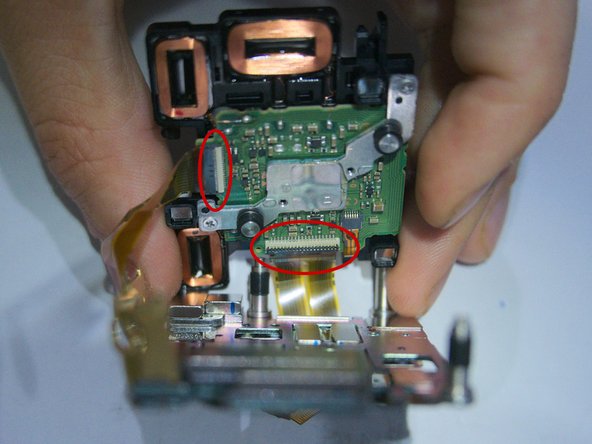
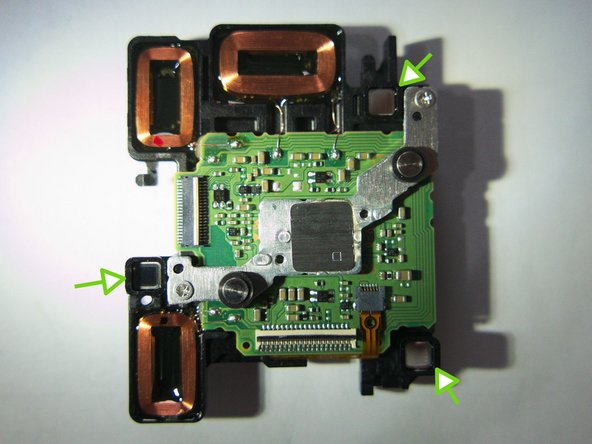
Photo 1: Remove the three 4 mm screws marked in orange
-
Photo 2: Lift up the C-shaped metal plate and disconnect the two ribbon cables
-
-
-
Photo 2: You can now pull out the sensor PCB from the stabilization unit
-
Photo 2: Close-up of the beads held inside the bluish filter, on which the sensor PCB rests to freely move.
-


To reassemble your device, follow these instructions in reverse order.
To reassemble your device, follow these instructions in reverse order.
Cancelar: não concluí este guia.
3 outras pessoas executaram este guia.

4 comentários
Can i e-mail you?
Fair warning — I bricked my camera following these instructions. Error message is “ please turn camera off and then on again” Only part I wasn’t sure of was to put back the UV filter housing in, which I didn’t because it didn’t want to fit without the filter. Maybe I ripped out a cable or something?
Hello,
N° 12, you forget a screw in the center ! ;)
Thanks for the guide Kevin, was very helpful!