Esta versão pode conter edições incorretas. Mude para o último instantâneo verificado.
O que você precisa
-
Este passo não foi traduzido. Ajude a traduzi-lo
-
Position the phone so the screen faces down.
-
Remove the stylus found on the back of the phone.
-
-
Este passo não foi traduzido. Ajude a traduzi-lo
-
Hold the button in the middle of the phone's back to remove the battery cover.
-
Slide the cover down to remove it, and set the cover aside.
-
-
Este passo não foi traduzido. Ajude a traduzi-lo
-
Lift the edge of the battery, separating contact points, and pull out as pictured.
-
-
Este passo não foi traduzido. Ajude a traduzi-lo
-
Remove the round, rubber cover to expose a screw that will be removed in the next step.
-
-
-
Este passo não foi traduzido. Ajude a traduzi-lo
-
Remove the six 6.9 mm screws as pictured with a T5 Torx screwdriver.
-
Remove the single 9.8 mm screw next to the antenna on the back plate, using a Phillips #00 screwdriver.
-
-
Este passo não foi traduzido. Ajude a traduzi-lo
-
Pull the antenna outward to remove the antenna from the body of the phone.
-
-
Este passo não foi traduzido. Ajude a traduzi-lo
-
Pry the back cover off using an iFixit opening tool.
-
-
Este passo não foi traduzido. Ajude a traduzi-lo
-
Remove the two 3.75 mm screws.
-
Pull off the logic board.
-
-
Este passo não foi traduzido. Ajude a traduzi-lo
-
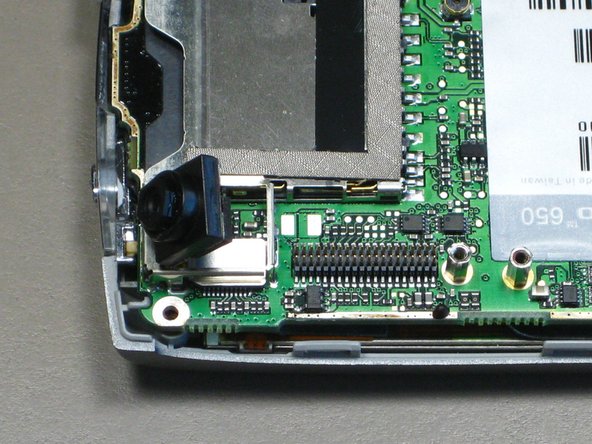
Pry off the camera connector plug.
-
Remove the camera.
-


Equipe

Cal Poly, Team 19-3, Maness Fall 2009 Membro de Cal Poly, Team 19-3, Maness Fall 2009
CPSU-MANESS-F09S19G3
Membros da 4
Autoria de 18 guias