Ir para o conteúdo principal

Palm IIIx Touch Screen Replacement

O que você precisa

  1. Palm IIIx Touch Screen Replacement, Battery: passo 1, imagem 1 %32
    • Place the Palm IIIx face down on a flat surface.

  2. Palm IIIx Touch Screen Replacement: passo 2, imagem 1 %32
    • Push down and lift up the battery cover to remove it.

  3. Palm IIIx Touch Screen Replacement: passo 3, imagem 1 %32
    • Remove the old batteries one at a time.

  4. Palm IIIx Touch Screen Replacement, Touch Screen: passo 4, imagem 1 %32
    • Using a Phillips #00 screwdriver, remove the four screws that hold the back cover in place.

  5. Palm IIIx Touch Screen Replacement: passo 5, imagem 1 %32
    • Hold the device on its side, positioning your hands as shown.

    • Remove the back cover by pushing in with your thumbs and pulling outward with the rest of your fingers.

  6. Palm IIIx Touch Screen Replacement: passo 6, imagem 1 %32
    • Hold the screen and front cover on its side, facing the screen inward as shown.

    • Position your hands so that you can push the screen outward with your thumbs.

    • Remove the screen by pushing outward with your thumbs. Use your index fingers to hold the front cover in place.

  7. Palm IIIx Touch Screen Replacement: passo 7, imagem 1 %32 Palm IIIx Touch Screen Replacement: passo 7, imagem 2 %32
    • Position the device with the screen facing down.

    • Locate the white ribbon wire on the left hand side of the device.

    • On either side of the ribbon wire are two white clasps. Gently push the two clasps away from the board (to the left).

  8. Palm IIIx Touch Screen Replacement: passo 8, imagem 1 %32
    • Detach the ribbon wire by gently pulling it out of its connector.

  9. Palm IIIx Touch Screen Replacement: passo 9, imagem 1 %32
    • Separate the motherboard from the screen.

  10. Palm IIIx Touch Screen Replacement: passo 10, imagem 1 %32 Palm IIIx Touch Screen Replacement: passo 10, imagem 2 %32
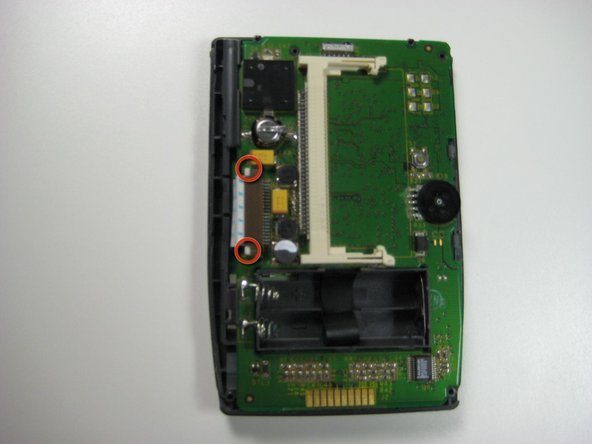
    • On the back of the screen near the top right corner is a plastic filament:

    • Gently lift up on the two brown clasps on either side of the filament connector as shown.

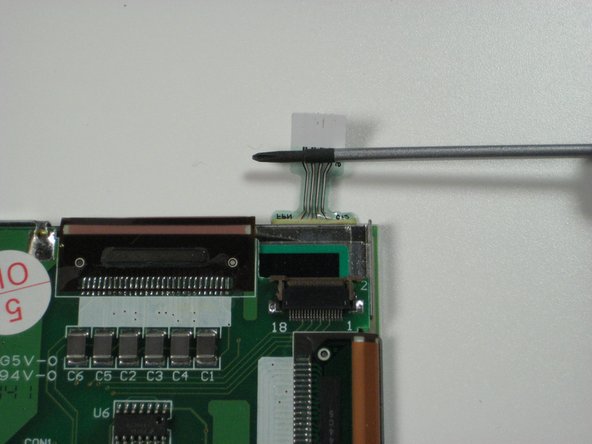
    • Using a thin, blunt object (a toothpick works well), slide it under the plastic filament and lift up to detach the filament from its connector.

  11. Palm IIIx Touch Screen Replacement: passo 11, imagem 1 %32
    • Insert a spudger tool between the metal backing and the glass cover piece, as shown.

    • Run the spudger along the edge of the screen until the screen is lifted and can be removed.

    • Replace or clean as needed.

Conclusão

To reassemble your device, follow these instructions in reverse order.

Uma outra pessoa concluiu este guia.

David Haskell

Membro desde: 01/21/10

44 Reputação

Autoria de 3 guias

Equipe

Cal Poly, Team 14-43, Regan Winter 2010 Membro de Cal Poly, Team 14-43, Regan Winter 2010

CPSU-REGAN-W10S14G43

Membros da 4

Autoria de 4 guias

0 comentários

Adicione um comentário

Exibir estatísticas:

Últimas 24 horas: 0

Últimos 7 dias: 0

Últimos 30 dias: 8

Duração total: 2,401