Esta versão pode conter edições incorretas. Mude para o último instantâneo verificado.
O que você precisa
-
Este passo não foi traduzido. Ajude a traduzi-lo
-
Keep track of all pieces removed from the device.
-
Gently pull off the device cover. The cover snaps on and off easily where the cover attaches to the Palm IIIc device
-
-
Este passo não foi traduzido. Ajude a traduzi-lo
-
Using a Phillips head screwdriver, take out the four screws on the back of the device. You may have to pull them out with your hands once they are unscrewed.
-
-
Este passo não foi traduzido. Ajude a traduzi-lo
-
Using a spudger, carefully pry open the front and back covers along the side seam.
-
-
-
Este passo não foi traduzido. Ajude a traduzi-lo
-
Unhook the battery cable from the motherboard and remove the battery.
-
-
Este passo não foi traduzido. Ajude a traduzi-lo
-
On the back of the motherboard use tweezers to pull up the ZIF connector which looks like a brown plastic tab.
-
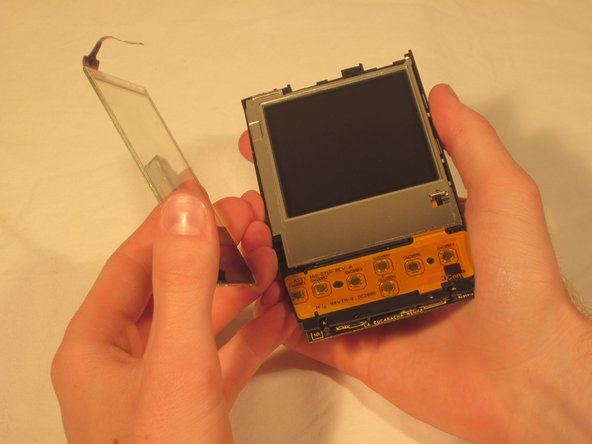
Once the ZIF connector is unattached, remove the clear screen cover.
-
-
Este passo não foi traduzido. Ajude a traduzi-lo
-
Using tweezers unhook the blue and red screen cables where they connect to the motherboard.
-
-
Este passo não foi traduzido. Ajude a traduzi-lo
-
Using tweezers, pull up the other two ZIF connector tabs.
-
-
Este passo não foi traduzido. Ajude a traduzi-lo
-
Gently pull the black clips on the inside case to detach the motherboard from the device. Pull the motherboard out towards the bottom left corner.
-


Equipe

Cal Poly, Team 20-69, Walters Spring 2011 Membro de Cal Poly, Team 20-69, Walters Spring 2011
CPSU-WALTERS-S11S20G69
Membros da 5
Autoria de 8 guias