Ir para o conteúdo principal

PDP Victrix Pro BFG Battery and Trigger Replacement

O que você precisa

  1. PDP Victrix Pro BFG Battery and Trigger Replacement, Battery and Trigger: passo 1, imagem 1 %32
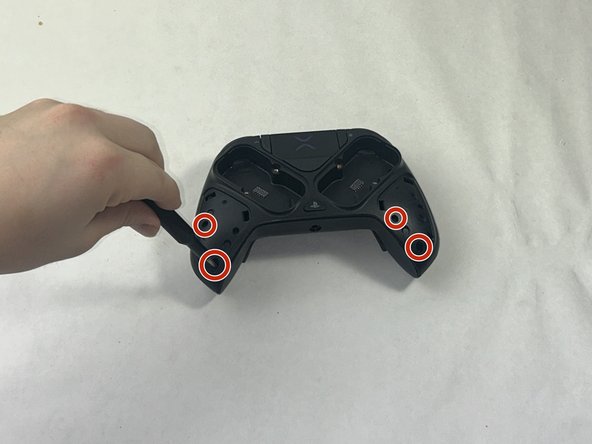
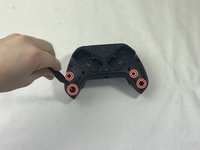
    • Use the purple Module Swap Tool that comes with the device to remove the 4 hex screws.

    • Remove the joystick/button modules from the controller.

  2. PDP Victrix Pro BFG Battery and Trigger Replacement: passo 2, imagem 1 %32
    • Remove the screws from each of the module compartments using a PH0 or J1 bit.

  3. PDP Victrix Pro BFG Battery and Trigger Replacement: passo 3, imagem 1 %32 PDP Victrix Pro BFG Battery and Trigger Replacement: passo 3, imagem 2 %32
    • Using the iFixit opening tool, gently pry open the two side grips.

    • Using a PH0 or J1 screwdriver bit with a 4mm diameter or less, remove the screws located in the bottom outside corners.

  4. PDP Victrix Pro BFG Battery and Trigger Replacement: passo 4, imagem 1 %32
    • Flip the controller to the other side so the label on the bottom is facing upwards.

    • On the label, there is a circular icon; this shows the location of a single screw.

    • Using the same PH0 or J1 screwdriver bit from the previous steps, remove the screw.

  5. PDP Victrix Pro BFG Battery and Trigger Replacement: passo 5, imagem 1 %32
    • Flip the controller so the charging port of the controller is facing you.

    • Using a spudger, carefully pry open the front component.

  6. PDP Victrix Pro BFG Battery and Trigger Replacement: passo 6, imagem 1 %32
    • Flip the controller so it is upside-down, but the charging port is still facing you.

    • In the center of the now exposed part, there will be a hidden silver screw.

    • Use the flexible piece attached to the screwdriver to remove this screw.

    • Now that everything is loosened, gently pry open the controller along the grooves.

  7. PDP Victrix Pro BFG Battery and Trigger Replacement: passo 7, imagem 1 %32
    • Using the screwdriver tool with a smaller head, remove the three screws from each trigger.

    • Remove the triggers.

  8. PDP Victrix Pro BFG Battery and Trigger Replacement: passo 8, imagem 1 %32
    • Using the screwdriver, remove the two screws in the bottom two corners.

    • Using the halberd spudger, carefully pry the circuit board open.

  9. PDP Victrix Pro BFG Battery and Trigger Replacement: passo 9, imagem 1 %32
    • To remove the batteries, use a pair of tweezers to carefully unplug the batteries from the circuit board.

Conclusão

To reassemble your device, follow these instructions in reverse order.

4 outras pessoas executaram este guia.

ryanmorabito

Membro desde: 03/20/24

260 Reputação

Autoria de 1 guia

Equipe

4Comentários do guia

Only guide I could find to get this controller apart for my son. Now have to find someone to resolder the USB c port.

Matthew Lash - Responder

R2 and L2 no response, the board location for button?

Terry - Responder

if my remote doesn’t turn on or charge should I change the battery or just throw it away?

Nerdy mom - Responder

How much and how can I buy the battery's?

Dino - Responder

Comentar

Visualizações:

Últimas 24 horas: 12

Últimos 7 dias: 69

Últimos 30 dias: 271

Ao todo: 4,785