Esta versão pode conter edições incorretas. Mude para o último instantâneo verificado.
O que você precisa
-
Este passo não foi traduzido. Ajude a traduzi-lo
-
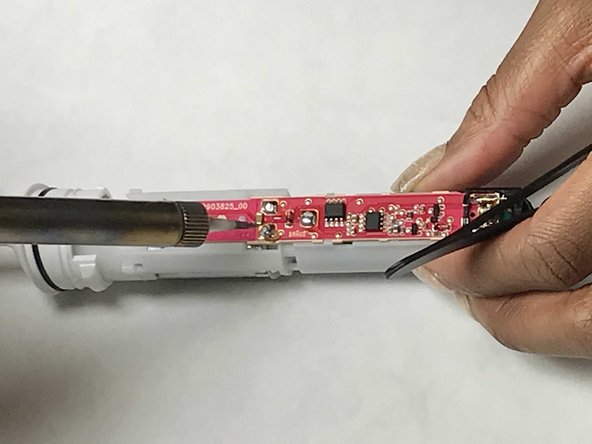
Pull off head, and use pliers to remove the white cap. Pull out the circuit core.
-
-
Este passo não foi traduzido. Ajude a traduzi-lo
-
De-solder in these four (4) locations.
-
The two (2) motor connections
-
The Positive (+) side of the battery
-
The Negative (-) side of the battery
-
-
Este passo não foi traduzido. Ajude a traduzi-lo
-
De-Solder lower battery connection terminal. Bend back battery terminal to clear circuit board.
-
-
-
Este passo não foi traduzido. Ajude a traduzi-lo
-
De-Solder the three (3) upper terminals from the circuit board.
-
-
Este passo não foi traduzido. Ajude a traduzi-lo
-
Use plastic prying tools to carefully pry off the circuit board. (Utilize metal spedger as a last resort)
-
-
Este passo não foi traduzido. Ajude a traduzi-lo
-
Pull the circuit board and battery assembly out. Then proceed to remove the battery from the circuit board
-


Cancelar: não concluí este guia.
15 outras pessoas executaram este guia.
Equipe

IUPUI, Team S2-G1, Harley Fall 2017 Membro de IUPUI, Team S2-G1, Harley Fall 2017
IUPUI-HARLEY-F17S2G1
Membros da 3
Autoria de 8 guias
8 comentários
This is very easy to do. I had no problems following your instructions.
Thanks.
Is this a regular rechargeable AA?
Thanks again.
The original battery is a NiCd with tabs. I just spot welded tabs onto a standard AA NiMH battery and it worked fine.
T C -
@stephen Shaw These batteries worked for me: https://www.amazon.com/dp/B00CR0R8KQ/ref...