Introdução
Use este guia para substituir o fan de refrigeração do Optoma HD72. O fan de refrigeração é essencial para manter as peças internas do projetor — particularmente a lâmpada de alta intensidade — na temperatura ideal de operação. Isso é feito através da entrada constante de ar frio e da saída de ar quente pelo fan de refrigeração, o que protege contra o superaquecimento que pode danificar componentes eletrônicos delicados.
Os seguintes sintomas podem indicar um problema ou a necessidade de substituição da fonte de alimentação interna.
- Ruído excessivo: Se o fan de refrigeração estiver zumbindo, rangendo ou fazendo barulho, pode indicar que os rolamentos estão se desgastando.
- Fluxo de ar reduzido: Se o ar liberado pelas aberturas do projetor estiver mais fraco que o normal, pode indicar que o fan de refrigeração não está circulando o ar corretamente.
- Superaquecimento: Se o dispositivo parecer desligar automaticamente devido ao calor excessivo, é um forte indício de que o fan de refrigeração não está funcionando corretamente.
Alguns avisos a considerar ao desmontar este dispositivo:
- Risco elétrico: Certifique-se de que o projetor esteja desconectado da tomada e desligado por pelo menos 5 a 10 minutos antes de começar a desmontar o dispositivo.
- Componentes delicados: Certifique-se de manusear os componentes delicados com cuidado para evitar danificar acidentalmente qualquer outra peça.
- Pasta térmica: Ao reinstalar um novo fan de refrigeração, aplique uma camada fina e uniforme de pasta térmica entre o fan de refrigeração e qualquer dissipador de calor ou outros componentes com os quais ele faça interface.
- Poeira/Detritos: Limpe cuidadosamente a área do fan de refrigeração e o interior do projetor de qualquer poeira ou detritos acumulados antes de reinstalar ou instalar um novo fan de refrigeração.
O que você precisa
-
-
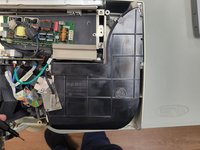
Use uma chave Phillips para remover os cinco parafusos de 2 mm na parte inferior do dispositivo.
 Pergunte ao FixBot
-
-
-
Vire o dispositivo e levante levemente a carcaça superior, com cuidado para não tensionar os dois cabos.
-
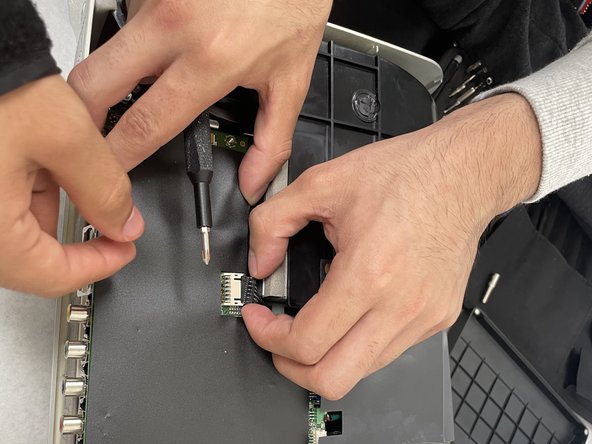
Desconecte os dois cabos que ligam a carcaça superior à placa-mãe.
-
Levante e remova a carcaça superior.
-
-
-
-
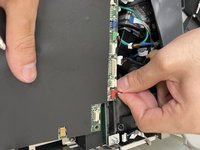
Desconecte todos os cabos que estão conectados à placa-mãe.
-
-
-
Remova os quatro parafusos Phillips de 2 mm que prendem a placa-mãe.
-
Levante a placa-mãe para fora do chassi.
-
-
-
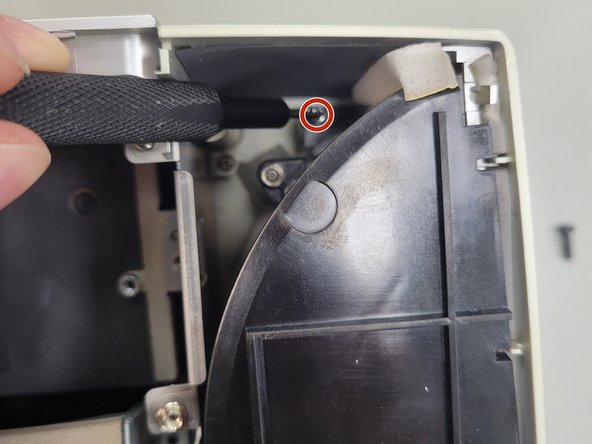
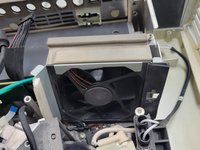
Remova os três parafusos Phillips de 2 mm que prendem a carcaça preta.
-
Retire a carcaça preta.
-
-
-
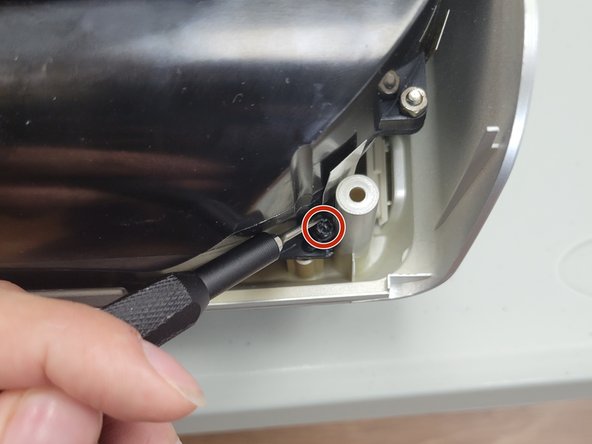
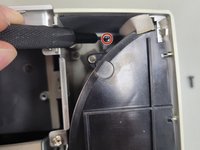
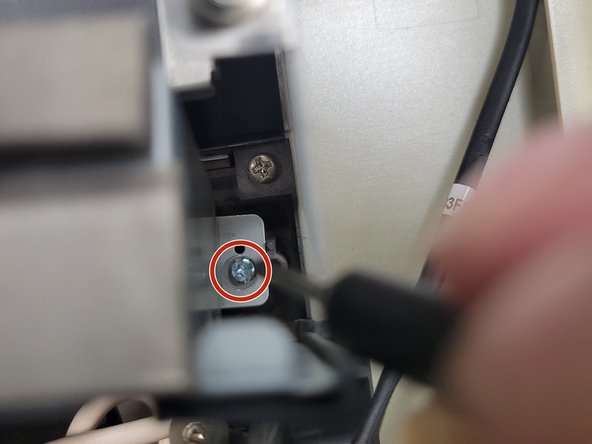
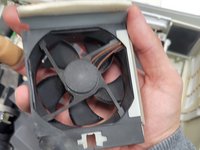
Remova os dois parafusos Phillips de 2 mm que prendem a ventoinha.
-
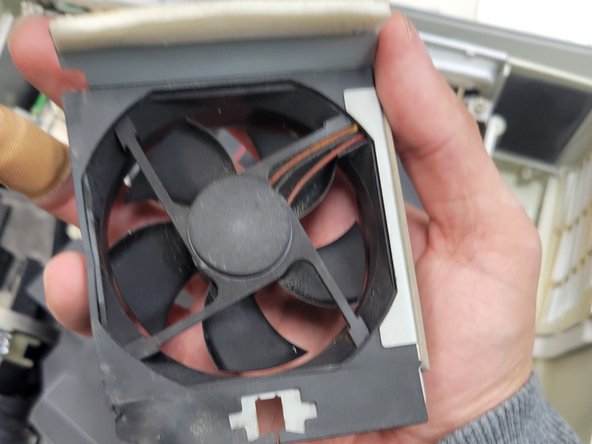
Levante a ventoinha para fora do chassi.
-


Para a remontagem de seu dispositivo, siga estas instruções na ordem inversa.
Um agradecimento especial a esses tradutores:
100%

Translation Bot está nos ajudando a consertar o mundo! Quer contribuir?
Comece a traduzir ›

Equipe

University of North Texas, Team 2-5, Kilpatrick Spring 2024 Membro de University of North Texas, Team 2-5, Kilpatrick Spring 2024
UNT-KILPATRICK-S24S2G5
3 Membros
Autoria de 10 guias