Introdução
Mit dieser Anleitung kannst du den Akku deines OnePlus 7 Pro tauschen.
O que você precisa
-
Passo 1 OnePlus 7 Pro Akkuabdeckung
Cuidado: os passos de 1 a 8 são provenientes de um guia marcado como em andamento.
-
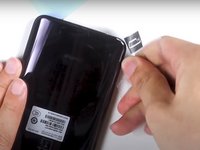
Drücke das SIM-Auswurfwerkzeug (oder eine aufgebogene Büroklammer) vorsichtig in das kleine Loch auf der linken Seite der Oberkante.
-
Drücke das SIM-Auswurfwerkzeug hinein, um den SIM-Einschub auszuwerfen.
-
Enterferne den SIM-Einschub vom Gerät.
-
-
-
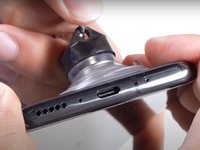
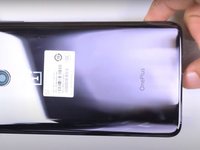
Platziere den Saugheber an der Rückseite so weit unten wie möglich. Hebe den Saugheber mit einer starken, gleichmäßigen Kraft an, bis ein kleiner Spalt zwischen Rückseite und Handy entsteht.
-
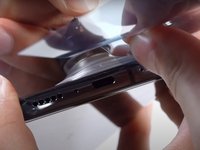
Setze einen Jimmy, ein Plektrum oder eine Kunststoffkarte unter die Kante der Rückabdeckung ein.
-
-
-
-
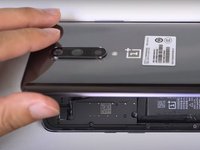
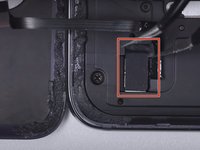
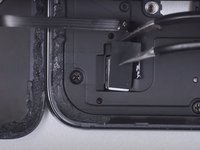
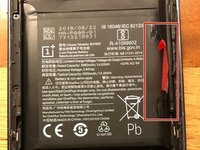
Entferne alle 14 Schrauben der oberen Platte.
-
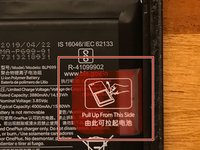
Sind alle Schrauben entfernt, kannst du mit Platte mit dem "Spudger Tool" abnehmen.
-
-
-
Nach Einsatz des neuen Akkus und Zusammenbau empfiehlt es sich, den Akku ohne Unterbrechungen zunächst auf 100% und danach noch zwei weitere Stunden zu laden. Daraufhin, einmal komplett zu entladen und wieder ohne Unterbrechung auf 100% zu laden.
-


Arbeite die Schritte in umgekehrter Reihenfolge ab, um dein Gerät wieder zusammenzubauen.
Cancelar: não concluí este guia.
23 outras pessoas executaram este guia.
10Comentários do guia
It didnt mention how to open the back cover in the first place? Which is the hardest part and the one that require the most skills and specialized tools.
The article links another article talking about the cover. Both do not cover how to apply the new part, specifically, how to install the new battery in this case. I think vitally important. :) @fabianjung
DO NOT use the jimmy tool or anything metal to scrape the glue off!!! You will scratch and remove the paint on the back cover!
5/10 as a guide IMHO.
Why isn't a replacement adhesive gasket part of the requirements (in addition to the replacement battery)??!
The seal will most likely be severely compromised after being opened.
Update: 7/10. Taking the back off went easily/smoothly after lying on a 3D printer bed (@80C) for about 10mins, then using a hot air gun (@90C) and a metal spudger and plastic picks to gently break the adhesive holding the back to the body.
No issue removing the inside cover and pulling out the battery.
Having a replacement adhesive gasket/tape is a good idea when re-assembling though. The original guide didn't mentioned this.