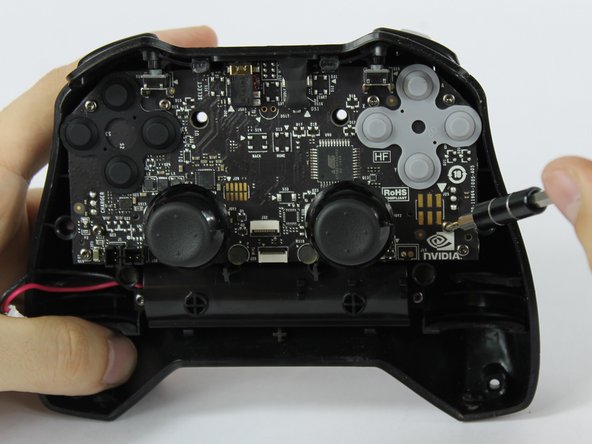
Ir para o conteúdo principal

Nvidia Shield TV 1st Generation Controller Battery Replacement

O que você precisa

  1. Nvidia Shield TV 1st Generation Controller Battery Replacement, Controller Battery: passo 1, imagem 1 %32 Nvidia Shield TV 1st Generation Controller Battery Replacement, Controller Battery: passo 1, imagem 2 %32
    • Remove the indicated six screws using the T6 Torx screwdriver.

  2. Nvidia Shield TV 1st Generation Controller Battery Replacement: passo 2, imagem 1 %32 Nvidia Shield TV 1st Generation Controller Battery Replacement: passo 2, imagem 2 %32
    • Use the plastic opening tool to pry the face of the controller away from the body.

    • Make sure the controller is face down during this step as the buttons can easily fall out.

  3. Nvidia Shield TV 1st Generation Controller Battery Replacement: passo 3, imagem 1 %32
    • Carefully remove the indicated ribbon wires from the face of the controller.

  4. Nvidia Shield TV 1st Generation Controller Battery Replacement: passo 4, imagem 1 %32 Nvidia Shield TV 1st Generation Controller Battery Replacement: passo 4, imagem 2 %32
    • Use the angled tweezers to remove the vibration motor cable, moving it upward from its socket.

    • Lift the vibration motor out of the front case.

    • Repeat for the other side.

    • Use the angled tweezers to remove the battery cable, moving it upward from its socket.

  5. Nvidia Shield TV 1st Generation Controller Battery Replacement: passo 5, imagem 1 %32 Nvidia Shield TV 1st Generation Controller Battery Replacement: passo 5, imagem 2 %32 Nvidia Shield TV 1st Generation Controller Battery Replacement: passo 5, imagem 3 %32
    • Using the T6 Torx screwdriver, remove the indicated eight screws from the logic board.

    • Lift the logic board away from the front case.

  6. Nvidia Shield TV 1st Generation Controller Battery Replacement: passo 6, imagem 1 %32 Nvidia Shield TV 1st Generation Controller Battery Replacement: passo 6, imagem 2 %32 Nvidia Shield TV 1st Generation Controller Battery Replacement: passo 6, imagem 3 %32
    • Using the T6 Torx screwdriver, remove the indicated four screws from the panel.

    • Remove the panel from the front case.

    • Lift the battery from the front case to remove it.

Conclusão

To reassemble your device, follow these instructions in reverse order.

12 outras pessoas executaram este guia.

Joshua Neally

Membro desde: 09/25/17

581 Reputação

Autoria de 4 guias

Equipe

USF Tampa, Team S16-G6, Eyestone Fall 2017 Membro de USF Tampa, Team S16-G6, Eyestone Fall 2017

USFT-EYESTONE-F17S16G6

Membros da 3

Autoria de 7 guias

8 comentários

Where can i buy the replacement Battery? What tags should i use to find it?

Rancid 3000a - Responder

LC18650 Remote Control accu

djcornelissen - Responder

Are battery packs available for the 2017 controller?

Andrew - Responder

Simply reconnecting the battery fixed my issues

Charles Keisler - Responder

Adicione um comentário

Exibir estatísticas:

Últimas 24 horas: 3

Últimos 7 dias: 25

Últimos 30 dias: 93

Duração total: 18,547