Esta versão pode conter edições incorretas. Mude para o último instantâneo verificado.
O que você precisa
-
Este passo não foi traduzido. Ajude a traduzi-lo
-
Remove the rear cover by pressing down on the cover and pulling it away from the device.
-
-
Este passo não foi traduzido. Ajude a traduzi-lo
-
Place your finger on the back of the battery located near the edge of the device.
-
Push your finger into the battery and lift up to pop the battery out of the device.
-
-
Este passo não foi traduzido. Ajude a traduzi-lo
-
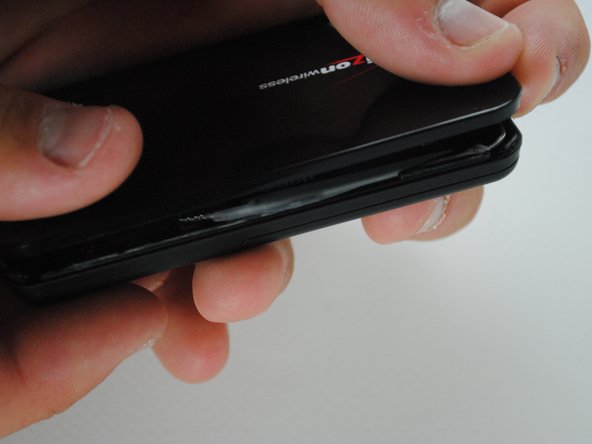
Using a metal spudger, pry open the device around the seam between the front and back cover.
-
-
-
Este passo não foi traduzido. Ajude a traduzi-lo
-
Once the seal has been broken all the way around, open the cases using your hands.
-
-
Este passo não foi traduzido. Ajude a traduzi-lo
-
To disconnect the antenna, pull up on the antenna's connection to the circuit board until it pops off.
-
-
Este passo não foi traduzido. Ajude a traduzi-lo
-
Carefully pull out the antenna along the edge of the device.
-
There is adhesive applied to the antenna, so it may not easily detach.
-
-
Este passo não foi traduzido. Ajude a traduzi-lo
-
Reconnect your new antenna to the circuit board in the same position described in step 3.
-
-
Este passo não foi traduzido. Ajude a traduzi-lo
-
Re-lay antenna around the edge and over the adhesive.
-
-
Este passo não foi traduzido. Ajude a traduzi-lo
-
Apply double-sided stick tape to the inner top and bottom halves of the device along the seam that was previously unsealed.
-
Snap the two halves together along the adhesive line to reconnect it as it previously was.
-


Equipe

Cal Poly, Team 7-36, Maness Spring 2012 Membro de Cal Poly, Team 7-36, Maness Spring 2012
CPSU-MANESS-S12S7G36
Membros da 5
Autoria de 5 guias