Ir para o conteúdo principal

Nook Tablet Back Cover Replacement

O que você precisa

  1. Nook Tablet Back Cover Replacement, Back Cover: passo 1, imagem 1 %32
    • Flip the Nook over.

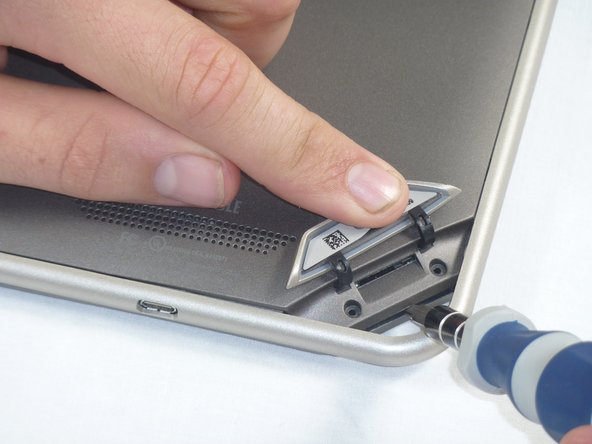
  2. Nook Tablet Back Cover Replacement: passo 2, imagem 1 %32 Nook Tablet Back Cover Replacement: passo 2, imagem 2 %32
    • Lift the flap that reads "Nook" to reveal the tape that is underneath. Remove the memory card if one is present.

    • Remove the tape covering the round holes to reveal two T5 Torx screws.

    • Remove the two T5 Torx screws securing the back cover.

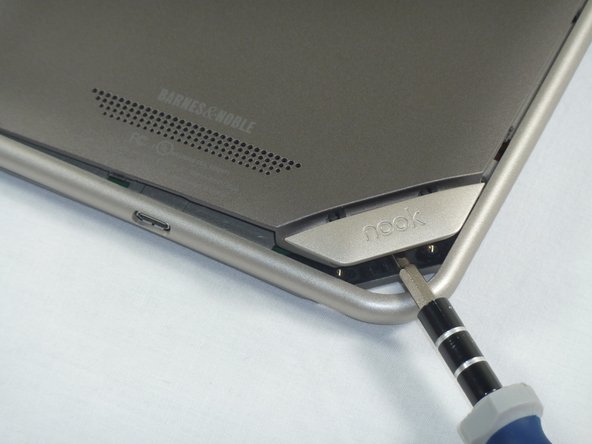
  3. Nook Tablet Back Cover Replacement: passo 3, imagem 1 %32 Nook Tablet Back Cover Replacement: passo 3, imagem 2 %32
    • Insert the flat end of a spudger between the front panel and the rear assembly.

    • Though these photos show a screwdriver, use a spudger or plastic opening tool in order to prevent damage to the device.

    • Use a spudger to lift the the back panel from the rest of the Nook.

  4. Nook Tablet Back Cover Replacement: passo 4, imagem 1 %32 Nook Tablet Back Cover Replacement: passo 4, imagem 2 %32
    • Slide the spudger around the edges of the Nook to loosen the back panel.

  5. Nook Tablet Back Cover Replacement: passo 5, imagem 1 %32
    • Pull the back panel off the Nook.

Conclusão

To reassemble your device, line up the piece that was removed with how it was on before and then just firmly press down till it snaps into place.

5 outras pessoas executaram este guia.

Equipe

Cal Poly, Team 1-4, Propen Fall 2012 Membro de Cal Poly, Team 1-4, Propen Fall 2012

CPSU-PROPEN-F12S1G4

Membros da 4

Autoria de 14 guias

0 comentários

Adicione um comentário

Exibir estatísticas:

Últimas 24 horas: 0

Últimos 7 dias: 6

Últimos 30 dias: 19

Duração total: 5,848