Introdução
We will be pulling apart the Nook HD and replacing the speakers.
O que você precisa
-
-
Be sure the device is powered off. Clean the device to prevent any dirt and dust from entering into the device.
-
Use the plastic opening tool to gently pry the plastic screen frame away from the screen. Run the plastic opening tool along the interior edge of the screen until the screen frame is completely separated from the glass.
-
The screen frame is held onto the Nook by a set of tab that run around the outside of the frame. There may also be a line of rubber cement around the Nook under the screen frame. If your Nook has this, you will have to dig deep to separate the frame from the Nook.
-
-
-
-
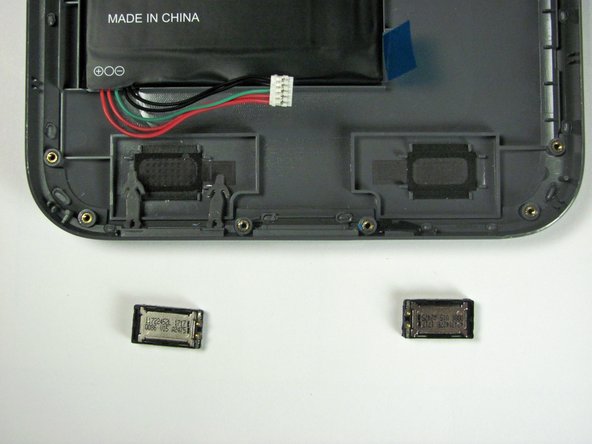
Use the plastic opening tool to pry the speakers away from the back plate starting with the inside edge. The speakers are likely glued to the backplate so some resistance is expected.
-
Place the replacement speakers so that they line up properly with the circuit board in order to make a connection.
-


To reassemble your device, follow these instructions in reverse order.
To reassemble your device, follow these instructions in reverse order.
Cancelar: não concluí este guia.
3 outras pessoas executaram este guia.
Equipe

Cal Poly, Team 3-43, Maness Spring 2014 Membro de Cal Poly, Team 3-43, Maness Spring 2014
CPSU-MANESS-S14S3G43
Membros da 5
Autoria de 10 guias