Ir para o conteúdo principal

Nokia 6310i Screen Replacement

O que você precisa

  1. Nokia 6310i Screen Replacement, Battery: passo 1, imagem 1 %32 Nokia 6310i Screen Replacement, Battery: passo 1, imagem 2 %32
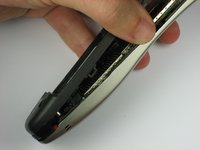
    • Press and hold the battery release button and slide the battery away from the Nokia logo

  2. Nokia 6310i Screen Replacement, SIM card: passo 2, imagem 1 %32 Nokia 6310i Screen Replacement, SIM card: passo 2, imagem 2 %32 Nokia 6310i Screen Replacement, SIM card: passo 2, imagem 3 %32
    • Slide the SIM card lock away from the SIM card.

    • The SIM card pops out. Remove the SIM card.

  3. Nokia 6310i Screen Replacement, Back Cover: passo 3, imagem 1 %32
    • Unscrew and remove the four T6 Torx screws.

  4. Nokia 6310i Screen Replacement: passo 4, imagem 1 %32 Nokia 6310i Screen Replacement: passo 4, imagem 2 %32 Nokia 6310i Screen Replacement: passo 4, imagem 3 %32
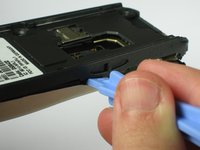
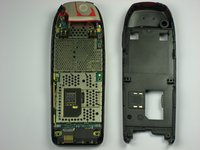
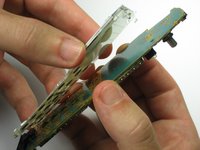
    • Insert a plastic opening tool between the faceplate and the black backplate. Gently pry them apart, working from the lower end to the upper side of the phone.

  5. Nokia 6310i Screen Replacement: passo 5, imagem 1 %32 Nokia 6310i Screen Replacement: passo 5, imagem 2 %32 Nokia 6310i Screen Replacement: passo 5, imagem 3 %32
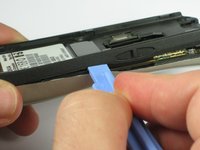
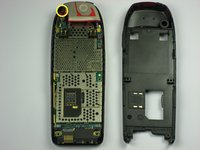
    • Use the plastic opening tool to separate the top part of the backplate.

    • The plastic clips at the top require slightly more force to separate.

  6. Nokia 6310i Screen Replacement, Antenna: passo 6, imagem 1 %32 Nokia 6310i Screen Replacement, Antenna: passo 6, imagem 2 %32
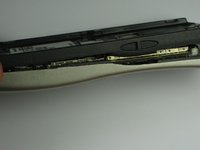
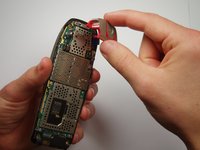
    • Remove the screw holding the antenna to the circuit board.

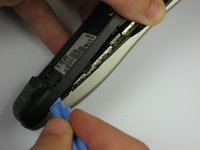
    • Carefully lift off the antenna from the circuit board.

  7. Nokia 6310i Screen Replacement, Motherboard: passo 7, imagem 1 %32
    • Lift off the motherboard from the faceplate.

  8. Nokia 6310i Screen Replacement, Screen: passo 8, imagem 1 %32 Nokia 6310i Screen Replacement, Screen: passo 8, imagem 2 %32 Nokia 6310i Screen Replacement, Screen: passo 8, imagem 3 %32
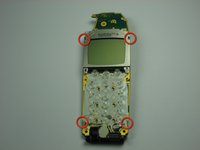
    • Remove the screen from the motherboard by carefully pushing the four tabs around the edge.

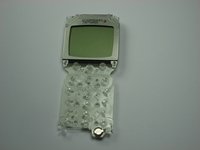
    • Carefully pull the screen away from the motherboard.

Conclusão

To reassemble your device, follow these instructions in reverse order.

5 outras pessoas executaram este guia.

Equipe

Cal Poly, Team 14-41, Forte Fall 2010 Membro de Cal Poly, Team 14-41, Forte Fall 2010

CPSU-FORTE-F10S14G41

Membros da 5

Autoria de 16 guias

0 comentários

Adicione um comentário

Exibir estatísticas:

Últimas 24 horas: 0

Últimos 7 dias: 5

Últimos 30 dias: 14

Duração total: 7,519