Esta versão pode conter edições incorretas. Mude para o último instantâneo verificado.
O que você precisa
-
Este passo não foi traduzido. Ajude a traduzi-lo
-
Press down on the grip on the back of the phone and slide the rear housing down towards the bottom of the phone.
-
-
Este passo não foi traduzido. Ajude a traduzi-lo
-
Use your finger to gently pull the bottom of the battery up by using the slip found at the bottom of the phone.
-
Lift out battery and remove.
-
-
Este passo não foi traduzido. Ajude a traduzi-lo
-
Use your finger to lift the metal cage up.
-
Remove SIM card.
-
-
-
Este passo não foi traduzido. Ajude a traduzi-lo
-
Insert your two fingers under the two tabs found at the top of the phone underneath the black casing, then pull the casing up and slide it out slowly.
-
-
Este passo não foi traduzido. Ajude a traduzi-lo
-
After removing the top cover, turn the phone over so the screen is facing upwards.
-
-
Este passo não foi traduzido. Ajude a traduzi-lo
-
Use your fingers to slowly lift the screen back towards the bottom of the phone using the arrows found at the top of the phone.
-
-
Este passo não foi traduzido. Ajude a traduzi-lo
-
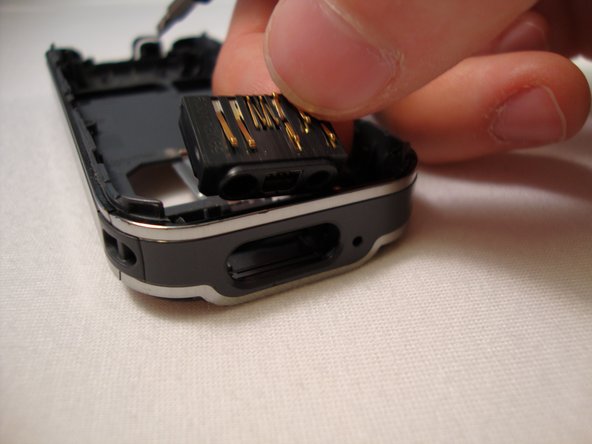
Insert the screwdriver below the charger connector and press down to pry out.
-
The charger connector should pop out with a slight push inwards with your thumb.
-


Cancelar: não concluí este guia.
Uma outra pessoa concluiu este guia.

Equipe

Cal Poly, Team 23-63, Johann Spring 2010 Membro de Cal Poly, Team 23-63, Johann Spring 2010
CPSU-JOHANN-S10S23G63
Membros da 3
Autoria de 17 guias