Ir para o conteúdo principal

Nokia 515 Front cover and keypad replacement

O que você precisa

  1. Nokia 515 Front cover and keypad replacement, Front cover and keypad: passo 1, imagem 1 %32
    • Remove the back cover with your fingers or with the eject tool which is included by Nokia.

    • Don't forget to turn off your device!

  2. Nokia 515 Front cover and keypad replacement: passo 2, imagem 1 %32
    • Remove the battery, the microSD card and the SIM card.

  3. Nokia 515 Front cover and keypad replacement: passo 3, imagem 1 %32
    • Remove the 2 screws with the T4 screwdriver.

    • Please store the screws on a safe place! I already lost a screw!

  4. Nokia 515 Front cover and keypad replacement: passo 4, imagem 1 %32 Nokia 515 Front cover and keypad replacement: passo 4, imagem 2 %32
    • Take the metal spudger and pry it firmly under the plastic hinges.

    • Although you want to replace the cover, be very careful by doing it! You could harm yourself with the metal spudger.

    • You could also use your fingers instead of the spudger to do it!

  5. Nokia 515 Front cover and keypad replacement, Remove the keypad: passo 5, imagem 1 %32 Nokia 515 Front cover and keypad replacement, Remove the keypad: passo 5, imagem 2 %32 Nokia 515 Front cover and keypad replacement, Remove the keypad: passo 5, imagem 3 %32
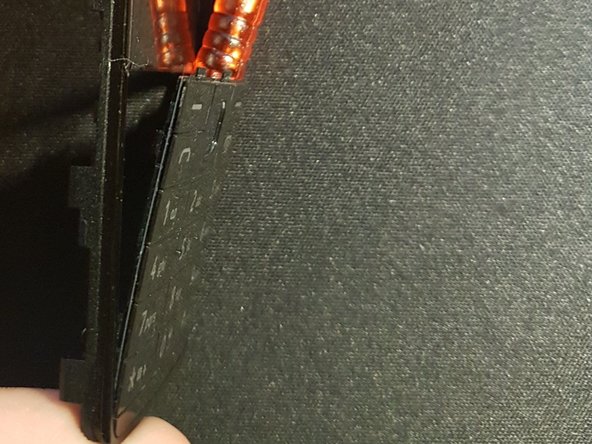
    • To remove the keypad, you should use the spudger to push the top clamps down a little bit while pressing your fingers against the inside of the keypad.

    • The keypad should be loose at the top.

    • To remove the bottom, just use a little bit of force to pull it off the front panel.

    • Just use a little bit of force.

  6. Nokia 515 Front cover and keypad replacement: passo 6, imagem 1 %32
    • To assemble the new keypad, start at the upper half of the keyboard.

  7. Nokia 515 Front cover and keypad replacement: passo 7, imagem 1 %32 Nokia 515 Front cover and keypad replacement: passo 7, imagem 2 %32 Nokia 515 Front cover and keypad replacement: passo 7, imagem 3 %32
    • To reassemble the front, just click it in place (you hear a clicking noise).

    • Now screw the T4 screws back into the holes.

    • Now you put the microSD card, the SIM card and the battery back into your device.

    • Now you can turn on your device.

Conclusão

You did it!

3 outras pessoas executaram este guia.

Um agradecimento especial a esses tradutores:

de en

100%

Leon está nos ajudando a consertar o mundo! Quer contribuir?
Comece a traduzir ›

Leon

Membro desde: 03/28/19

376 Reputação

Autoria de 1 guia

0 comentários

Adicione um comentário

Exibir estatísticas:

Últimas 24 horas: 0

Últimos 7 dias: 6

Últimos 30 dias: 25

Duração total: 818