Ir para o conteúdo principal

Nokero N222-Huron Mounting Technique

O que você precisa

  1. Nokero N222-Huron Mounting Technique, Nokero N222-Huron Mounting Technique: passo 1, imagem 1 %32
    • Place the mounting bracket in the desired location and mark the center location. This is where the screw will be placed.

    • It is optional to drill a pilot hole for the screw if splitting is a concern (usually for mounting in wood).

  2. Nokero N222-Huron Mounting Technique: passo 2, imagem 1 %32 Nokero N222-Huron Mounting Technique: passo 2, imagem 2 %32 Nokero N222-Huron Mounting Technique: passo 2, imagem 3 %32
    • Place the screw through the bracket, as shown, and screw it into the marked or drilled location.

  3. Nokero N222-Huron Mounting Technique: passo 3, imagem 1 %32
    • Make sure the bracket is facing in the desired direction before tightening the screw.

    • When the Nokero logo is facing forward, the light will pivot forward and backward.

  4. Nokero N222-Huron Mounting Technique: passo 4, imagem 1 %32 Nokero N222-Huron Mounting Technique: passo 4, imagem 2 %32 Nokero N222-Huron Mounting Technique: passo 4, imagem 3 %32
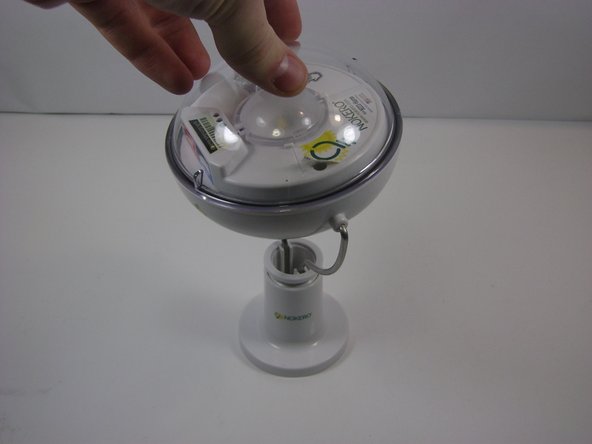
    • Place the light in the bracket as shown and turn clockwise until it is secure.

Conclusão

To remove or change the fixed mount for your device, follow these instructions in reverse order.

Vinny Capone

Membro desde: 10/18/13

549 Reputação

Autoria de 5 guias

Equipe

UMass Dartmouth, Team 2-4, Gulbrandsen Fall 2013 Membro de UMass Dartmouth, Team 2-4, Gulbrandsen Fall 2013

UMASSD-GULBRANDSEN-F13S2G4

Membros da 3

Autoria de 5 guias

0 comentários

Adicione um comentário

Exibir estatísticas:

Últimas 24 horas: 2

Últimos 7 dias: 8

Últimos 30 dias: 12

Duração total: 202