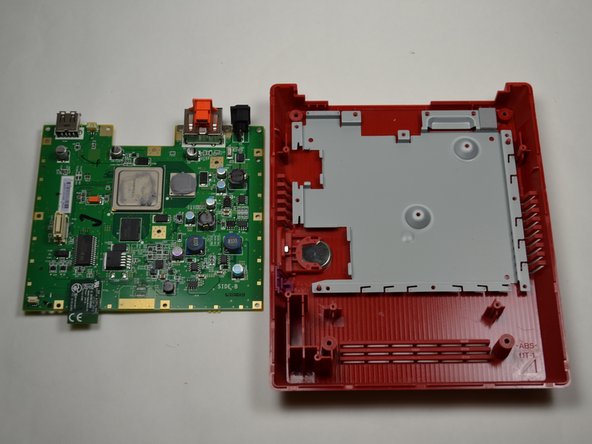
Ir para o conteúdo principal

Nintendo Wii mini Motherboard Replacement

O que você precisa

  1. Nintendo Wii mini Motherboard Replacement, Unscrew the Bottom: passo 1, imagem 1 %32 Nintendo Wii mini Motherboard Replacement, Unscrew the Bottom: passo 1, imagem 2 %32
    • Remove the two rubber feet at the back of the console to reveal the hidden screws.

    • Remove the four 6mm Phillips #0 screws.

  2. Nintendo Wii mini Motherboard Replacement, Remove the Cover: passo 2, imagem 1 %32 Nintendo Wii mini Motherboard Replacement, Remove the Cover: passo 2, imagem 2 %32 Nintendo Wii mini Motherboard Replacement, Remove the Cover: passo 2, imagem 3 %32
    • Turn the Wii mini right-side up. Then run a plastic opening tool around the middle edge of the console to loosen the top piece.

    • Gently lift the top piece of the console and set it aside.

  3. Nintendo Wii mini Motherboard Replacement, Unscrew the Fan: passo 3, imagem 1 %32 Nintendo Wii mini Motherboard Replacement, Unscrew the Fan: passo 3, imagem 2 %32
    • Turn the Wii mini around so that the back of the device is facing you.

    • Using a Phillips #0 Screwdriver, unscrew the two 6mm screws on either side of the fan piece.

    • You may need to use tweezers to pull out the screws once they are loosened.

  4. Nintendo Wii mini Motherboard Replacement, Detach the Fan Connector: passo 4, imagem 1 %32 Nintendo Wii mini Motherboard Replacement, Detach the Fan Connector: passo 4, imagem 2 %32 Nintendo Wii mini Motherboard Replacement, Detach the Fan Connector: passo 4, imagem 3 %32
    • Using your fingers, gently pull the top of the pin connector straight up to detach the fan from the console.

    • Do not wiggle the connector or cable while removing. This may cause the connector to come loose

    • Remove the fan piece and set it aside.

  5. Nintendo Wii mini Motherboard Replacement, Power Board: passo 5, imagem 1 %32 Nintendo Wii mini Motherboard Replacement, Power Board: passo 5, imagem 2 %32 Nintendo Wii mini Motherboard Replacement, Power Board: passo 5, imagem 3 %32
    • Using your fingers, slide out the blue ribbon cable from the the top of the power board.

    • Using a Phillips #0 Screwdriver, unscrew the two 4mm screws at the top and bottom of the power board.

  6. Nintendo Wii mini Motherboard Replacement: passo 6, imagem 1 %32 Nintendo Wii mini Motherboard Replacement: passo 6, imagem 2 %32
    • Using your fingers, gently pull the pin connector to disconnect the power board from the disc drive.

  7. Nintendo Wii mini Motherboard Replacement: passo 7, imagem 1 %32 Nintendo Wii mini Motherboard Replacement: passo 7, imagem 2 %32
    • Lift the power board from the console and set it aside.

  8. Nintendo Wii mini Motherboard Replacement, Disc Drive: passo 8, imagem 1 %32 Nintendo Wii mini Motherboard Replacement, Disc Drive: passo 8, imagem 2 %32
    • Using a Phillips #0 Screwdriver, unscrew the four 6mm screws.

  9. Nintendo Wii mini Motherboard Replacement: passo 9, imagem 1 %32 Nintendo Wii mini Motherboard Replacement: passo 9, imagem 2 %32
    • Lift the disc drive out of the console and set it aside.

  10. Nintendo Wii mini Motherboard Replacement, Unscrew the Tray: passo 10, imagem 1 %32
    • Using a Phillips #0 Screwdriver, unscrew the 6 mm screw at the top of the black tray.

    There is actually two additional screws at the bottom of the tray

    Serhii Mukha - Responder

  11. Nintendo Wii mini Motherboard Replacement, Remove the Tray: passo 11, imagem 1 %32 Nintendo Wii mini Motherboard Replacement, Remove the Tray: passo 11, imagem 2 %32 Nintendo Wii mini Motherboard Replacement, Remove the Tray: passo 11, imagem 3 %32
    • Using your fingers, pull the black plastic tray toward you to loosen it from the console.

    • Make sure the black square pieces are separated from the metal square pieces before trying to lift out the tray.

    • Once separated, lift the plastic tray out of the console and set it aside.

    • Trying to remove the tray before it is completely loosened may result in damage to the metal square pieces.

  12. Nintendo Wii mini Motherboard Replacement, Unscrew the Metal Casing: passo 12, imagem 1 %32 Nintendo Wii mini Motherboard Replacement, Unscrew the Metal Casing: passo 12, imagem 2 %32
    • Using a Phillips #0 screwdriver, remove the eleven 5 mm screws holding the silver metal plate to the console.

    • These screws are indicated by small arrows on the metal plate. (See Photo #2)

  13. Nintendo Wii mini Motherboard Replacement, Remove Metal Casing: passo 13, imagem 1 %32 Nintendo Wii mini Motherboard Replacement, Remove Metal Casing: passo 13, imagem 2 %32
    • Lift out the metal plate and set it aside.

  14. Nintendo Wii mini Motherboard Replacement, Remove Motherboard: passo 14, imagem 1 %32 Nintendo Wii mini Motherboard Replacement, Remove Motherboard: passo 14, imagem 2 %32
    • Lift out the motherboard and set it aside.

Conclusão

To reassemble your device, follow these instructions in reverse order.

9 outras pessoas executaram este guia.

Kristin Anderson

Membro desde: 01/23/15

963 Reputação

Autoria de 5 guias

Equipe

UWT Liner: Group 5 Membro de UWT Liner: Group 5

Community

Membros da 3

Autoria de 10 guias

Um comentário

Can you fit a Wii Motherboard inside this casing, and use the dvd drive, if so I have a few wiis with broken DVD drives I would like to repair and this would be a cheap solution.

Christopher Wortman - Responder

Adicione um comentário

Exibir estatísticas:

Últimas 24 horas: 4

Últimos 7 dias: 14

Últimos 30 dias: 85

Duração total: 4,746