Introdução
This guide will show you how to replace the fan in your Nintendo Wii mini in the case of it malfunctioning or failing to work. If your fan does break, it is important to replace it as soon as possible to prevent your system from overheating, which can lead to further damage. The importance of this part also helps prolong the usage/life of the other internal components, keeping the replacement rate down.
Once you have successfully replaced your fan, run the system to confirm the fan works and prevents overheating.
O que você precisa
-
-
Remove the two rubber feet at the back of the console to reveal the hidden screws.
-
Remove the four 6mm Phillips #0 screws.
-
-
-
Turn the Wii mini right-side up. Then run a plastic opening tool around the middle edge of the console to loosen the top piece.
-
Gently lift the top piece of the console and set it aside.
-
-
-
Ferramenta utilizada neste passo:Tweezers$4.99
-
Turn the Wii mini around so that the back of the device is facing you.
-
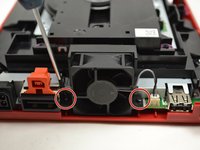
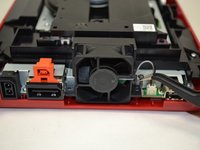
Using a Phillips #0 Screwdriver, unscrew the two 6mm screws on either side of the fan piece.
-
-
-
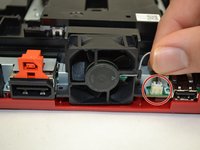
Using your fingers, gently pull the top of the pin connector straight up to detach the fan from the console.
-
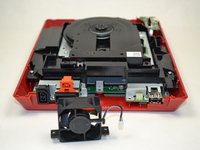
Remove the fan piece and set it aside.
-


To reassemble your device, follow these instructions in reverse order.
To reassemble your device, follow these instructions in reverse order.
Cancelar: não concluí este guia.
3 outras pessoas executaram este guia.
Equipe
