Ir para o conteúdo principal

Nintendo Wii U Wireless Module Replacement

O que você precisa

  1. Nintendo Wii U Wireless Module Replacement, Console Outer Case: passo 1, imagem 1 %32
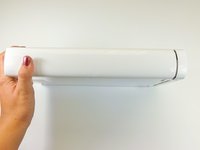
    • With the bottom of the console facing up, remove the following 6 screws hidden underneath the white square stickers:

    • Three 5.1mm Phillips #000 screws

    • Two 6.1mm Tri-wing Y0 screws

    • One 13.2mm Tri-wing Y1 screw

  2. Nintendo Wii U Wireless Module Replacement: passo 2, imagem 1 %32
    • Rotate the console 180 degrees so that the exhaust vents are facing you.

    • Remove the two 7.1mm Phillips #00 screws.

  3. Nintendo Wii U Wireless Module Replacement: passo 3, imagem 1 %32 Nintendo Wii U Wireless Module Replacement: passo 3, imagem 2 %32
    • On the side opposite of the exhaust vents, slide the cover faceplate towards the back of the console and pull upwards to release it.

  4. Nintendo Wii U Wireless Module Replacement: passo 4, imagem 1 %32
    • On the bottom of the console beneath the previously removed faceplate, remove the three 13.2mm Tri-wing Y1 screws.

  5. Nintendo Wii U Wireless Module Replacement: passo 5, imagem 1 %32 Nintendo Wii U Wireless Module Replacement: passo 5, imagem 2 %32 Nintendo Wii U Wireless Module Replacement: passo 5, imagem 3 %32
    • On the back of the console, lift up and release the main top cover.

  6. Nintendo Wii U Wireless Module Replacement, Front Faceplate: passo 6, imagem 1 %32 Nintendo Wii U Wireless Module Replacement, Front Faceplate: passo 6, imagem 2 %32
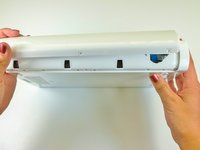
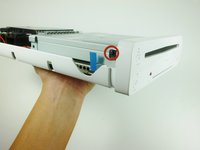
    • Rotate the device so that the front plate is facing you.

    • On each side of the console, remove the 3.5mm Phillips #0 screw connecting the DVD drive to the faceplate.

  7. Nintendo Wii U Wireless Module Replacement: passo 7, imagem 1 %32
    • Rotate the device so that the front plate is on the right side and the ribbon cable is visible.

    • The ribbon cable is connected to the system by a latch which holds in the blue tab. Flip this latch up to unlock it.

    • Lift up on the blue tab to release the ribbon cable.

  8. Nintendo Wii U Wireless Module Replacement: passo 8, imagem 1 %32
    • Remove the front faceplate.

  9. Nintendo Wii U Wireless Module Replacement, DVD Drive: passo 9, imagem 1 %32
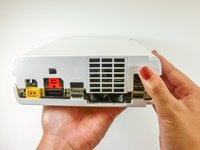
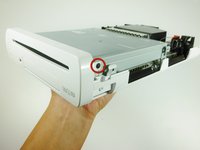
    • On each side of the DVD drive, remove the two 4.6mm Phillips #0 mounting screws.

  10. Nintendo Wii U Wireless Module Replacement: passo 10, imagem 1 %32 Nintendo Wii U Wireless Module Replacement: passo 10, imagem 2 %32
    • Rotate the device so that the disc drive slot is visible.

    • A ribbon cable is attached to the bottom right side of the disc drive. The ribbon cable can rip if it isn't removed properly.

    • Lift the disc drive out of the mount and turn over to the right so it lies like a book.

    • Use a spudger to release the ribbon cable.

  11. Nintendo Wii U Wireless Module Replacement: passo 11, imagem 1 %32
    • Remove the disc drive.

  12. Nintendo Wii U Wireless Module Replacement, Motherboard: passo 12, imagem 1 %32 Nintendo Wii U Wireless Module Replacement, Motherboard: passo 12, imagem 2 %32 Nintendo Wii U Wireless Module Replacement, Motherboard: passo 12, imagem 3 %32
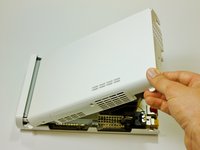
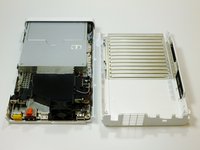
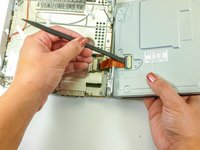
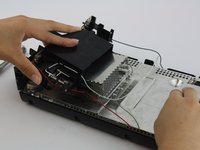
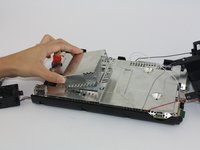
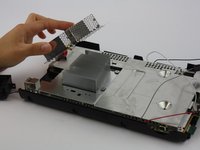
    • Remove the black plastic shielding by unscrewing connecting screws with a Phillip's Head screwdriver.

    • You will have to carefully adjust the antenna cables out of the way in order to proceed comfortably.

  13. Nintendo Wii U Wireless Module Replacement: passo 13, imagem 1 %32 Nintendo Wii U Wireless Module Replacement: passo 13, imagem 2 %32 Nintendo Wii U Wireless Module Replacement: passo 13, imagem 3 %32
    • The metal cap does not require unscrewing and should lift up with ease.

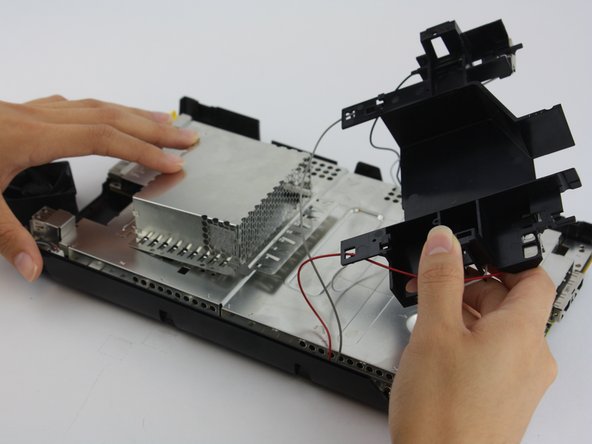
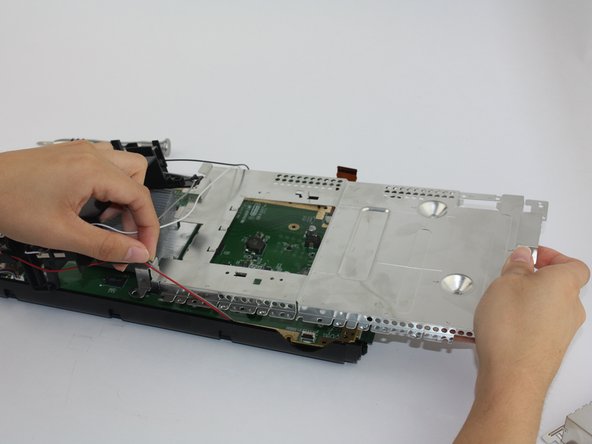
    • Unscrew all the screws that outline the perimeter of the board using a Phillips Head (PH1) screwdriver.

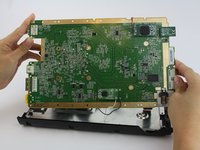
    • Remove the silver shielding plate once all screws are removed. Be careful when pulling it under the affixed antenna cables.

  14. Nintendo Wii U Wireless Module Replacement: passo 14, imagem 1 %32 Nintendo Wii U Wireless Module Replacement: passo 14, imagem 2 %32
    • At this point, the motherboard should easily separate from the lower tray.

  15. Nintendo Wii U Wireless Module Replacement, Wireless 5ghz Module: passo 15, imagem 1 %32 Nintendo Wii U Wireless Module Replacement, Wireless 5ghz Module: passo 15, imagem 2 %32 Nintendo Wii U Wireless Module Replacement, Wireless 5ghz Module: passo 15, imagem 3 %32
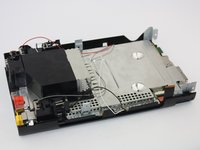
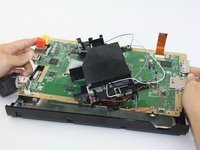
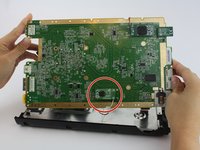
    • Flip the motherboard over to view the underside where the Wii U's wireless modules are located. The Bluetooth module is circled in red.

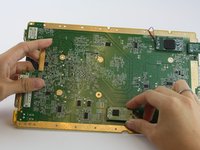
    • This module is affixed with strong adhesive, so in order to remove it you will need to wiggle the module with slight force for a couple of minutes.

Conclusão

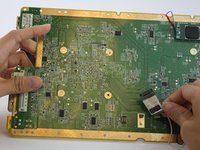
To reassemble your device, follow these instructions in reverse order.

4 outras pessoas executaram este guia.

Emily Vasquez

Membro desde: 02/24/16

884 Reputação

Autoria de 3 guias

Equipe

USF Tampa, Team 1-2, Leahy Spring 2016 Membro de USF Tampa, Team 1-2, Leahy Spring 2016

USFT-LEAHY-S16S1G2

Membros da 3

Autoria de 12 guias

14 comentários

Where would be able to buy this replacement part? Anyone know?

Salvador Mora - Responder

I found on aliexpress

Rodrigo Mafort -

I actually just bought a secondary Wii U just to be sure I don't get a cheap part, it was like $65 with a credit on eBay

Salvador Mora -

Which one of these is for the module for control pad?:

Broadcom BCM43237KMLG Wireless LAN module

Broadcom BCM43362KUB6 802.11n Wireless Module—the same one used in the Roku 2 XS

Broadcom BCM20702 Bluetooth 4.0

Dan - Responder

Adicione um comentário

Exibir estatísticas:

Últimas 24 horas: 4

Últimos 7 dias: 18

Últimos 30 dias: 98

Duração total: 11,353