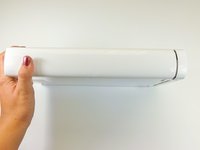
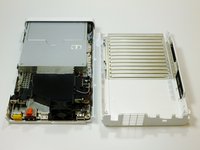
Ir para o conteúdo principal

Nintendo Wii U Console Outer Case Replacement

O que você precisa

  1. Nintendo Wii U Console Outer Case Replacement, Console Outer Case: passo 1, imagem 1 %32
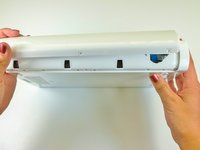
    • With the bottom of the console facing up, remove the following 6 screws hidden underneath the white square stickers:

    • Three 5.1mm Phillips #000 screws

    • Two 6.1mm Tri-wing Y0 screws

    • One 13.2mm Tri-wing Y1 screw

  2. Nintendo Wii U Console Outer Case Replacement: passo 2, imagem 1 %32
    • Rotate the console 180 degrees so that the exhaust vents are facing you.

    • Remove the two 7.1mm Phillips #00 screws.

  3. Nintendo Wii U Console Outer Case Replacement: passo 3, imagem 1 %32 Nintendo Wii U Console Outer Case Replacement: passo 3, imagem 2 %32
    • On the side opposite of the exhaust vents, slide the cover faceplate towards the back of the console and pull upwards to release it.

  4. Nintendo Wii U Console Outer Case Replacement: passo 4, imagem 1 %32
    • On the bottom of the console beneath the previously removed faceplate, remove the three 13.2mm Tri-wing Y1 screws.

  5. Nintendo Wii U Console Outer Case Replacement: passo 5, imagem 1 %32 Nintendo Wii U Console Outer Case Replacement: passo 5, imagem 2 %32 Nintendo Wii U Console Outer Case Replacement: passo 5, imagem 3 %32
    • On the back of the console, lift up and release the main top cover.

Conclusão

To reassemble your device, follow these instructions in reverse order.

27 outras pessoas executaram este guia.

Kim Arre

Membro desde: 01/11/13

4.888 Reputação

Autoria de 8 guias

Equipe

Cal Poly, Team 17-20, Forte Winter 2013 Membro de Cal Poly, Team 17-20, Forte Winter 2013

CPSU-FORTE-W13S17G20

Membros da 5

Autoria de 38 guias

0 comentários

Adicione um comentário

Exibir estatísticas:

Últimas 24 horas: 9

Últimos 7 dias: 69

Últimos 30 dias: 338

Duração total: 31,767