Ir para o conteúdo principal
Participe da comunidade de reparos - Criar conta

Nintendo Wii Faceplate Replacement

O que você precisa

  1. Nintendo Wii Faceplate Replacement, Faceplate: passo 1, imagem 1 %32 Nintendo Wii Faceplate Replacement, Faceplate: passo 1, imagem 2 %32
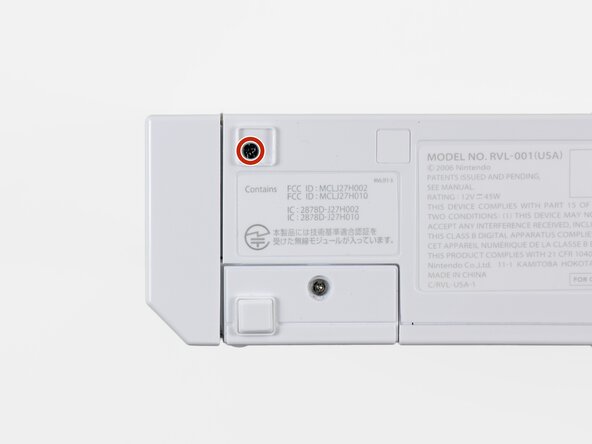
    • Use a metal spudger to remove the white plastic screw covers stuck to the lower case near the front of the Wii.

  2. Nintendo Wii Faceplate Replacement: passo 2, imagem 1 %32
    • Remove the two 8.3 mm Tri-Point screws hidden under the covers you just removed.

  3. Nintendo Wii Faceplate Replacement: passo 3, imagem 1 %32
    • Remove the single 5.9 mm Phillips screw under the controller port door nearest the faceplate.

  4. Nintendo Wii Faceplate Replacement: passo 4, imagem 1 %32
    • Use a metal spudger to remove the rubber foot stuck to the side of the Wii near the DVD drive opening.

  5. Nintendo Wii Faceplate Replacement: passo 5, imagem 1 %32
    • Remove the single 5.9 mm Phillips screw hidden under the foot you just removed.

  6. Nintendo Wii Faceplate Replacement: passo 6, imagem 1 %32 Nintendo Wii Faceplate Replacement: passo 6, imagem 2 %32
    Ferramenta utilizada neste passo:
    Tweezers
    $4.99
    • Carefully pull the faceplate away from the front of the Wii.

    • Use a pair of tweezers to disconnect the LED cable's plastic connector from the motherboard.

    • Remove the faceplate.

Conclusão

To reassemble your device, follow these instructions in reverse order.

24 outras pessoas executaram este guia.

3Comentários do guia

Any more to do if pressing the on button does nothing, its still red power light?

Kyrre - Responder

Tanks for this guide Btw

Kyrre - Responder

Thanks for the guide, I just wish it continued with replacing the components within the faceplate, as I wanted to replace the white shell. Still helpful though!

Cynthia - Responder

Comentar

Visualizações:

Últimas 24 horas: 18

Últimos 7 dias: 132

Últimos 30 dias: 556

Ao todo: 61,400