Ir para o conteúdo principal

Nintendo WaveBird Wireless Controller Front Panel Replacement

O que você precisa

  1. Nintendo WaveBird Wireless Controller Front Panel Replacement, Batteries: passo 1, imagem 1 %32 Nintendo WaveBird Wireless Controller Front Panel Replacement, Batteries: passo 1, imagem 2 %32
    • Pull down on the battery cover release lever and pull back to remove the cover.

  2. Nintendo WaveBird Wireless Controller Front Panel Replacement: passo 2, imagem 1 %32
    • Remove both batteries from the device.

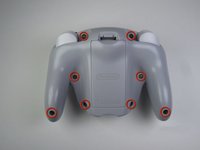
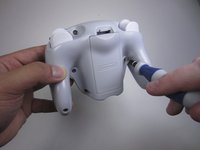
  3. Nintendo WaveBird Wireless Controller Front Panel Replacement, Front Panel: passo 3, imagem 1 %32 Nintendo WaveBird Wireless Controller Front Panel Replacement, Front Panel: passo 3, imagem 2 %32
    • Remove the eight 9 mm screws from the back panel using the Tri-point Y1 screwdriver.

    • During reassembly, firmly hold the panels of the controller together while replacing the screws so the panels do not separate.

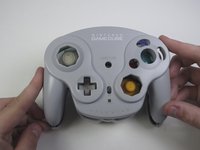
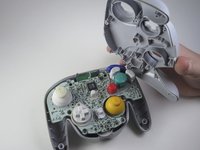
  4. Nintendo WaveBird Wireless Controller Front Panel Replacement: passo 4, imagem 1 %32 Nintendo WaveBird Wireless Controller Front Panel Replacement: passo 4, imagem 2 %32
    • Carefully turn over the controller and place it on a flat surface.

    • Slowly separate the top panel from the bottom panel.

    • The buttons are loose and may fall off the motherboard.

    • Once separated, set aside the top panel.

    • During reassembly, make sure the front panel lines up with the buttons so they slide back into place.

Conclusão

To reassemble your device, follow these instructions in reverse order.

3 outras pessoas executaram este guia.

JT Gryder

Membro desde: 04/12/13

105 Reputação

Autoria de 1 guia

Equipe

Cal Poly, Team 10-40, Amido Spring 2013 Membro de Cal Poly, Team 10-40, Amido Spring 2013

CPSU-AMIDO-S13S10G40

Membros da 4

Autoria de 37 guias

0 comentários

Adicione um comentário

Exibir estatísticas:

Últimas 24 horas: 0

Últimos 7 dias: 0

Últimos 30 dias: 7

Duração total: 1,505