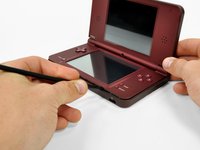
Ir para o conteúdo principal

Nintendo DSi XL Camera Assembly Replacement

Guia arquivado
Este guia é mantido exclusivamente para fins históricos. Use a versão atualizada do guia para executar o reparo.

O que você precisa

  1. Nintendo DSi XL Camera Assembly Replacement, Battery: passo 1, imagem 1 %32 Nintendo DSi XL Camera Assembly Replacement, Battery: passo 1, imagem 2 %32
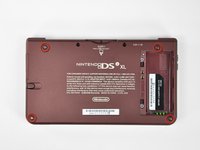
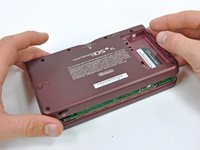
    • Remove the two Phillips screws securing the battery cover to the back of the handheld console.

    • Lift the battery cover off the back of the DSi XL.

  2. Nintendo DSi XL Camera Assembly Replacement: passo 2, imagem 1 %32
    • Lift the battery from the DSi XL.

  3. Nintendo DSi XL Camera Assembly Replacement, Lower Case: passo 3, imagem 1 %32 Nintendo DSi XL Camera Assembly Replacement, Lower Case: passo 3, imagem 2 %32 Nintendo DSi XL Camera Assembly Replacement, Lower Case: passo 3, imagem 3 %32
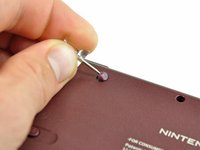
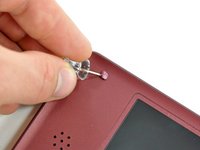
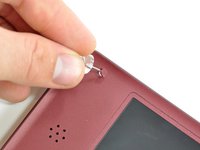
    • Remove the four rubber screw covers on the lower case by prying them up with a push pin.

  4. Nintendo DSi XL Camera Assembly Replacement: passo 4, imagem 1 %32
    • Remove the following seven Phillips screws that secure the lower case to the rest of the DSi XL:

    • Four silver 5.3 mm screws

    • Two black 5.3 mm screws

    • One black 2.5 mm screw

  5. Nintendo DSi XL Camera Assembly Replacement: passo 5, imagem 1 %32 Nintendo DSi XL Camera Assembly Replacement: passo 5, imagem 2 %32 Nintendo DSi XL Camera Assembly Replacement: passo 5, imagem 3 %32
    • Turn the DSi XL over, and open the display.

    • Insert a spudger between the upper and lower case at the bottom left corner of the DSi.

    • Slide the spudger along the bottom edge of the upper case to release the latches securing the upper case to the lower case.

  6. Nintendo DSi XL Camera Assembly Replacement: passo 6, imagem 1 %32 Nintendo DSi XL Camera Assembly Replacement: passo 6, imagem 2 %32
    • Close the display and turn the DSi XL over.

    • Lift the lower case from the front edge.

    • Rotate the lower case away from the DSi.

    • The lower case cannot be completely removed yet, since it is still connected to the motherboard.

  7. Nintendo DSi XL Camera Assembly Replacement: passo 7, imagem 1 %32 Nintendo DSi XL Camera Assembly Replacement: passo 7, imagem 2 %32
    • Using a spudger, pry the SD card/right shoulder button connector off its socket.

    • Pry the volume button/left shoulder button connector off its socket on the motherboard with a spudger.

  8. Nintendo DSi XL Camera Assembly Replacement, Wi-Fi Board: passo 8, imagem 1 %32 Nintendo DSi XL Camera Assembly Replacement, Wi-Fi Board: passo 8, imagem 2 %32
    • Lift the Wi-Fi board up off its socket on the motherboard.

    • Do not attempt to completely remove the Wi-Fi board yet. It is attached to the motherboard by an antenna cable.

  9. Nintendo DSi XL Camera Assembly Replacement: passo 9, imagem 1 %32
    • Use a spudger to pry the Wi-Fi cable off its socket on the underside of the Wi-Fi board.

  10. Nintendo DSi XL Camera Assembly Replacement, Motherboard: passo 10, imagem 1 %32
    • Use a spudger to pry the microphone cable off the motherboard.

    • Pry from underneath the cable.

  11. Nintendo DSi XL Camera Assembly Replacement: passo 11, imagem 1 %32 Nintendo DSi XL Camera Assembly Replacement: passo 11, imagem 2 %32
    • Using the flat end of a spudger, flip up the retaining flap on the camera ribbon ZIF connector.

    • Use the pointed end of a spudger to pull the camera ribbon from the ZIF connector.

  12. Nintendo DSi XL Camera Assembly Replacement: passo 12, imagem 1 %32 Nintendo DSi XL Camera Assembly Replacement: passo 12, imagem 2 %32
    • Using the flat end of a spudger, flip up the retaining flap on the touchscreen cable ZIF connector.

    • With the pointed end of the spudger, pull the touchscreen cable from its connector on the motherboard.

  13. Nintendo DSi XL Camera Assembly Replacement: passo 13, imagem 1 %32 Nintendo DSi XL Camera Assembly Replacement: passo 13, imagem 2 %32
    • Using the flat end of a spudger, flip up the retaining flap on the backlight cable ZIF connector.

    • With the pointed end of the spudger, pull the backlight cable from its connector on the motherboard.

  14. Nintendo DSi XL Camera Assembly Replacement: passo 14, imagem 1 %32 Nintendo DSi XL Camera Assembly Replacement: passo 14, imagem 2 %32
    • Using the flat end of a spudger, flip up the retaining flap on the lower display data cable ZIF connector.

    • With the pointed end of the spudger, pull the lower display data cable from its connector on the motherboard.

  15. Nintendo DSi XL Camera Assembly Replacement: passo 15, imagem 1 %32 Nintendo DSi XL Camera Assembly Replacement: passo 15, imagem 2 %32
    • Using the flat end of a spudger, flip up the retaining flap on the ZIF connector for the D-Pad/power button cable.

    • With the pointed end of the spudger, pull the D-Pad/power button cable from its connector on the motherboard.

  16. Nintendo DSi XL Camera Assembly Replacement: passo 16, imagem 1 %32
    • Using the flat end of the spudger, pry the battery cable up off its socket on the motherboard.

  17. Nintendo DSi XL Camera Assembly Replacement: passo 17, imagem 1 %32
    • Remove the screws securing the motherboard to the upper case:

    • A single 2.5 mm silver Phillips screw

    • Four 3.7 mm black Phillips screws

  18. Nintendo DSi XL Camera Assembly Replacement: passo 18, imagem 1 %32
    • Deroute the microphone and antenna cables through the slot in the motherboard.

  19. Nintendo DSi XL Camera Assembly Replacement: passo 19, imagem 1 %32 Nintendo DSi XL Camera Assembly Replacement: passo 19, imagem 2 %32
    • Rotate the motherboard off the lower case.

    • The motherboard cannot be completely removed yet. It is still attached by the upper LCD's display data ribbon cable.

  20. Nintendo DSi XL Camera Assembly Replacement: passo 20, imagem 1 %32 Nintendo DSi XL Camera Assembly Replacement: passo 20, imagem 2 %32
    • Using the flat end of a spudger, flip up the retaining flap on the upper display data cable ZIF connector.

    • With the pointed end of the spudger, pull the upper display data cable from its connector on the underside of the motherboard.

    • The motherboard is now free from the upper case.

  21. Nintendo DSi XL Camera Assembly Replacement, Lower Display Assembly: passo 21, imagem 1 %32 Nintendo DSi XL Camera Assembly Replacement, Lower Display Assembly: passo 21, imagem 2 %32
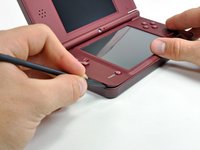
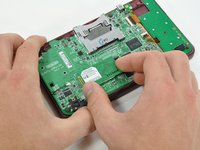
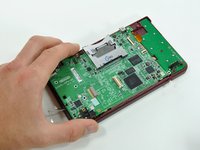
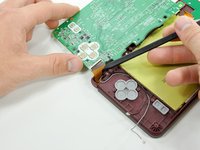
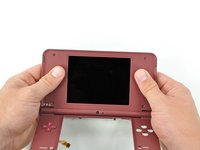
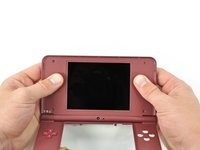
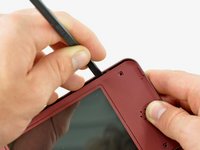
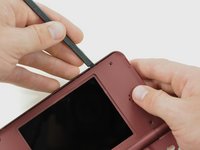
    • With the console still upside-down, open the DSi XL slightly.

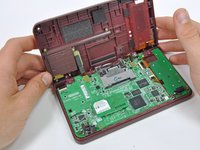
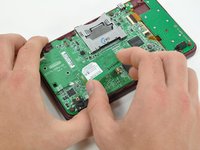
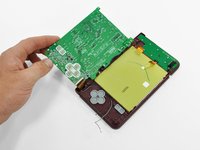
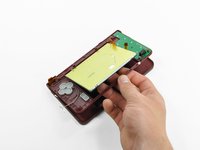
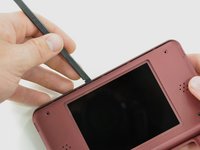
    • Push the lower display away from the upper case.

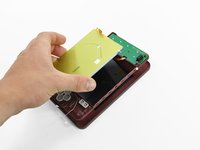
    • Remove the lower display from the DSi XL.

  22. Nintendo DSi XL Camera Assembly Replacement, Rear Bezel: passo 22, imagem 1 %32 Nintendo DSi XL Camera Assembly Replacement, Rear Bezel: passo 22, imagem 2 %32 Nintendo DSi XL Camera Assembly Replacement, Rear Bezel: passo 22, imagem 3 %32
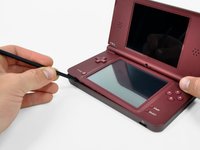
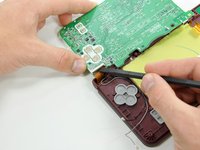
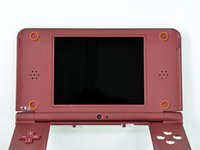
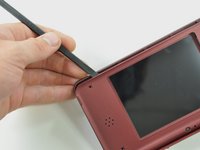
    • Turn the DSi XL over and open the display.

    • When re-assembling the device, be sure to re-install the ABXY and Start/Select buttons, as they are likely to fall out once the handheld console is turned over.

    • Use a pushpin to remove the four plastic screw covers on the front bezel.

  23. Nintendo DSi XL Camera Assembly Replacement: passo 23, imagem 1 %32
    • Remove the four 3.5 mm silver Phillips screws securing the rear bezel to the front bezel.

  24. Nintendo DSi XL Camera Assembly Replacement: passo 24, imagem 1 %32 Nintendo DSi XL Camera Assembly Replacement: passo 24, imagem 2 %32
    • Using two hands, gently slide the rear bezel upwards.

    • The rear bezel will move only about 2 mm.

  25. Nintendo DSi XL Camera Assembly Replacement: passo 25, imagem 1 %32 Nintendo DSi XL Camera Assembly Replacement: passo 25, imagem 2 %32
    • Insert a spudger into the gap between the front and rear bezel.

    • Rotate the spudger away from the DSi XL, prying the two bezels apart.

  26. Nintendo DSi XL Camera Assembly Replacement: passo 26, imagem 1 %32 Nintendo DSi XL Camera Assembly Replacement: passo 26, imagem 2 %32
    • In the same manner as described above, continue prying along the top edge of the front and rear bezels.

  27. Nintendo DSi XL Camera Assembly Replacement: passo 27, imagem 1 %32
    • Separate the rear bezel from the front bezel.

    • Do not attempt to completely remove the rear bezel yet. It is still attached to the front bezel by the rear-facing camera.

  28. Nintendo DSi XL Camera Assembly Replacement: passo 28, imagem 1 %32
    • Using the flat end of a spudger, pry the rear camera off the rear bezel.

    • Remove the rear bezel.

  29. Nintendo DSi XL Camera Assembly Replacement, Camera Assembly: passo 29, imagem 1 %32 Nintendo DSi XL Camera Assembly Replacement, Camera Assembly: passo 29, imagem 2 %32
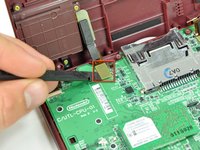
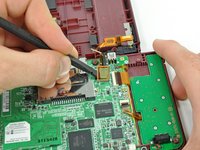
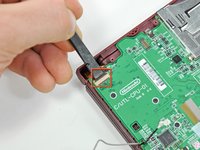
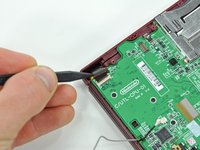
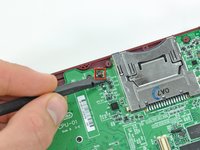
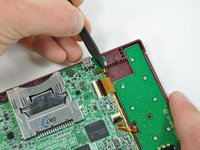
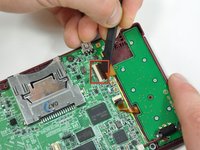
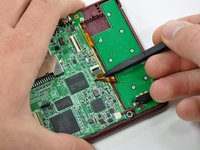
    • Remove the Phillips screw holding the metal securing bracket in place.

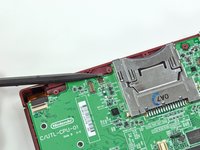
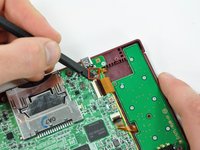
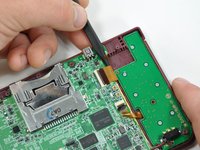
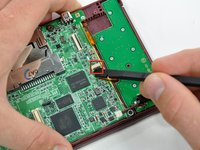
    • Lift the metal bracket off the camera.

    • The bracket cannot be completely removed yet, because is attached to the upper display data cable.

  30. Nintendo DSi XL Camera Assembly Replacement: passo 30, imagem 1 %32
    • Lift the camera out of its seat on the front bezel.

  31. Nintendo DSi XL Camera Assembly Replacement: passo 31, imagem 1 %32 Nintendo DSi XL Camera Assembly Replacement: passo 31, imagem 2 %32 Nintendo DSi XL Camera Assembly Replacement: passo 31, imagem 3 %32
    • Grab the LCD and camera cable with one hand, and slowly feed the camera cable and data display cable through the right hinge connecting the upper case and front bezel.

    • Use your free hand to guide the ends of the cables through the right hinge.

    • Be careful when feeding the thin ribbon cable through the hole; it will tear easily.

  32. Nintendo DSi XL Camera Assembly Replacement: passo 32, imagem 1 %32 Nintendo DSi XL Camera Assembly Replacement: passo 32, imagem 2 %32
    • When feeding the camera and upper LCD cables through the right hinge, it is helpful to wrap the cables together with a piece of tape.

    • Be sure to wrap the cables tight enough to get through the hole, but not so tight as to damage or bend the the connections.

  33. Nintendo DSi XL Camera Assembly Replacement: passo 33, imagem 1 %32
    • Remove the camera ribbon from the DSi XL.

Conclusão

To reassemble your device, follow these instructions in reverse order.

David Hodson

Membro desde: 04/13/10

150.455 Reputação

Autoria de 127 guias

0 comentários

Adicione um comentário

Exibir estatísticas:

Últimas 24 horas: 0

Últimos 7 dias: 0

Últimos 30 dias: 0

Duração total: 1,033