Introdução
This guide will show how to replace the Nintendo 64 motherboard.
O que você precisa
-
-
Remove the expansion pack cover by pushing in the tab and pulling out.
 Pergunte ao FixBot
-
-
-
Remove the six screws on the bottom side indicated in the example with a gamebit head or screwdriver.
-
-
-
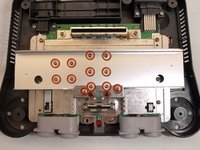
Remove the fourteen screws indicated in the example using the larger Phillips screwdriver.
-
-
-
-
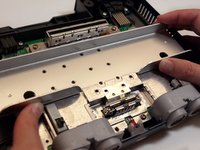
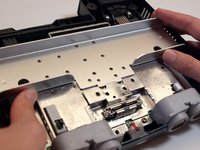
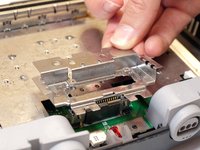
Remove the metal plate indicated in the example by sliding it back and then lifting it up.
-
-
-
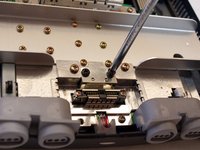
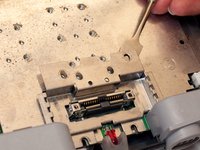
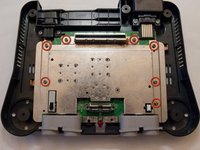
Remove the two screws indicated in the example using the smaller Phillips screwdriver.
-
-
-
Remove the screw to the right of the LED light using the larger Phillips screwdriver.
-
-
-
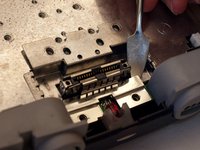
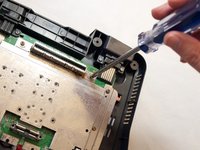
Remove the small metal bracket from the back of the expansion pack slot.
-
-
-
Remove the small metal bracket from the front of the expansion pack slot with the metal spudger.
-
-
-
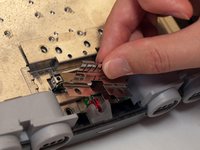
Remove the small metal bracket behind the expansion slot using the spudger.
-
-
-
Remove the seven screws indicated in the example using the larger Phillips screwdriver.
-
-
-
Remove the four screws indicated using the #1 Phillips screwdriver.
-


To reassemble your device, follow these instructions in reverse order.
Cancelar: não concluí este guia.
41 outras pessoas executaram este guia.

Equipe

Cal Poly, Team 5-4, Regan Fall 2009 Membro de Cal Poly, Team 5-4, Regan Fall 2009
CPSU-REGAN-F09S5G4
7 Membros
Autoria de 20 guias
3Comentários do guia
4.2mm doesn't seem right. When I looked to purchase all I saw was 4.5mm and now that I have one in my hand it seems to fit very precisely on the screws on my N64.
i got the second comment :whyy:
What are the symptoms of a bad motherboard?