Ir para o conteúdo principal

Nikon Coolpix L820 Device Ports Replacement

O que você precisa

  1. Nikon Coolpix L820 Device Ports Replacement, Settings Buttons: passo 1, imagem 1 %32 Nikon Coolpix L820 Device Ports Replacement, Settings Buttons: passo 1, imagem 2 %32 Nikon Coolpix L820 Device Ports Replacement, Settings Buttons: passo 1, imagem 3 %32
    • Remove the battery before beginning.

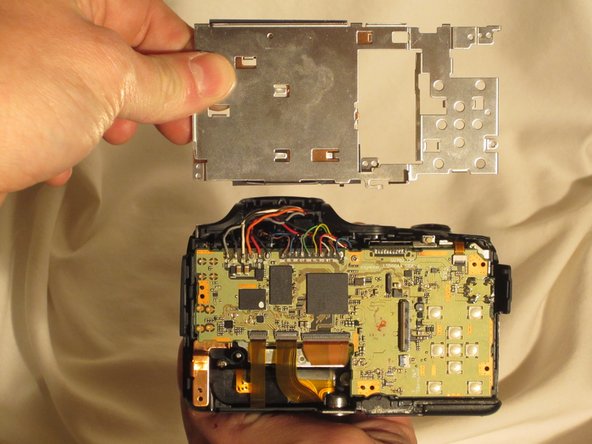
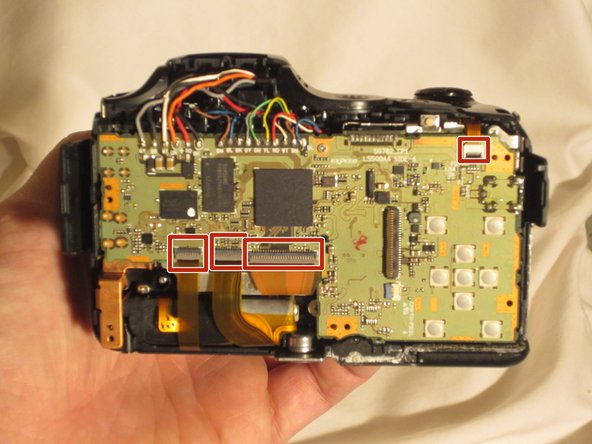
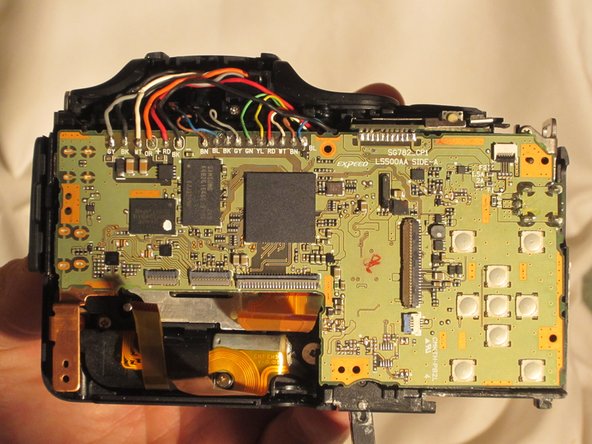
    • Use a Phillips #0 screwdriver to remove the screws on the front casing. There are ten screws, three on the left side, two on the bottom, and one on the right side of the camera.

  2. Nikon Coolpix L820 Device Ports Replacement: passo 2, imagem 1 %32 Nikon Coolpix L820 Device Ports Replacement: passo 2, imagem 2 %32
    • Remove the front top Phillips screw with the screwdriver.

    • Open the empty battery slot on the bottom of the camera, revealing four additional screws.

    • Unscrew the four Phillips screws with the screwdriver.

  3. Nikon Coolpix L820 Device Ports Replacement: passo 3, imagem 1 %32 Nikon Coolpix L820 Device Ports Replacement: passo 3, imagem 2 %32 Nikon Coolpix L820 Device Ports Replacement: passo 3, imagem 3 %32
    • Using the spudger, move around the casing, carefully separating the rear housing from the camera assembly.

    • Be sure to only apply pressure to the casing panels and not the sensitive internal electronics.

    • Once the rear housing is separated, the settings buttons will be accessible for replacement.

  4. Nikon Coolpix L820 Device Ports Replacement, LCD screen: passo 4, imagem 1 %32 Nikon Coolpix L820 Device Ports Replacement, LCD screen: passo 4, imagem 2 %32 Nikon Coolpix L820 Device Ports Replacement, LCD screen: passo 4, imagem 3 %32
    • Remove the front casing to expose the LCD screen and wires.

    • Do not damage the exposed wires.

  5. Nikon Coolpix L820 Device Ports Replacement: passo 5, imagem 1 %32 Nikon Coolpix L820 Device Ports Replacement: passo 5, imagem 2 %32 Nikon Coolpix L820 Device Ports Replacement: passo 5, imagem 3 %32
    • Using the tweezers, lift the hinges connecting the two ribbon wires to the camera.

  6. Nikon Coolpix L820 Device Ports Replacement: passo 6, imagem 1 %32 Nikon Coolpix L820 Device Ports Replacement: passo 6, imagem 2 %32
    • Once the flexible ribbon wires are disconnected, remove the LCD screen.

  7. Nikon Coolpix L820 Device Ports Replacement, Device Ports: passo 7, imagem 1 %32
    • Begin by removing these five screws

  8. Nikon Coolpix L820 Device Ports Replacement: passo 8, imagem 1 %32
    • From there, the panel covering the motherboard can be removed.

  9. Nikon Coolpix L820 Device Ports Replacement: passo 9, imagem 1 %32 Nikon Coolpix L820 Device Ports Replacement: passo 9, imagem 2 %32
    • Using the pointed end of the spudger, lift the hinges that secure these four flex circuits.

  10. Nikon Coolpix L820 Device Ports Replacement: passo 10, imagem 1 %32 Nikon Coolpix L820 Device Ports Replacement: passo 10, imagem 2 %32
    • Once the flex circuits are removed, the motherboard can be lifted and the device can be accessed for replacement.

Conclusão

To reassemble your device, follow these instructions in reverse order.

2 outras pessoas executaram este guia.

Marc

Membro desde: 03/23/15

430 Reputação

Autoria de 3 guias

Equipe

UMass Dartmouth, Team 1-4, Miles Spring 2015 Membro de UMass Dartmouth, Team 1-4, Miles Spring 2015

UMASSD-MILES-S15S1G4

Membros da 3

Autoria de 10 guias

Um comentário

Could you explain how the power button is changed? Thank you!!

minigalinda - Responder

Adicione um comentário

Exibir estatísticas:

Últimas 24 horas: 1

Últimos 7 dias: 5

Últimos 30 dias: 9

Duração total: 1,826