Ir para o conteúdo principal
Participe da comunidade de reparos - Criar conta

Nikon Coolpix L610 Control Panel Replacement

O que você precisa

    1. Nikon Coolpix L610 Control Panel Replacement, Plastic Cover: passo 1, imagem 1 %32 Nikon Coolpix L610 Control Panel Replacement, Plastic Cover: passo 1, imagem 2 %32
      • Remove the four (3.20 mm) Phillips #00 screws at the bottom of the device.

      Pergunte ao FixBot

      Comentar

    2. Nikon Coolpix L610 Control Panel Replacement: passo 2, imagem 1 %32
      • Remove the top (4.10 mm) Phillips #00 screw adjacent to the battery compartment.

      • Remove the bottom (3.20 mm) Phillips #00 screw adjacent to the battery compartment.

      Pergunte ao FixBot

      Comentar

    3. Nikon Coolpix L610 Control Panel Replacement: passo 3, imagem 1 %32
      • Remove the top (4.20 mm) Phillips #00 screw adjacent to the mic side of the camera and opposite the battery side.

      • Remove the lower (3.20 mm) Phillips #00 screw adjacent to the mic side of the camera and opposite of the battery side.

      Pergunte ao FixBot

      Comentar

    4. Nikon Coolpix L610 Control Panel Replacement: passo 4, imagem 1 %32 Nikon Coolpix L610 Control Panel Replacement: passo 4, imagem 2 %32 Nikon Coolpix L610 Control Panel Replacement: passo 4, imagem 3 %32
      • Separate the case using the plastic prying tool. This can be done by placing the tool in the position that is shown and in the position on the left side of the camera.

      Pergunte ao FixBot

      Comentar

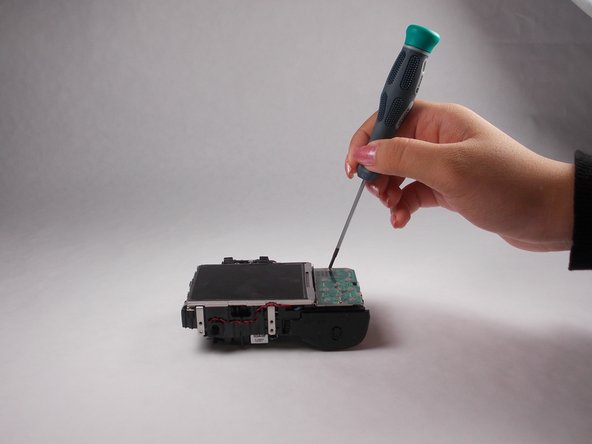
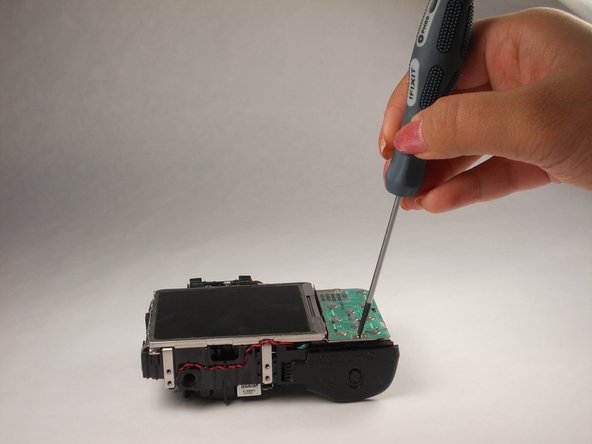
    1. Nikon Coolpix L610 Control Panel Replacement, Control Panel: passo 5, imagem 1 %32 Nikon Coolpix L610 Control Panel Replacement, Control Panel: passo 5, imagem 2 %32 Nikon Coolpix L610 Control Panel Replacement, Control Panel: passo 5, imagem 3 %32
      • Carefully unscrew and remove the top and bottom (2.25 mm) screws from the control panel.

      • Carefully unscrew and remove the middle (3.20 mm) screws from the control panel.

      Pergunte ao FixBot

      Comentar

    2. Nikon Coolpix L610 Control Panel Replacement: passo 6, imagem 1 %32
      • Carefully remove the ribbon connecting the control panel to the camera. The latch can be removed by sliding it down and pulling the ribbon down.

      Pergunte ao FixBot

      Comentar

Conclusão

To reassemble your device, follow these instructions in reverse order.

Cancelar: não concluí este guia.

Jeremy

Membro desde: 01/21/15

1.099 Reputação

Autoria de 5 guias

Equipe

USF Tampa, Team 9-4, Brown Winter 2015 Membro de USF Tampa, Team 9-4, Brown Winter 2015

USFT-BROWN-W15S9G4

4 Membros

Autoria de 66 guias

0Comentários do guia

Comentar

Visualizações:

Últimas 24 horas: 0

Últimos 7 dias: 3

Últimos 30 dias: 26

Ao todo: 939