Introdução
This guide shows how to remove the motherboard's plastic midframe from the inside of the phone to better access the phone's internal features.
O que você precisa
-
Ferramenta utilizada neste passo:SIM Card Eject Tool$2.99
-
Power off the phone, by long-pressing the power button and touching Power off.
-
Remove the SIM tray using the SIM Card Eject Tool.
-
-
Ferramenta utilizada neste passo:T5 Torx Screwdriver$5.49
-
Remove the two screws from the bottom of the phone with a T5 Torx Screwdriver.
-
-
-
-
Remove the two 1.8 mm Phillips screws holding down the battery connector.
-
Using a plastic opening tool, disconnect the battery cable from its socket on the motherboard.
-
-
Ferramenta utilizada neste passo:Plastic Cards$2.99
-
Remove the blue tape that secures the white antenna cable to the battery.
-
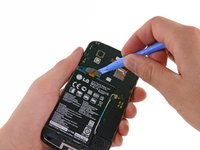
Using a spudger, carefully disconnect the white antenna cable.
-
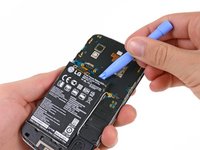
Carefully pry the battery out with a Plastic Opening Tool, starting at the top left-hand corner and working down towards the bottom right-hand corner.
-
-
-
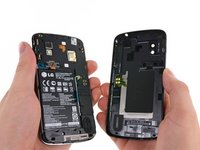
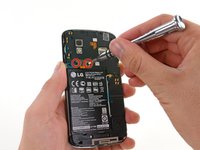
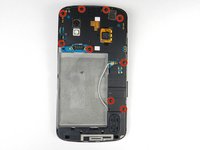
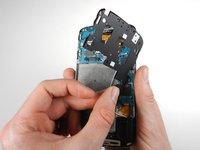
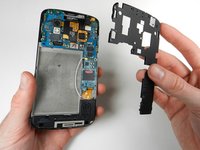
Remove the nine 4.6 mm Phillips #000 screws. Gently lift out the plastic cover.
-
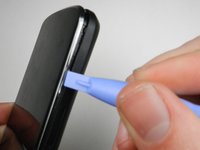
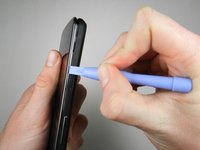
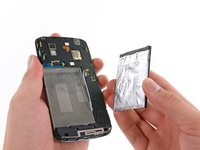
The midframe is held in with two clips, one at either side. Use a plastic spudger to release each side and gently lift up and away.
-


To reassemble your device, follow these instructions in reverse order.
To reassemble your device, follow these instructions in reverse order.
Cancelar: não concluí este guia.
7 outras pessoas executaram este guia.
Equipe

Cal Poly, Team 3-32, Amido Winter 2013 Membro de Cal Poly, Team 3-32, Amido Winter 2013
CPSU-AMIDO-W13S3G32
Membros da 4
Autoria de 8 guias