Introdução
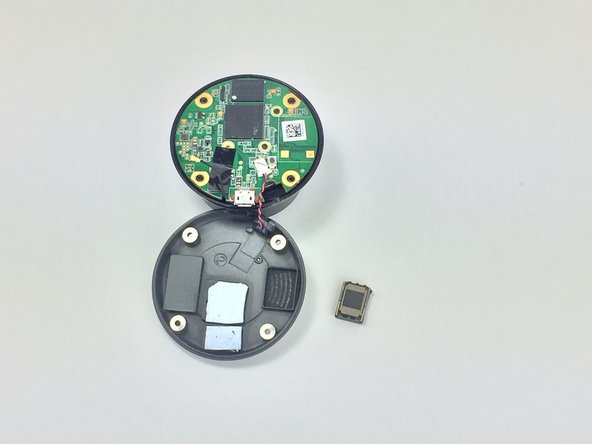
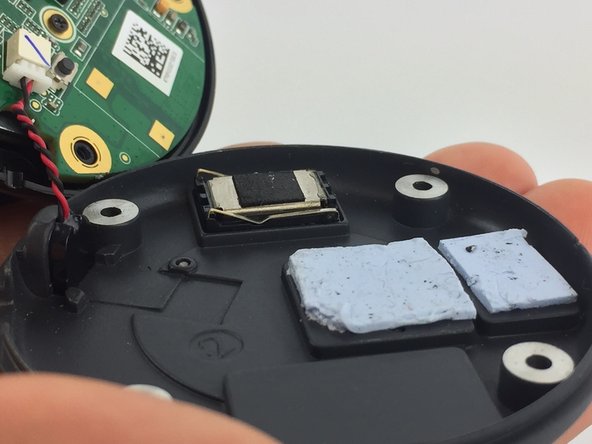
The Nest Cam's speaker is responsible for producing sound and is an important part of the system, if your Nest Cam's audio is muffled or completely absent, the speaker may need to be replaced. This guide will help walk you through the steps of replacing a faulty speaker.
O que você precisa
-
-
Remove the four 6 mm screws from the back panel with the J000 Phillips head screwdriver.
-
-


To reassemble your device, follow these instructions in reverse order.
To reassemble your device, follow these instructions in reverse order.
Cancelar: não concluí este guia.
Uma outra pessoa concluiu este guia.

Equipe

USF Tampa, Team 1-1, Leahy Spring 2016 Membro de USF Tampa, Team 1-1, Leahy Spring 2016
USFT-LEAHY-S16S1G1
Membros da 7
Autoria de 10 guias
4 comentários
where can I buy the new replacement speaker part?
I’m curious as well if anyone has found where to obtain replacement/repair parts. Should be simple enough if we can determine the part number of the speaker.. suppose I’ll tear one down real quick to see.
Looking at the speaker without thermal coverings looks like it just has some sound information. “8 ohm 0.5 w”. Next line, “1742 (space) 1”. Third line, “+ S -”.
Looks like electrical info of the speaker. I’ll keep looking!