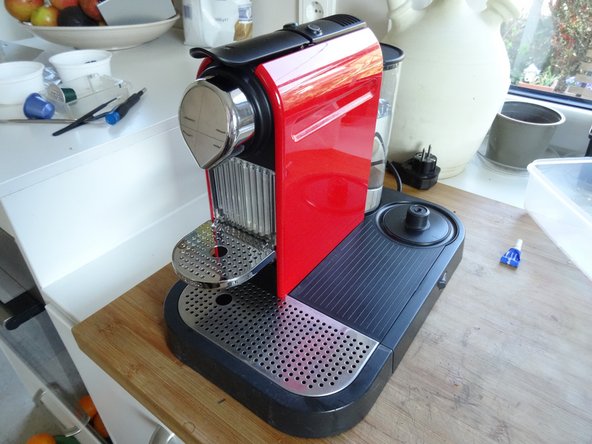
Ir para o conteúdo principal

Nespresso CitiZ Brewing Unit replace

O que você precisa

  1. Nespresso CitiZ Brewing Unit replace, Dismantle Nespresso CitiZ: passo 1, imagem 1 %32
    • Never forget: pull the plug!

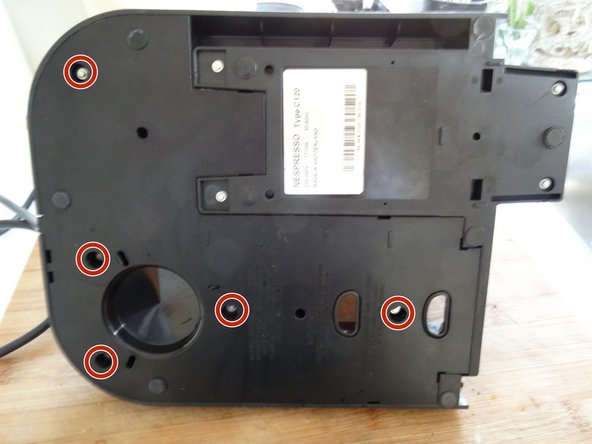
    • Remove all attachments: Water tank, capsule and cup drawer, drip tray.

    • The model shown is also equipped with a milk frother, remove that too.

  2. Nespresso CitiZ Brewing Unit replace: passo 2, imagem 1 %32 Nespresso CitiZ Brewing Unit replace: passo 2, imagem 2 %32
    Ferramenta utilizada nesse passo:
    iFixit Precision 4 mm Screwdriver Bit
    $2.99
    Comprar
    • The bottom is secured by oval head screws.

    • These screws have an oval head that makes them look like rivets (picture 2). You need to use a special bit - also available at iFixit - for their removal. Here a DIY guide. If the right bit is not available, it could be done with a pair of needle nose pliers. Nespresso wants to keep us out of our own machines!!!

    • Remove five oval head screws securing the large bottom panel.

    • Note: this panel is smaller on models without milk frother.

  3. Nespresso CitiZ Brewing Unit replace: passo 3, imagem 1 %32 Nespresso CitiZ Brewing Unit replace: passo 3, imagem 2 %32 Nespresso CitiZ Brewing Unit replace: passo 3, imagem 3 %32
    • The bottom panel is just snapped into place. Insert a metal spudger into the slots and lift the panel out. It sits quite tightly and you might use some force to get it out.

  4. Nespresso CitiZ Brewing Unit replace: passo 4, imagem 1 %32
    • Remove the large bottom panel.

  5. Nespresso CitiZ Brewing Unit replace: passo 5, imagem 1 %32
    • Use a spudger to slide off the two silicon tubes.

  6. Nespresso CitiZ Brewing Unit replace: passo 6, imagem 1 %32 Nespresso CitiZ Brewing Unit replace: passo 6, imagem 2 %32
    • Disconnect the two spade plugs on the blue and brown wires from the power switch. The two left ones remain.

  7. Nespresso CitiZ Brewing Unit replace: passo 7, imagem 1 %32
    • Remove four oval head screws from the small bottom panel.

    • Remove the main device from the base. It´s still connected with some wires, but this doesn´t bother much.

  8. Nespresso CitiZ Brewing Unit replace: passo 8, imagem 1 %32 Nespresso CitiZ Brewing Unit replace: passo 8, imagem 2 %32 Nespresso CitiZ Brewing Unit replace: passo 8, imagem 3 %32
    • The two colored side panels are only snapped into place. However, the latches sit very tight. You really need a lot of force. First lift the lower edge using a plastic opening tool.

    • Depending from the model it might help, when you first pry off the coffee spout. (See next step)

    • Unfold each of the side panels upwards and remove them.

  9. Nespresso CitiZ Brewing Unit replace: passo 9, imagem 1 %32
    • Insert a opening tool in the gap on the bottom of the coffee spout. Pry it off carefully.

  10. Nespresso CitiZ Brewing Unit replace, Brewing unit: passo 10, imagem 1 %32
    • Get the wires out of their holder.

  11. Nespresso CitiZ Brewing Unit replace: passo 11, imagem 1 %32 Nespresso CitiZ Brewing Unit replace: passo 11, imagem 2 %32
    • The plastic cover over the brewing unit is secured by two clips on each side. Use a metal spudger to pry them off.

    • Lift the cover slightly, but don't remove it, it is still connected by some cables.

  12. Nespresso CitiZ Brewing Unit replace: passo 12, imagem 1 %32
    • Open the lever and lift the cover out over the lever. Make sure that the cables are not strained too much.

    • Put the cover aside, but leave the cables connected.

  13. Nespresso CitiZ Brewing Unit replace: passo 13, imagem 1 %32
    • Use a metal spudger and insert it into the seam between the inner coffee spout and the brewing unit. Pry off the coffee spout.

    • Remove the inner coffee spout.

  14. Nespresso CitiZ Brewing Unit replace: passo 14, imagem 1 %32 Nespresso CitiZ Brewing Unit replace: passo 14, imagem 2 %32
    • Use a Torx T10 screwdriver to remove the four screws securing the brewing unit.

  15. Nespresso CitiZ Brewing Unit replace: passo 15, imagem 1 %32 Nespresso CitiZ Brewing Unit replace: passo 15, imagem 2 %32 Nespresso CitiZ Brewing Unit replace: passo 15, imagem 3 %32
    • The brewing unit now remains only attached to the hot water hose. Use the metal spudger to pull out the metal clip at the end of the hose.

    • Pull out the end of the hot water hose.

  16. Nespresso CitiZ Brewing Unit replace: passo 16, imagem 1 %32
    • Lift the brewing unit from the device.

Conclusão

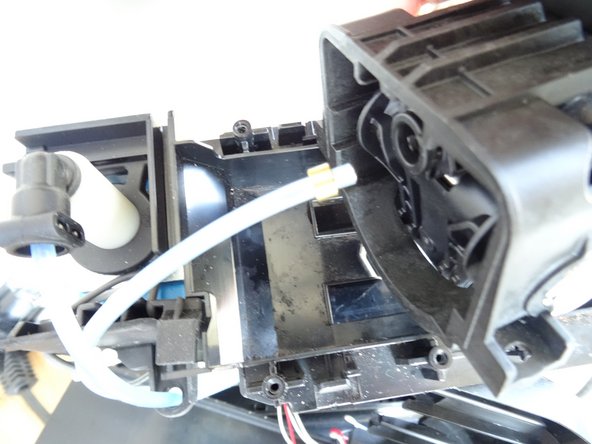
To reassemble your device, follow these instructions in reverse order.

6 outras pessoas executaram este guia.

Um agradecimento especial a esses tradutores:

de en

100%

VauWeh está nos ajudando a consertar o mundo! Quer contribuir?
Comece a traduzir ›

VauWeh

Membro desde: 10/19/15

201.568 Reputação

Autoria de 246 guias

Equipe

Repair is War on Entropy Membro de Repair is War on Entropy

Community

Membros da 24

Autoria de 1.097 guias

4 comentários

Hallo schönen guten Tag ich habe Problem mit meine Gran Maestria Espressomaschine... habe einen neuen Brühkopf eingebaut wie komme ich an den Wasserschlauch in der Maschine..mfg

klausi.lindner - Responder

Hallo ich habe Problem mit meinen Nespresso-Maschine gran Maestria.. habe den Brühkopf neu ausgetauscht wie komme ich an den Wasserschlauch dran

klausi.lindner - Responder

Brilliant! A very helpful guide and essential to have the ifixit special tools. Two points - the inner coffee spout is easier to remove once the brewing unit has been unscrewed (Steps 13 + 14). Also, suggect the the inner coffee spout is cleaned before replacing as it can often be partially blocked which can lead to leaks.

It can often be difficult finding the correct brewing unit (my machine was a KRUPS) - obviously the manufacturers try to make it difficult for you!

Richard B - Responder

Ich habe die Schritte 13 und 14 getauscht, vielen Dank für diesen Hinweis.

I have swapped steps 13 and 14, thank you very much for this tip.

VauWeh - Responder

Adicione um comentário

Exibir estatísticas:

Últimas 24 horas: 6

Últimos 7 dias: 48

Últimos 30 dias: 272

Duração total: 7,769