Esta versão pode conter edições incorretas. Mude para o último instantâneo verificado.
O que você precisa
-
Este passo não foi traduzido. Ajude a traduzi-lo
-
Remove the two 9.0 mm Phillips screws securing the battery compartment.
-
Slide the battery compartment out.
-
-
Este passo não foi traduzido. Ajude a traduzi-lo
-
Remove the five 9.0 mm Phillips screws securing the trigger.
-
-
Este passo não foi traduzido. Ajude a traduzi-lo
-
Remove the single 11.0 mm Phillips screw securing the magazine cartridge chambers.
-
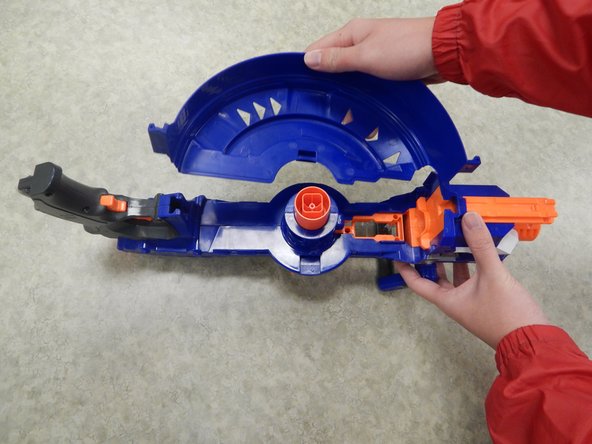
Pull the entire chamber upwards to separate it from the rest of the Nerf Gun.
-
-
Este passo não foi traduzido. Ajude a traduzi-lo
-
Remove both halves of the ring by tugging on it upwards until the lock gets freed.
-
-
-
Este passo não foi traduzido. Ajude a traduzi-lo
-
Remove the four 9.0 mm Phillips screws from the newly revealed cylinder.
-
-
Este passo não foi traduzido. Ajude a traduzi-lo
-
Remove the three 9.0 mm Phillips screws holding the top latch of the Nerf Gun together.
-
-
Este passo não foi traduzido. Ajude a traduzi-lo
-
Remove the three 9.0 mm Phillips screws holding together the firing chamber.
-
Remove the single 7.0 mm Phillips screw below the barrel.
-
Remove the two 14.0 mm Philips screws using a screwdriver with a length of approximately 4.0 inches and a diameter of approximately 0.2 cm.
-
-
Este passo não foi traduzido. Ajude a traduzi-lo
-
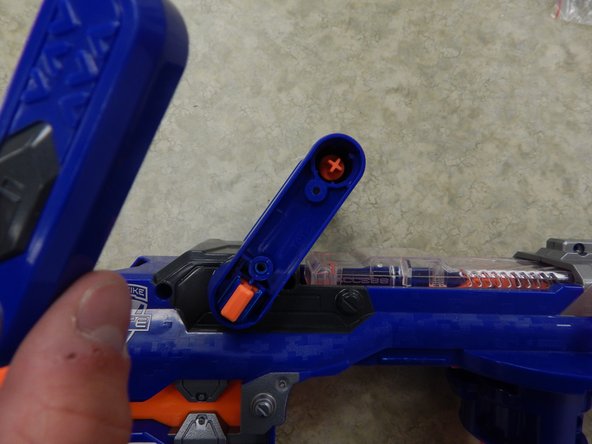
Remove the single 14.0 mm Phillips screw holding together the handle and the Nerf Gun.
-
-
Este passo não foi traduzido. Ajude a traduzi-lo
-
Remove the two 9.0 mm Phillips screws holding together the handle.
-
Remove the plastic cover of the handle.
-
-
Este passo não foi traduzido. Ajude a traduzi-lo
-
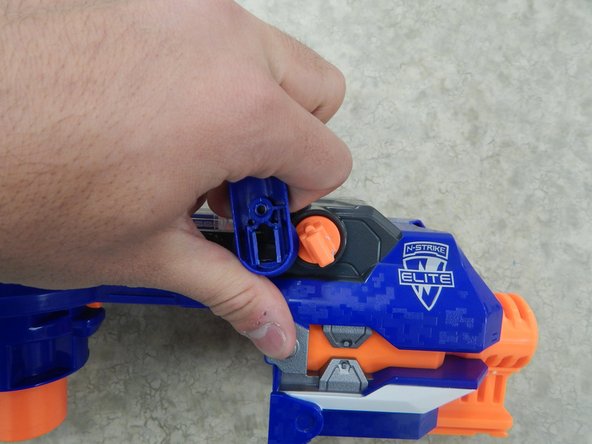
Insert one plastic opening tool inside one side of the orange part depicted in the picture.
-
Insert a second plastic opening tool to the other side of the orange part and gradually pull the piece out, freeing it from the handle.
-
-
Este passo não foi traduzido. Ajude a traduzi-lo
-
Pull one end of the handle away from the orange latch.
-
Repeat the procedure on the other side to completely remove the handle from the rest of the Nerf Gun.
-
-
Este passo não foi traduzido. Ajude a traduzi-lo
-
Completely remove the left shell from the rest of the Nerf Gun.
-


Cancelar: não concluí este guia.
Uma outra pessoa concluiu este guia.
Equipe

Cal Poly, Team 13-13, Regan Winter 2014 Membro de Cal Poly, Team 13-13, Regan Winter 2014
CPSU-REGAN-W14S13G13
Membros da 4
Autoria de 7 guias