Ir para o conteúdo principal

Neato Botvac D8000 Top Face Panel Replacement

O que você precisa

  1. Neato Botvac D8000 Top Face Panel Replacement, Top Face Panel: passo 1, imagem 1 %32
    • Grab the rear bumper with both hands on either side.

  2. Neato Botvac D8000 Top Face Panel Replacement: passo 2, imagem 1 %32 Neato Botvac D8000 Top Face Panel Replacement: passo 2, imagem 2 %32
    • Firmly pull the bumper forward at a steady pace.

    • When pulling the bumper forward avoid being too rough because the bumper might break.

  3. Neato Botvac D8000 Top Face Panel Replacement: passo 3, imagem 1 %32 Neato Botvac D8000 Top Face Panel Replacement: passo 3, imagem 2 %32
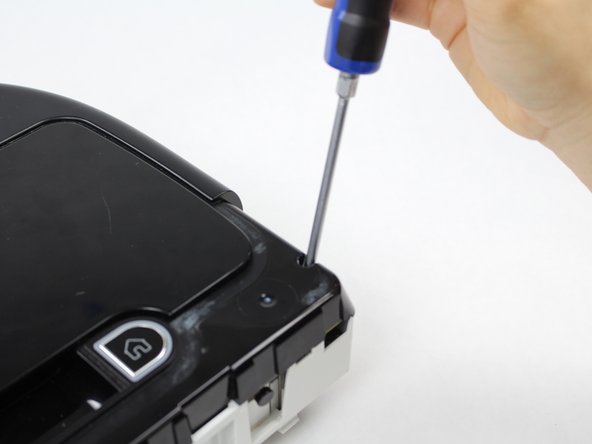
    • Looking from above, remove the two 11mm screws with a Torx T10 screwdriver.

  4. Neato Botvac D8000 Top Face Panel Replacement: passo 4, imagem 1 %32 Neato Botvac D8000 Top Face Panel Replacement: passo 4, imagem 2 %32 Neato Botvac D8000 Top Face Panel Replacement: passo 4, imagem 3 %32
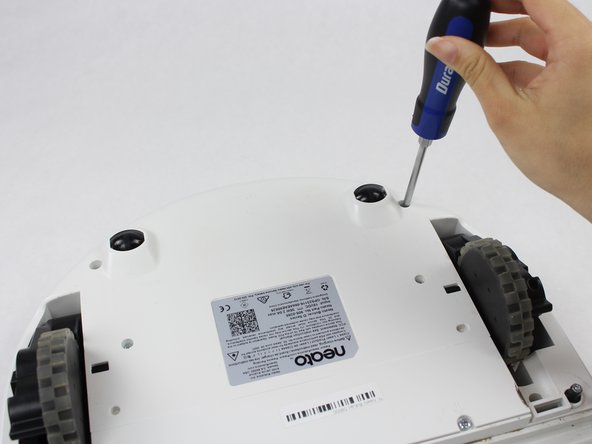
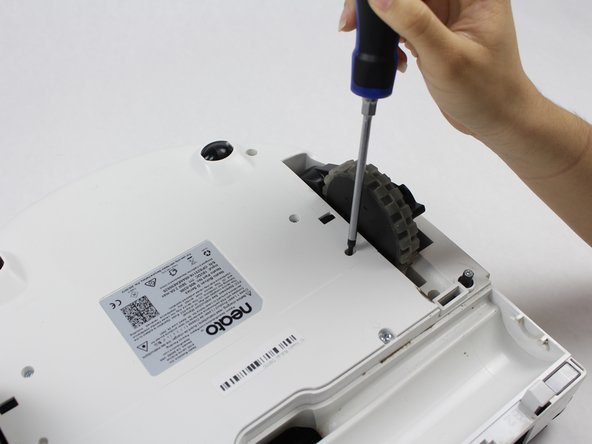
    • Place the robot on its back and remove the six 11mm screws using a Torx T10 screwdriver.

  5. Neato Botvac D8000 Top Face Panel Replacement: passo 5, imagem 1 %32 Neato Botvac D8000 Top Face Panel Replacement: passo 5, imagem 2 %32 Neato Botvac D8000 Top Face Panel Replacement: passo 5, imagem 3 %32
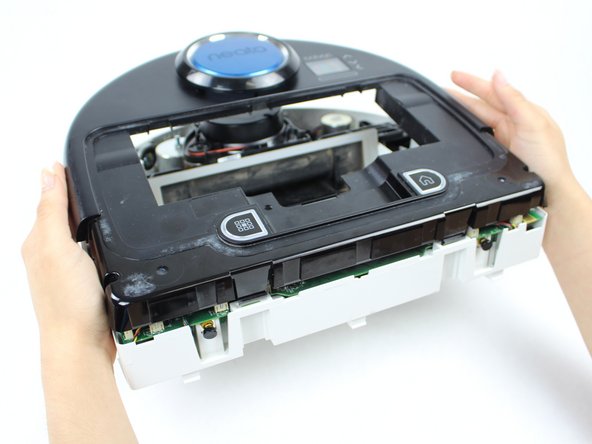
    • Push the clips, located in the back side, inward.

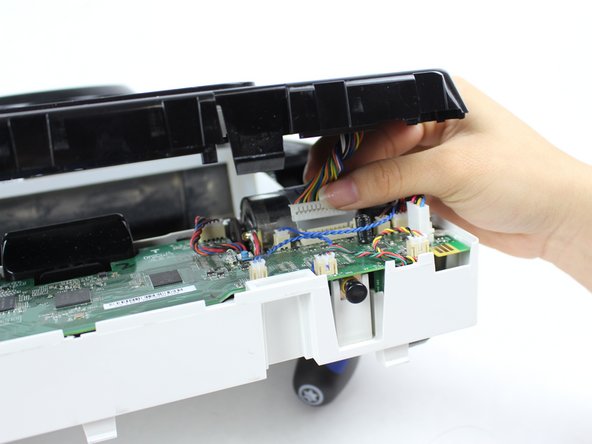
    • Gently lift up the top cover until you can see the wires. Then gently un-clip all the wires.

    • When you lift the top cover be careful because the wires are thin and fragile.

  6. Neato Botvac D8000 Top Face Panel Replacement: passo 6, imagem 1 %32
    • Once you have carefully removed the wire clip; you can fully remove the top cover.

Conclusão

To reassemble your device, follow these instructions in reverse order.

2 outras pessoas executaram este guia.

Ruth Lopez

Membro desde: 03/22/18

280 Reputação

Autoria de 2 guias

Equipe

0 comentários

Adicione um comentário

Exibir estatísticas:

Últimas 24 horas: 0

Últimos 7 dias: 1

Últimos 30 dias: 4

Duração total: 914