Ir para o conteúdo principal
NETGEAR WGT624 v3 Antenna Replacement

NETGEAR WGT624 v3 Antenna Replacement

Jonathon Sather

Jonathon Sather e 5 outros colaboradores

Última atualização em May 7, 2024

15 minutos
Moderado
Guia do aluno destaque

Introdução

Ir para o passo 1

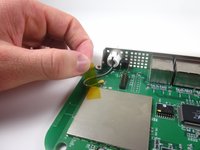
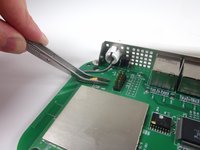
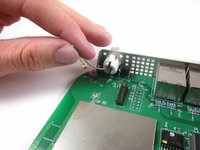
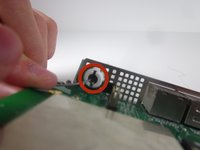
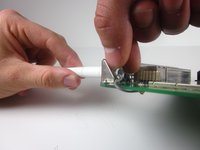
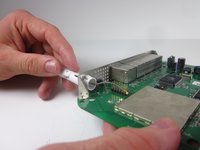
Removing the antenna will allow you access to other parts of the device or it can replace the antenna if it is not working properly.
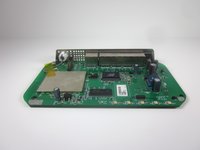
O que você precisa

Peças

Ferramentas

Exibir mais…

  1. NETGEAR WGT624 v3 Antenna Replacement, Lower Case: passo 1, imagem 1 %32
    • Turn the device so that the bottom is facing up.

  2. NETGEAR WGT624 v3 Antenna Replacement: passo 2, imagem 1 %32 NETGEAR WGT624 v3 Antenna Replacement: passo 2, imagem 2 %32 NETGEAR WGT624 v3 Antenna Replacement: passo 2, imagem 3 %32
    • Use the plastic opening tool to carefully lift the rubber stops in each corner.

    • Do not completely remove the rubber stops, because they are difficult to replace.

  3. NETGEAR WGT624 v3 Antenna Replacement: passo 3, imagem 1 %32 NETGEAR WGT624 v3 Antenna Replacement: passo 3, imagem 2 %32
    • Unscrew the 4 11.8 mm T-8 Torx screws from each corner of the device.

  4. NETGEAR WGT624 v3 Antenna Replacement: passo 4, imagem 1 %32 NETGEAR WGT624 v3 Antenna Replacement: passo 4, imagem 2 %32
    • Lift the lower case straight up from the rest of the router.

  5. NETGEAR WGT624 v3 Antenna Replacement, Motherboard: passo 5, imagem 1 %32 NETGEAR WGT624 v3 Antenna Replacement, Motherboard: passo 5, imagem 2 %32
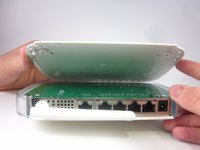
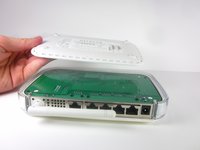
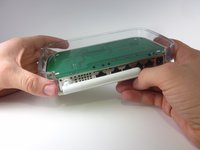
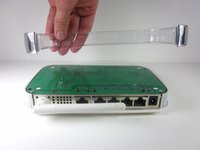
    • Remove the clear plastic casing by lifting it straight up from the router.

  6. NETGEAR WGT624 v3 Antenna Replacement: passo 6, imagem 1 %32 NETGEAR WGT624 v3 Antenna Replacement: passo 6, imagem 2 %32
    • Separate the motherboard from the top shell by lifting it straight up from the router.

  7. NETGEAR WGT624 v3 Antenna Replacement, Antenna: passo 7, imagem 1 %32
    • Turn the motherboard, so that the top is facing upwards.

    • Place the motherboard on a clean flat surface.

  8. NETGEAR WGT624 v3 Antenna Replacement: passo 8, imagem 1 %32 NETGEAR WGT624 v3 Antenna Replacement: passo 8, imagem 2 %32
    • Remove the yellow tape that holds the wire.

    • Make sure that you set the tape aside on a clean surface, so that it can be reused.

  9. NETGEAR WGT624 v3 Antenna Replacement: passo 9, imagem 1 %32 NETGEAR WGT624 v3 Antenna Replacement: passo 9, imagem 2 %32 NETGEAR WGT624 v3 Antenna Replacement: passo 9, imagem 3 %32
    Ferramenta utilizada neste passo:
    Tweezers
    $4.99
    • Use tweezers to gently pull the metal bracket that connects the antenna to the motherboard.

    • The wire should now be completely separate from the motherboard.

  10. NETGEAR WGT624 v3 Antenna Replacement: passo 10, imagem 1 %32
    • Extend the antenna away from the device, so that it becomes straight.

  11. NETGEAR WGT624 v3 Antenna Replacement: passo 11, imagem 1 %32 NETGEAR WGT624 v3 Antenna Replacement: passo 11, imagem 2 %32 NETGEAR WGT624 v3 Antenna Replacement: passo 11, imagem 3 %32
    • Find the clips that hold the antenna onto the router.

    • Use one hand to push the clips in, while using your other hand to pull out the antenna. You may need to gently twist the antenna so it can separate from the hole.

    • The antenna may take considerable force to remove.

  12. NETGEAR WGT624 v3 Antenna Replacement: passo 12, imagem 1 %32
    • Completely separate the antenna and wire from the rest of the device.

Conclusão

To reassemble your device, follow these instructions in reverse order.

Jonathon Sather

Membro desde: 01/23/13

45 Reputação

Autoria de 3 guias

Equipe

Cal Poly, Team 3-31, Amido Winter 2013 Membro de Cal Poly, Team 3-31, Amido Winter 2013

CPSU-AMIDO-W13S3G31

3 Membros

Autoria de 12 guias

0Comentários do guia

Comentar

Visualizações:

Últimas 24 horas: 2

Últimos 7 dias: 7

Últimos 30 dias: 10

Ao todo: 4,452