Esta versão pode conter edições incorretas. Mude para o último instantâneo verificado.
O que você precisa
-
Este passo não foi traduzido. Ajude a traduzi-lo
-
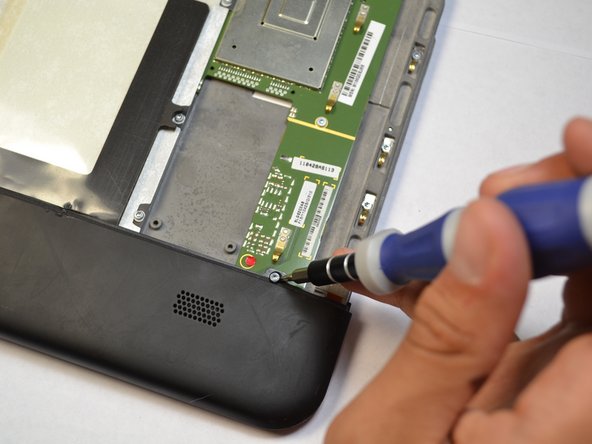
There are two 6.6 mm screws that hold ports into place as well as the back panel. Remove these with a T5 Torx screwdriver.
-
-
Este passo não foi traduzido. Ajude a traduzi-lo
-
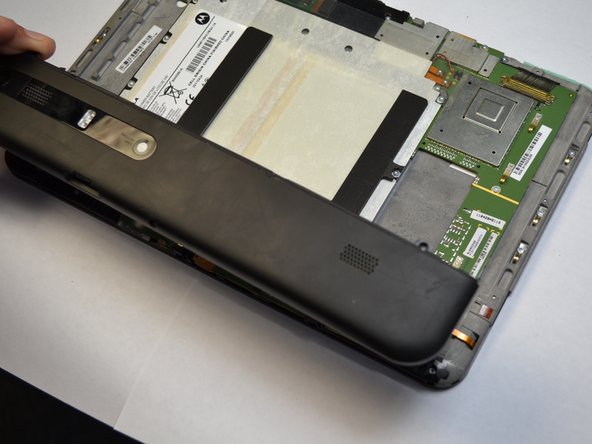
Apply light pressure with hand and slide the back plate till it stops in this position.
-
There is a flex clip on both sides that need to be pushed down in order for the plate to slide off completely. Use a plastic opening tool to release the flex clips. They are located under the back cover near the sides.
-
As soon as the clips are released the back should slide off.
-
-
-
Este passo não foi traduzido. Ajude a traduzi-lo
-
Remove last two 4.2 mm screws from the remaining back piece with a T5 Torx screwdriver.
-
Once both screws are taken out, lift the rest of the backing out of the way.
-
-
Este passo não foi traduzido. Ajude a traduzi-lo
-
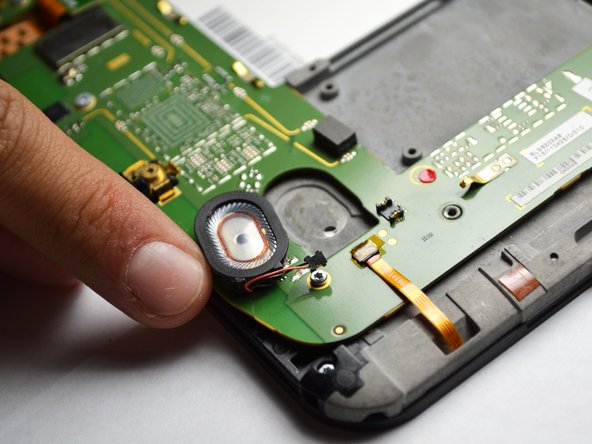
Use a plastic opening tool to pop out the speaker. Make sure to carefully pull off the wire as well.
-
Replace speaker if necessary.
-


Equipe

Cal Poly, Team 3-39, Maness Spring 2014 Membro de Cal Poly, Team 3-39, Maness Spring 2014
CPSU-MANESS-S14S3G39
Membros da 4
Autoria de 16 guias