Ir para o conteúdo principal

Motorola Photon 4G MB855 Motherboard Replacement

O que você precisa

  1. Motorola Photon 4G MB855 Motherboard Replacement, Removing the Back Cover: passo 1, imagem 1 %32 Motorola Photon 4G MB855 Motherboard Replacement, Removing the Back Cover: passo 1, imagem 2 %32
    • Insert a plastic opening tool into the indentation at the bottom of the phone between the front and rear covers.

    • Lift the back cover from the bottom and remove it from the phone.

  2. Motorola Photon 4G MB855 Motherboard Replacement, Removing the Battery: passo 2, imagem 1 %32 Motorola Photon 4G MB855 Motherboard Replacement, Removing the Battery: passo 2, imagem 2 %32
    • Insert a plastic opening tool, or your finger, into the notch in between the sim card and the battery and lift the battery upward.

    • Remove the battery from your phone.

  3. Motorola Photon 4G MB855 Motherboard Replacement, Removing Screw Covers: passo 3, imagem 1 %32 Motorola Photon 4G MB855 Motherboard Replacement, Removing Screw Covers: passo 3, imagem 2 %32 Motorola Photon 4G MB855 Motherboard Replacement, Removing Screw Covers: passo 3, imagem 3 %32
    • Remove all five screw covers with tweezers located in the picture.

  4. Motorola Photon 4G MB855 Motherboard Replacement, Removing the Midframe: passo 4, imagem 1 %32 Motorola Photon 4G MB855 Motherboard Replacement, Removing the Midframe: passo 4, imagem 2 %32 Motorola Photon 4G MB855 Motherboard Replacement, Removing the Midframe: passo 4, imagem 3 %32
    • Remove the 10 T4 Torx screws securing the midframe to the display assembly.

    • Gently pry the midframe from the display assembly and remove it.

  5. Motorola Photon 4G MB855 Motherboard Replacement, Unclipping Display Data Cable: passo 5, imagem 1 %32 Motorola Photon 4G MB855 Motherboard Replacement, Unclipping Display Data Cable: passo 5, imagem 2 %32 Motorola Photon 4G MB855 Motherboard Replacement, Unclipping Display Data Cable: passo 5, imagem 3 %32
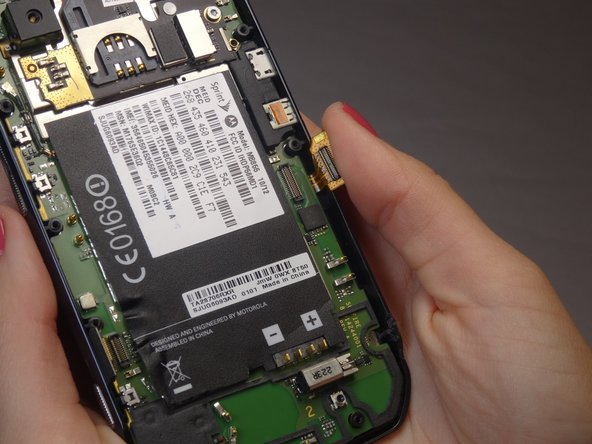
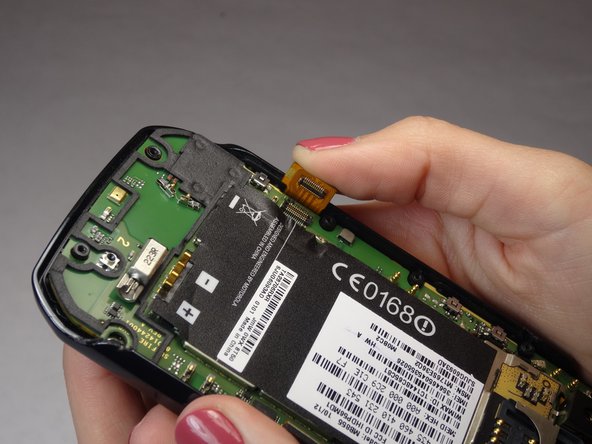
    • Locate the Display Data Cables

    • Use hands or plastic opening tool to carefully pry off the connectors.

  6. Motorola Photon 4G MB855 Motherboard Replacement, Removing Motherboard: passo 6, imagem 1 %32 Motorola Photon 4G MB855 Motherboard Replacement, Removing Motherboard: passo 6, imagem 2 %32 Motorola Photon 4G MB855 Motherboard Replacement, Removing Motherboard: passo 6, imagem 3 %32
    • Be careful when removing the motherboard. The earpiece is connected with small wires and adhesive. Use a thin tool to pry it off before removing the motherboard.

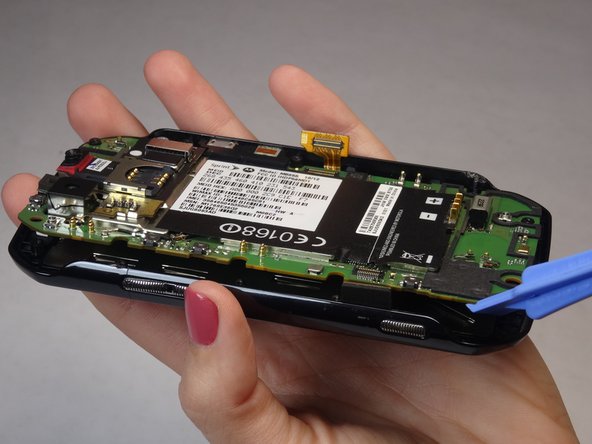
    • Use a plastic opening tool to gently pry off each section of the Motherboard.

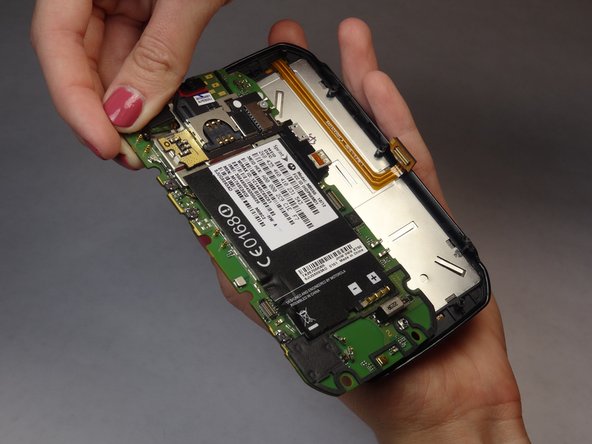
    • Slowly and carefully remove the motherboard from the front panel assembly.

Conclusão

To reassemble your device, follow these instructions in reverse order.

4 outras pessoas executaram este guia.

Eddie Krause

Membro desde: 10/07/14

260 Reputação

Autoria de 3 guias

Equipe

USF Tampa, Team 8-6, Leahy Fall 2014 Membro de USF Tampa, Team 8-6, Leahy Fall 2014

USFT-LEAHY-F14S8G6

Membros da 3

Autoria de 10 guias

0 comentários

Adicione um comentário

Exibir estatísticas:

Últimas 24 horas: 0

Últimos 7 dias: 0

Últimos 30 dias: 5

Duração total: 1,362