Ir para o conteúdo principal

Motorola Moto Q Front Casing Replacement

O que você precisa

  1. Motorola Moto Q Front Casing Replacement, Back Casing: passo 1, imagem 1 %32
    • Use the Push Pin to remove the rubber screw covers by pushing the needle into the rubber and pulling up.

    • Be careful not to poke yourself when handling the push pin because it is very sharp.

  2. Motorola Moto Q Front Casing Replacement: passo 2, imagem 1 %32
    • Use the T6 screwdriver to remove the four screws holding the casing together.

    • Note: they are in the same place where you removed the four rubber coverings

  3. Motorola Moto Q Front Casing Replacement: passo 3, imagem 1 %32 Motorola Moto Q Front Casing Replacement: passo 3, imagem 2 %32
    • Wedge the plastic opening tool in between the top and bottom cases. This may require a little or a lot of force so be careful.

    • Note: the phone should be face up and the plastic opening tool should be face downwards

    • Once you get the plastic opening tool in, slide it across the side of the phone, making sure to keep the plastic opening tool wedged in between the two casings.

    • Repeat the 3 steps above for the top, bottom, and opposite side.

  4. Motorola Moto Q Front Casing Replacement: passo 4, imagem 1 %32 Motorola Moto Q Front Casing Replacement: passo 4, imagem 2 %32
    • Gently lift and remove the back casing.

  5. Motorola Moto Q Front Casing Replacement, Camera: passo 5, imagem 1 %32 Motorola Moto Q Front Casing Replacement, Camera: passo 5, imagem 2 %32
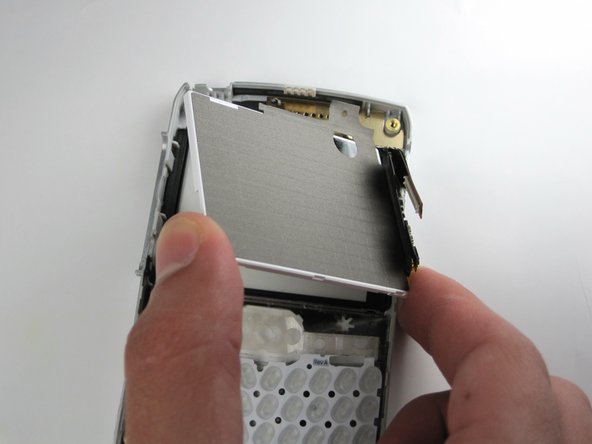
    • Remove the plastic inner cover by placing the spudger under the left-most side and pry to the left and upwards.

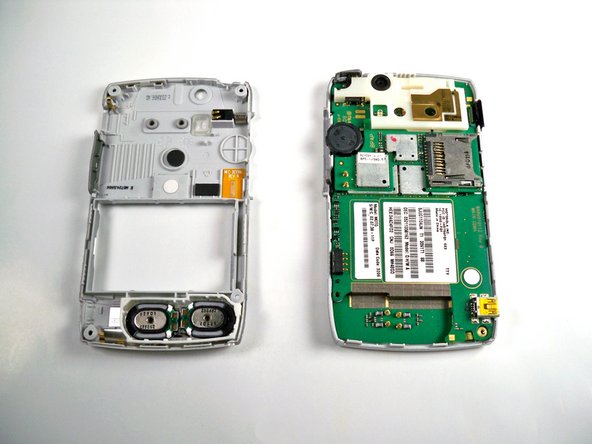
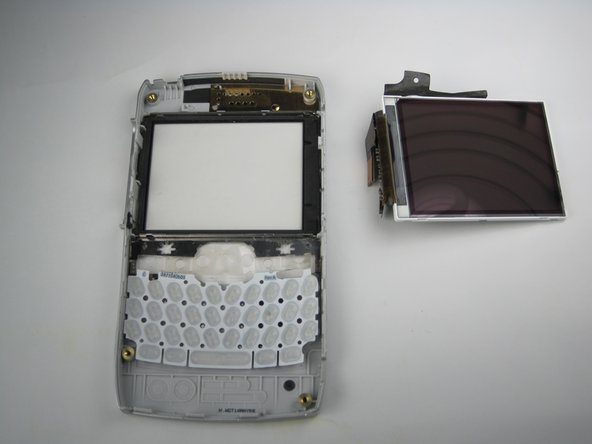
    • Gently rotate/wiggle the cover until you can pull it off the phone.

  6. Motorola Moto Q Front Casing Replacement: passo 6, imagem 1 %32 Motorola Moto Q Front Casing Replacement: passo 6, imagem 2 %32
    • Using your fingers, remove the plastic piece that holds the camera in place.

  7. Motorola Moto Q Front Casing Replacement: passo 7, imagem 1 %32 Motorola Moto Q Front Casing Replacement: passo 7, imagem 2 %32
    • Carefully pry up the upper circuit board with the spudger.

    • The second picture shows what your phone should look like when the upper circuit board is removed.

  8. Motorola Moto Q Front Casing Replacement: passo 8, imagem 1 %32 Motorola Moto Q Front Casing Replacement: passo 8, imagem 2 %32
    • Take out the camera and attached chip with the iPod removal tool. Carefully pry the chip off its connection and the camera will come out too.

  9. Motorola Moto Q Front Casing Replacement, LCD Display: passo 9, imagem 1 %32 Motorola Moto Q Front Casing Replacement, LCD Display: passo 9, imagem 2 %32
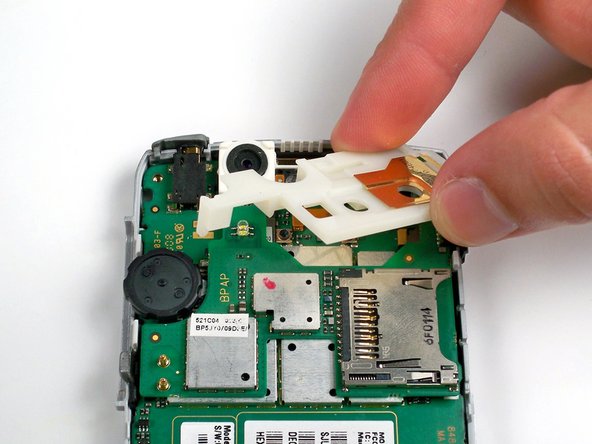
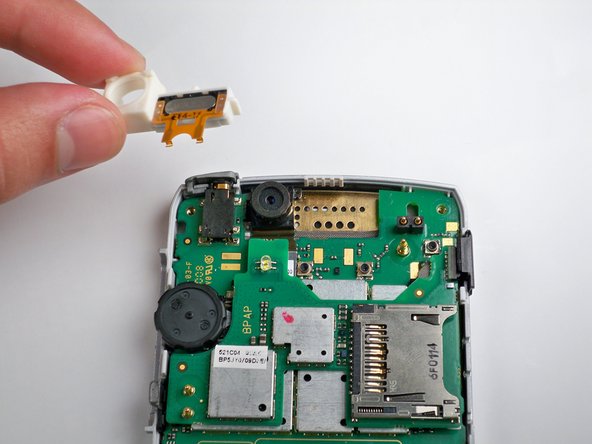
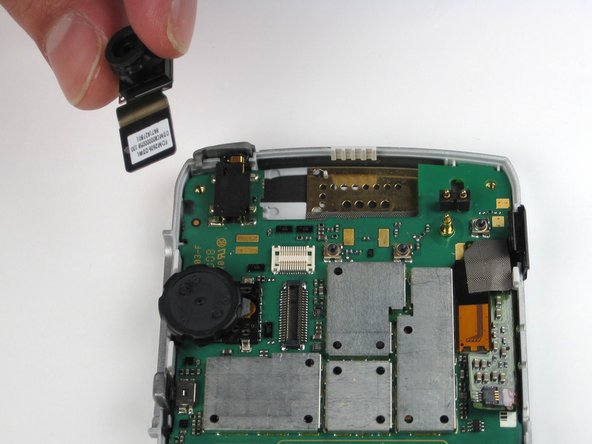
    • Remove the infra red plastic covering,the button on the left side of the phone, and the earphone cover lid by pulling straight up on them with your fingers.

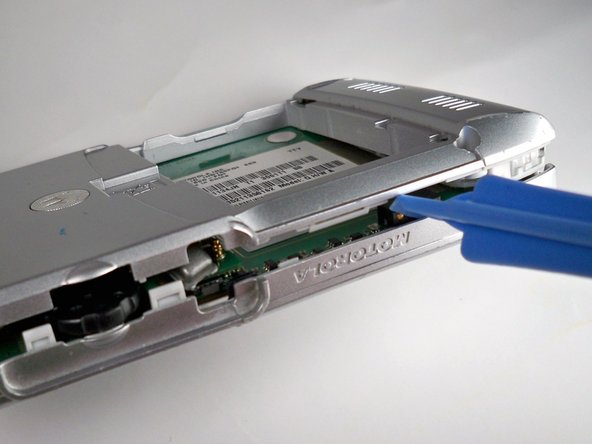
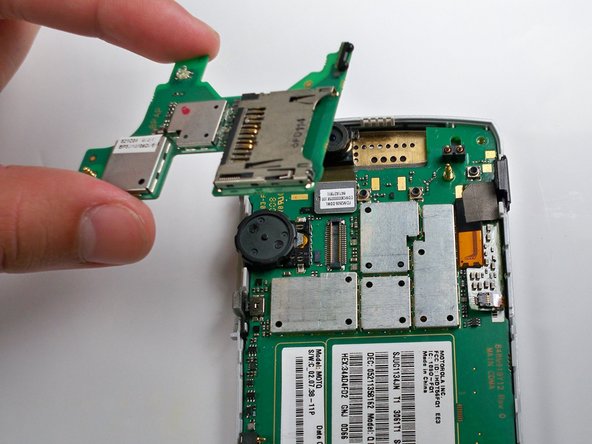
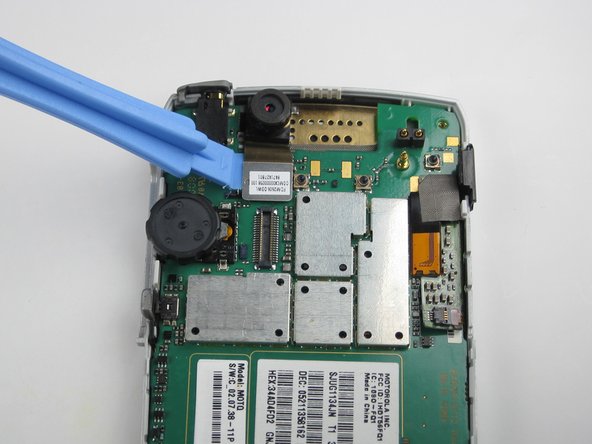
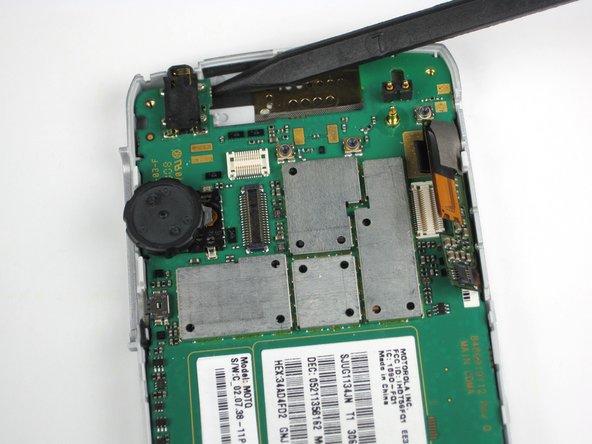
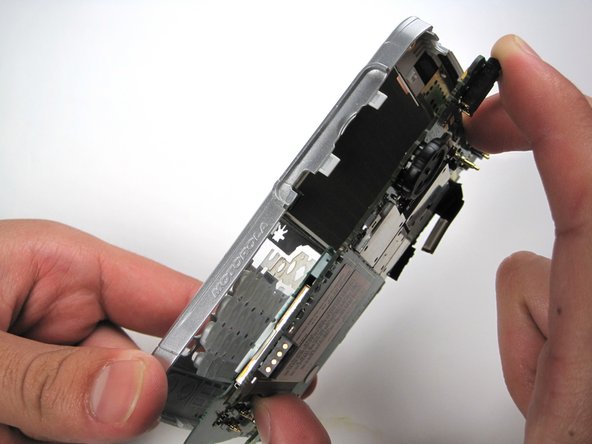
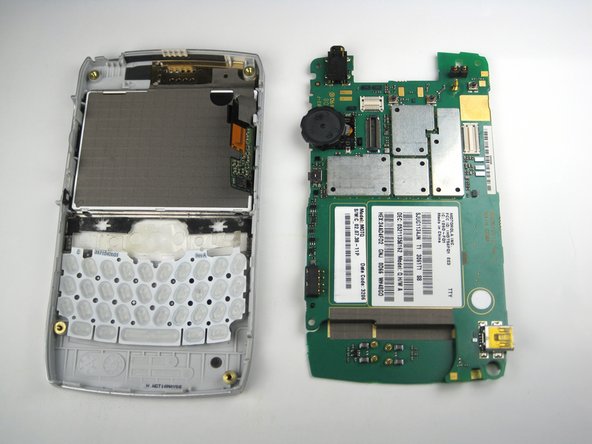
    • Wedge the plastic opening tool in between the logic board and the small orange band and gently pry upwards.

    • Note: the orange band is connected to the logic board by a small connector.

  10. Motorola Moto Q Front Casing Replacement: passo 10, imagem 1 %32 Motorola Moto Q Front Casing Replacement: passo 10, imagem 2 %32 Motorola Moto Q Front Casing Replacement: passo 10, imagem 3 %32
    • Wedge the spudger in between the logic board and the front casing and gently lift while pulling away from the orange ribbon.

    • Note: it is easier to remove the logic board by prying upwards near the top of left corner phone.

  11. Motorola Moto Q Front Casing Replacement: passo 11, imagem 1 %32 Motorola Moto Q Front Casing Replacement: passo 11, imagem 2 %32 Motorola Moto Q Front Casing Replacement: passo 11, imagem 3 %32
    • Wedge the plastic opening tool between the LCD screen and the metal casing holding it in and lift gently.

    • Note: the LCD screen is also held in place by a silver tape. Simply pull the screen from one side to other to remove the screen completely.

  12. Motorola Moto Q Front Casing Replacement, Keyboard: passo 12, imagem 1 %32 Motorola Moto Q Front Casing Replacement, Keyboard: passo 12, imagem 2 %32 Motorola Moto Q Front Casing Replacement, Keyboard: passo 12, imagem 3 %32
    • The keyboard is held in place with a little bit of glue.

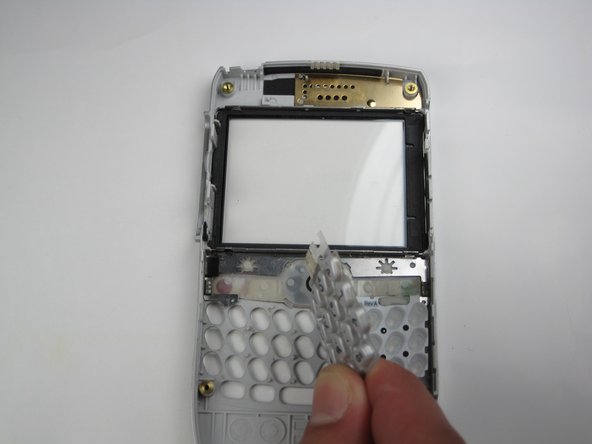
    • Simply lift the keyboard buttons with your hands pulling from one side to the other.

  13. Motorola Moto Q Front Casing Replacement, Front Casing: passo 13, imagem 1 %32
    • Remove the navigation buttons by pushing them with your finger(s) until they come loose.

    • Now simply peel the buttons off.

    • The buttons are held in place by glue. it may require a little extra pull to take off the buttons.

Conclusão

To reassemble your device, follow these instructions in reverse order.

Uma outra pessoa concluiu este guia.

Luis Herrera

Membro desde: 01/21/10

52 Reputação

Autoria de 4 guias

Equipe

Cal Poly, Team 16-33, Maness Winter 2010 Membro de Cal Poly, Team 16-33, Maness Winter 2010

CPSU-MANESS-W10S16G33

Membros da 4

Autoria de 10 guias

0 comentários

Adicione um comentário

Exibir estatísticas:

Últimas 24 horas: 0

Últimos 7 dias: 0

Últimos 30 dias: 1

Duração total: 17,220