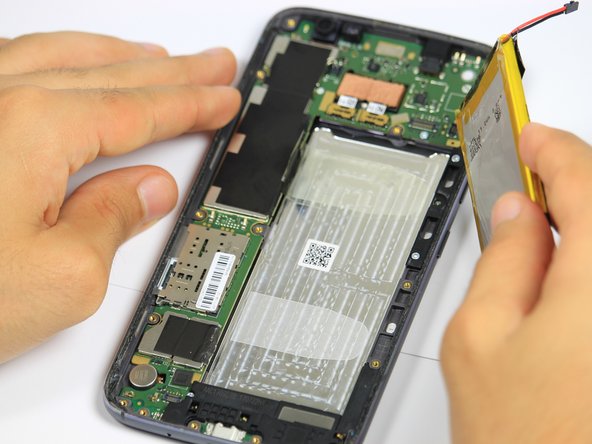
Ir para o conteúdo principal

Motorola Moto G5s Plus Battery Replacement

O que você precisa

  1. Motorola Moto G5s Plus Battery Replacement, Display: passo 1, imagem 1 %32 Motorola Moto G5s Plus Battery Replacement, Display: passo 1, imagem 2 %32 Motorola Moto G5s Plus Battery Replacement, Display: passo 1, imagem 3 %32
    • Power off the phone before you begin.

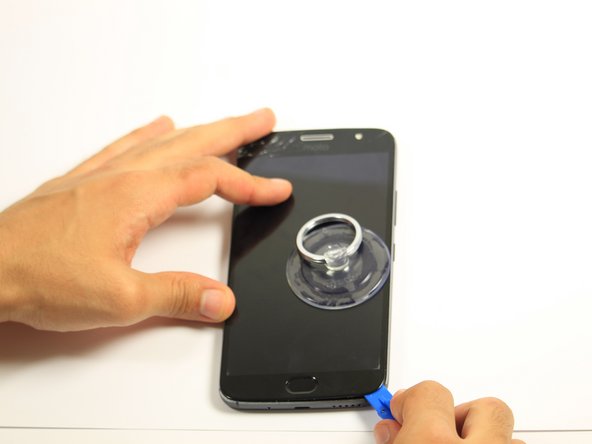
    • Bring the heat gun one to two inches from the edges of the display to melt the display adhesive.

    • Spend equal amounts of time applying heat around the entire edge of the phone.

  2. Motorola Moto G5s Plus Battery Replacement: passo 2, imagem 1 %32 Motorola Moto G5s Plus Battery Replacement: passo 2, imagem 2 %32
    • Attach the suction cup to the display slightly to the left of center.

    • Exert a moderate force to pull on the suction cup. The display will come loose.

  3. Motorola Moto G5s Plus Battery Replacement: passo 3, imagem 1 %32 Motorola Moto G5s Plus Battery Replacement: passo 3, imagem 2 %32 Motorola Moto G5s Plus Battery Replacement: passo 3, imagem 3 %32
    • Insert the opening tool inside the loosened edge.

    • Gradually work the opening tool around the edge of the entire screen to cut through the adhesive.

    • Do not wedge the opening tool too far beneath the screen. Using too much force can result in torn connector cables.

  4. Motorola Moto G5s Plus Battery Replacement: passo 4, imagem 1 %32 Motorola Moto G5s Plus Battery Replacement: passo 4, imagem 2 %32 Motorola Moto G5s Plus Battery Replacement: passo 4, imagem 3 %32
    • The display should now be entirely loose, attached only by the connectors at the top of the device and the fingerprint sensor connector at the bottom of the device.

    • Press down on the fingerprint sensor with the display slightly raised to disconnect it from the display.

    • If the fingerprint sensor does not come loose, use the heat gun to loosen its adhesive.

  5. Motorola Moto G5s Plus Battery Replacement: passo 5, imagem 1 %32 Motorola Moto G5s Plus Battery Replacement: passo 5, imagem 2 %32
    • The cables at the top of the device are fragile. If you are using this guide as a prerequisite for replacing another part, be careful not to tear the cables while lifting the screen.

    • Remove the one 5mm Torx-5 screw located by the connector cables in the top right corner of the device.

  6. Motorola Moto G5s Plus Battery Replacement: passo 6, imagem 1 %32 Motorola Moto G5s Plus Battery Replacement: passo 6, imagem 2 %32
    • Grab the unscrewed metal plate with your blunt tweezers.

    • Slide the metal plate to the left and then out to remove it.

    • Removing the plate will expose the display assembly's connection to the phone's motherboard.

  7. Motorola Moto G5s Plus Battery Replacement: passo 7, imagem 1 %32 Motorola Moto G5s Plus Battery Replacement: passo 7, imagem 2 %32
    • Disengage the two cable connectors by gently prying beneath the edge of the connector with the opening tool.

  8. Motorola Moto G5s Plus Battery Replacement: passo 8, imagem 1 %32 Motorola Moto G5s Plus Battery Replacement: passo 8, imagem 2 %32
    • Lift up the detached right connector from its housing using blunt tweezers.

    • The housing has light adhesive underneath it. Use a small amount of force to remove the connector from the housing.

  9. Motorola Moto G5s Plus Battery Replacement, Fingerprint Sensor: passo 9, imagem 1 %32
    • Remove the nine black 5mm Torx-5 screws.

    • Remove the seven silver 5mm Torx-5 screws.

  10. Motorola Moto G5s Plus Battery Replacement: passo 10, imagem 1 %32 Motorola Moto G5s Plus Battery Replacement: passo 10, imagem 2 %32
    • Remove the metal cover by prying underneath it with the opening tool.

  11. Motorola Moto G5s Plus Battery Replacement: passo 11, imagem 1 %32 Motorola Moto G5s Plus Battery Replacement: passo 11, imagem 2 %32 Motorola Moto G5s Plus Battery Replacement: passo 11, imagem 3 %32
    • Grab ahold of the fingerprint sensor and push it through the opening in the metal cover.

  12. Motorola Moto G5s Plus Battery Replacement: passo 12, imagem 1 %32 Motorola Moto G5s Plus Battery Replacement: passo 12, imagem 2 %32
    • Remove the fingerprint connector by gently prying underneath the connector with the opening tool.

  13. Motorola Moto G5s Plus Battery Replacement, Battery: passo 13, imagem 1 %32
    • The battery is now fully exposed and ready to be removed.

  14. Motorola Moto G5s Plus Battery Replacement: passo 14, imagem 1 %32 Motorola Moto G5s Plus Battery Replacement: passo 14, imagem 2 %32
    • Use the opening tool to remove the two metal connectors located above the battery.

    • Apply a gentle upward pressure to loosen the metal plates.

  15. Motorola Moto G5s Plus Battery Replacement: passo 15, imagem 1 %32 Motorola Moto G5s Plus Battery Replacement: passo 15, imagem 2 %32 Motorola Moto G5s Plus Battery Replacement: passo 15, imagem 3 %32
    • Using the spudger, cut downwards along the black tape on left side of the battery.

  16. Motorola Moto G5s Plus Battery Replacement: passo 16, imagem 1 %32
    • Use the opening tool to disengage the black connector located above the battery.

  17. Motorola Moto G5s Plus Battery Replacement: passo 17, imagem 1 %32
    • Heating up the battery excessively could cause the battery to ignite

    • Use the heat gun along the back of the phone to loosen the adhesive that holds the battery in place.

    • Spend equal intervals of time on each area applying heat.

  18. Motorola Moto G5s Plus Battery Replacement: passo 18, imagem 1 %32 Motorola Moto G5s Plus Battery Replacement: passo 18, imagem 2 %32 Motorola Moto G5s Plus Battery Replacement: passo 18, imagem 3 %32
    • Insert the spudger underneath the right side of the battery.

    • Apply a moderate upward force along the length of battery, until the battery lifts out of place.

    • Remove the battery with your hand.

Conclusão

To reassemble your device, follow these instructions in reverse order.

11 outras pessoas executaram este guia.

Kevin George

Membro desde: 10/08/18

1.072 Reputação

Autoria de 4 guias

Equipe

Cal Poly, Team S4-G5, White Fall 2018 Membro de Cal Poly, Team S4-G5, White Fall 2018

CPSU-WHITE-F18S4G5

Membros da 4

Autoria de 5 guias

Um comentário

Hello,

I would like to chance the battery.

But for me it isn’t not clear how to glue the screen back again. I can not find any sealing at the market

Thanks

Jirik - Responder

Adicione um comentário

Exibir estatísticas:

Últimas 24 horas: 1

Últimos 7 dias: 19

Últimos 30 dias: 91

Duração total: 12,529