Ir para o conteúdo principal

Motorola Moto E4 Plus Motherboard Replacement

Guia arquivado
Este guia é mantido exclusivamente para fins históricos. Use a versão atualizada do guia para executar o reparo.

O que você precisa

  1. Motorola Moto E4 Plus Motherboard Replacement, Back Plate and Battery: passo 1, imagem 1 %32 Motorola Moto E4 Plus Motherboard Replacement, Back Plate and Battery: passo 1, imagem 2 %32
    • Insert the spudger into the notch on the corner of the phone and lift up to remove the back case.

  2. Motorola Moto E4 Plus Motherboard Replacement: passo 2, imagem 1 %32
    • Use the T4 Torx Screwdriver to remove the 17 3.2 mm screws in the back panel covering the battery.

    What do you do if the screws to tight and you can not unscrew them… Also the head of the screws too soft and damages easily.. I got few screws damaged, simply will probably need to use drill to get them out or something…

    Alexander Gen - Responder

  3. Motorola Moto E4 Plus Motherboard Replacement: passo 3, imagem 1 %32 Motorola Moto E4 Plus Motherboard Replacement: passo 3, imagem 2 %32 Motorola Moto E4 Plus Motherboard Replacement: passo 3, imagem 3 %32
    • Lift up and remove the back panel.

  4. Motorola Moto E4 Plus Motherboard Replacement: passo 4, imagem 1 %32 Motorola Moto E4 Plus Motherboard Replacement: passo 4, imagem 2 %32
    • After removing the back panel, use the spudger to lift and detach the Battery Flux Cable from the Motherboard.

  5. Motorola Moto E4 Plus Motherboard Replacement: passo 5, imagem 1 %32 Motorola Moto E4 Plus Motherboard Replacement: passo 5, imagem 2 %32 Motorola Moto E4 Plus Motherboard Replacement: passo 5, imagem 3 %32
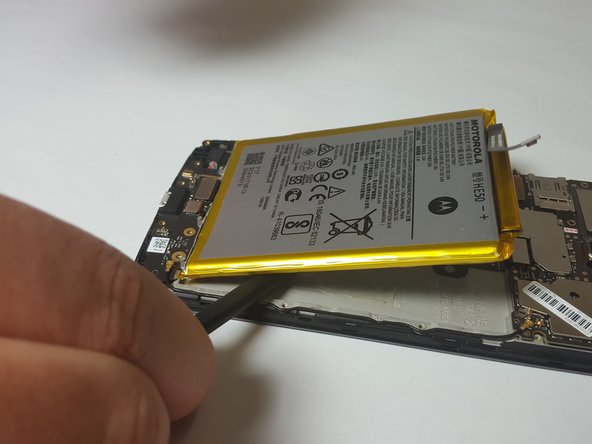
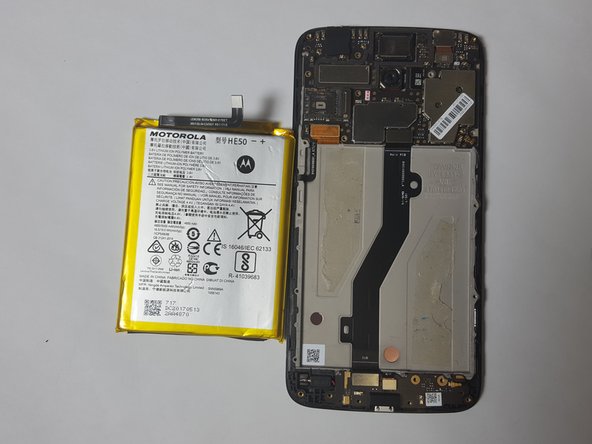
    • Wedge the spudger between the battery and the phone to lift the battery up and remove the battery. There will be slight resistance to this but the battery will not be damaged by this. It is just the adhesive tape.

    Is there a reason to remove the battery?

    Alejandro Amaya - Responder

  6. Motorola Moto E4 Plus Motherboard Replacement, Rear Camera: passo 6, imagem 1 %32 Motorola Moto E4 Plus Motherboard Replacement, Rear Camera: passo 6, imagem 2 %32
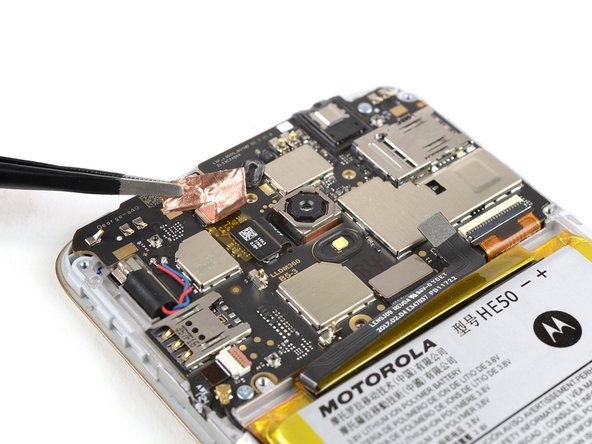
    • Use a pair of tweezers to peel up the copper tape that covers the rear camera flex connector.

    • Fold the copper tape out of the way.

  7. Motorola Moto E4 Plus Motherboard Replacement: passo 7, imagem 1 %32 Motorola Moto E4 Plus Motherboard Replacement: passo 7, imagem 2 %32
    • Use the flat end of a spudger to pry up and disconnect the rear camera flex cable.

  8. Motorola Moto E4 Plus Motherboard Replacement: passo 8, imagem 1 %32
    • Carefully remove the rear camera with a pair of tweezers.

  9. Motorola Moto E4 Plus Motherboard Replacement, Motherboard: passo 9, imagem 1 %32
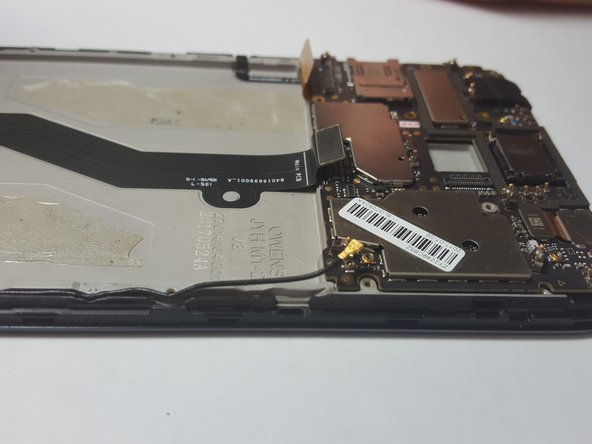
    • Use the T4 Torx Screwdriver to remove the 2 3.2 mm screws circled in the image.

  10. Motorola Moto E4 Plus Motherboard Replacement: passo 10, imagem 1 %32 Motorola Moto E4 Plus Motherboard Replacement: passo 10, imagem 2 %32
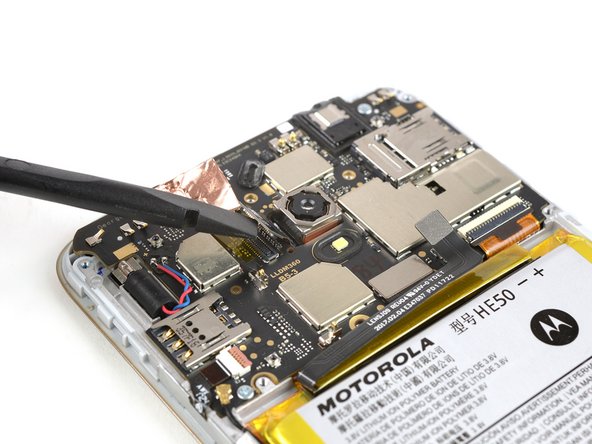
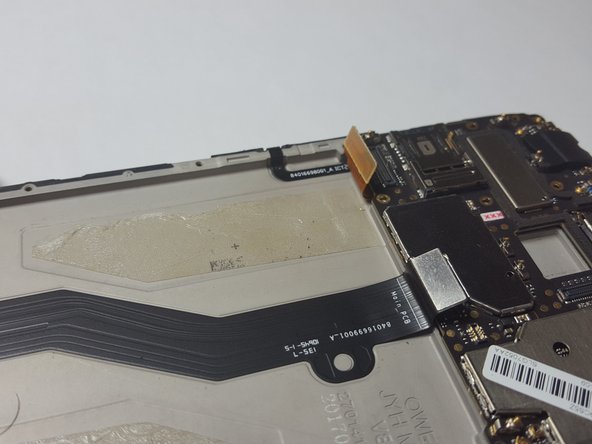
    • Use the Spudger to lift up and detach the Main Flex Cable from the Motherboard.

    I need help with something

    bobby young - Responder

  11. Motorola Moto E4 Plus Motherboard Replacement: passo 11, imagem 1 %32 Motorola Moto E4 Plus Motherboard Replacement: passo 11, imagem 2 %32
    • Use the Spudger to lift up and detach the LCD Screen Flex Cable from the Motherboard.

  12. Motorola Moto E4 Plus Motherboard Replacement: passo 12, imagem 1 %32
    • Use the Plastic Spudger to lift up and detach the Signal Flex Cable from the Motherboard. The Signal Flex Cable should still be attached to the body of the phone.

  13. Motorola Moto E4 Plus Motherboard Replacement: passo 13, imagem 1 %32 Motorola Moto E4 Plus Motherboard Replacement: passo 13, imagem 2 %32
    • Use the Spudger to lift up and remove the Motherboard from the phone.

Conclusão

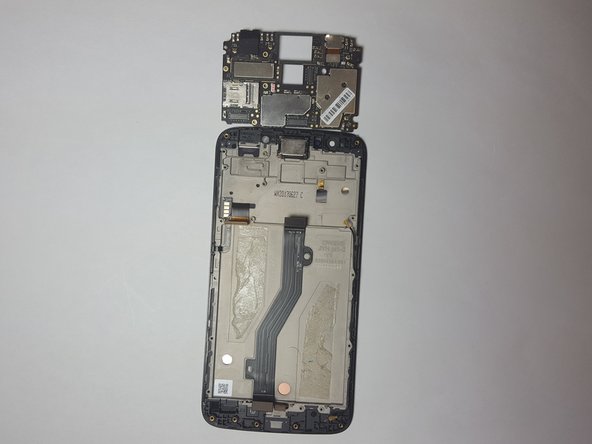
To reassemble your device, follow these instructions in reverse order.

10 outras pessoas executaram este guia.

Jack Haseman

Membro desde: 03/19/18

1.396 Reputação

Autoria de 6 guias

Equipe

Baylor, Team S3-G2, Williams Spring 2018 Membro de Baylor, Team S3-G2, Williams Spring 2018

BU-WILLIAMS-S18S3G2

Membros da 4

Autoria de 13 guias

2 comentários

guide states that there are 17 screws to remove (step 2) but there are 20 screws circled… Counting is hard I guess?

CPR South Portland - Responder

From step 9 it’s another phone. I’m guessing E4 (regular) but they are not the same. The vibration motor, second sim tray, and many other components disappear suddenly. Mixing different phones is very irresponsable and lazy.

Randy Sickmind - Responder

Adicione um comentário

Exibir estatísticas:

Últimas 24 horas: 0

Últimos 7 dias: 0

Últimos 30 dias: 2

Duração total: 6,030