Ir para o conteúdo principal

Moto C Daughterboard Replacement

O que você precisa

  1. Moto C Daughterboard Replacement, Back Cover: passo 1, imagem 1 %32 Moto C Daughterboard Replacement, Back Cover: passo 1, imagem 2 %32 Moto C Daughterboard Replacement, Back Cover: passo 1, imagem 3 %32
    • Power off your phone before beginning disassembly.

    • Insert a thumbnail, or spudger, into the notch on the bottom right corner to start separating the phone unit from the back cover.

    • Move it to the bottom left corner and pry the phone unit out of the back cover until you can get a good grip.

  2. Moto C Daughterboard Replacement: passo 2, imagem 1 %32 Moto C Daughterboard Replacement: passo 2, imagem 2 %32
    • Lift the phone out of the back cover.

  3. Moto C Daughterboard Replacement, Battery: passo 3, imagem 1 %32 Moto C Daughterboard Replacement, Battery: passo 3, imagem 2 %32 Moto C Daughterboard Replacement, Battery: passo 3, imagem 3 %32
    • Use a finger or spudger to lever the battery out of its recess and remove it.

  4. Moto C Daughterboard Replacement, Daughterboard Cover: passo 4, imagem 1 %32
    • Remove the four 3.5 mm long Torx T5 screws.

    • Some screws might be covered with stickers.

  5. Moto C Daughterboard Replacement: passo 5, imagem 1 %32 Moto C Daughterboard Replacement: passo 5, imagem 2 %32 Moto C Daughterboard Replacement: passo 5, imagem 3 %32
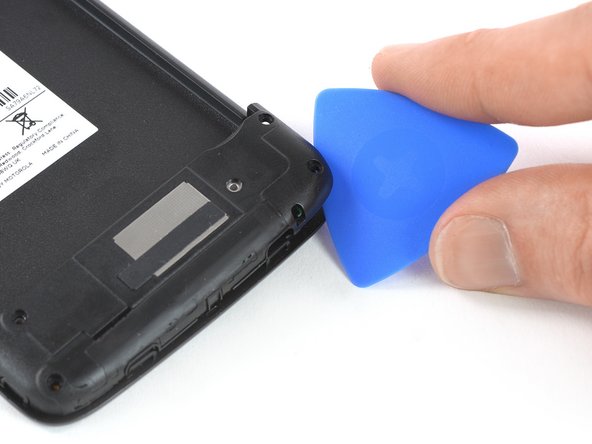
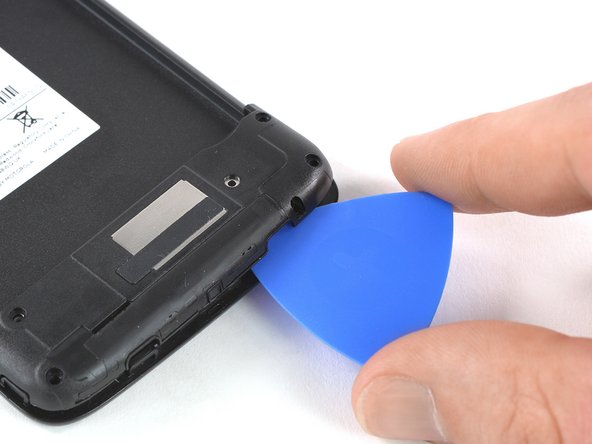
    • Apply the edge of an opening pick to the bottom right corner under the daughterboard cover.

    • Twist the opening pick to open the plastic clamps of the daughterboard cover.

    • Slide the opening pick to the left and pry it upwards until you can get a good grip on the daughterboard cover.

  6. Moto C Daughterboard Replacement: passo 6, imagem 1 %32
    • Remove the daughterboard cover.

  7. Moto C Daughterboard Replacement, Daughterboard: passo 7, imagem 1 %32 Moto C Daughterboard Replacement, Daughterboard: passo 7, imagem 2 %32
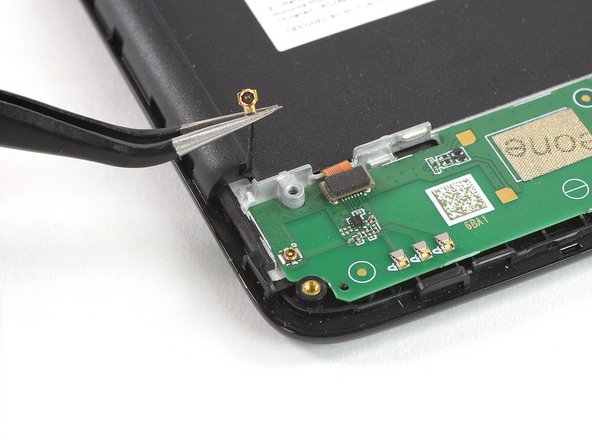
    • Use a pair of tweezers to disconnect the antenna cable on the left of the daughterboard.

  8. Moto C Daughterboard Replacement: passo 8, imagem 1 %32 Moto C Daughterboard Replacement: passo 8, imagem 2 %32
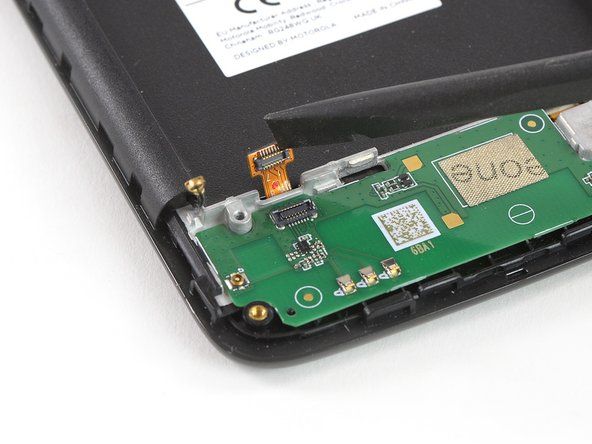
    • Use a spudger to disconnect the digitizer flex cable on the upper left of the daughterboard.

  9. Moto C Daughterboard Replacement: passo 9, imagem 1 %32 Moto C Daughterboard Replacement: passo 9, imagem 2 %32
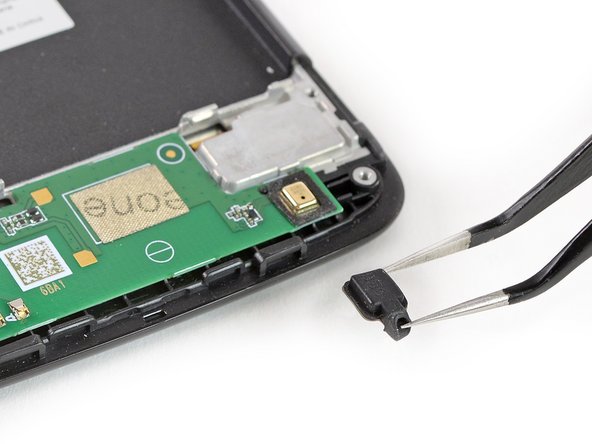
    • Use a pair of tweezers to remove the rubber gasket that covers the microphone on the bottom right of the daughterboard.

  10. Moto C Daughterboard Replacement: passo 10, imagem 1 %32
    • Prepare an iOpener and apply it to the bottom part of the display for at least two minutes to loosen the adhesive beneath the daughterboard.

  11. Moto C Daughterboard Replacement: passo 11, imagem 1 %32 Moto C Daughterboard Replacement: passo 11, imagem 2 %32 Moto C Daughterboard Replacement: passo 11, imagem 3 %32
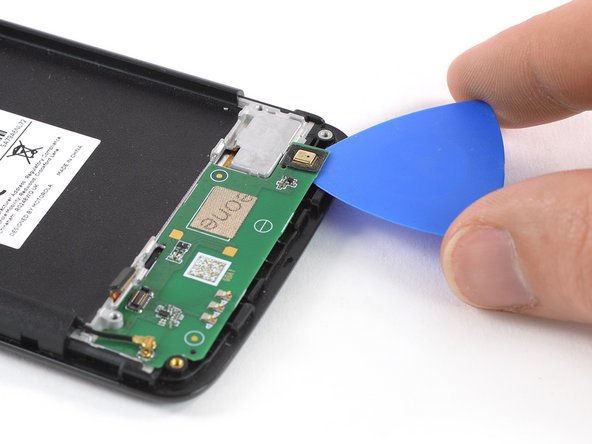
    • Apply an opening pick to the bottom right corner of the daughterboard.

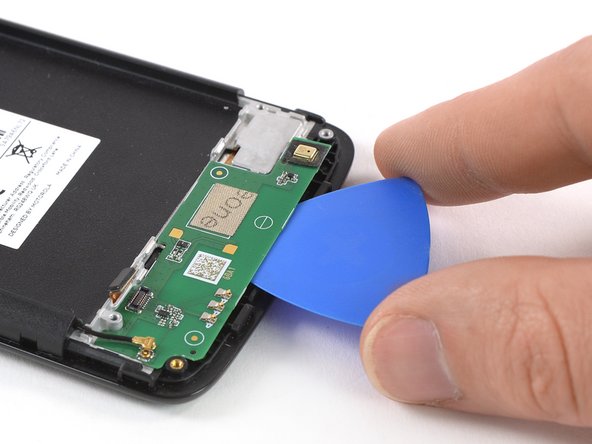
    • Carefully slide the opening pick under the daughterboard to cut the adhesive underneath.

    • Slide the opening pick from right to left to cut all the adhesive.

  12. Moto C Daughterboard Replacement: passo 12, imagem 1 %32 Moto C Daughterboard Replacement: passo 12, imagem 2 %32
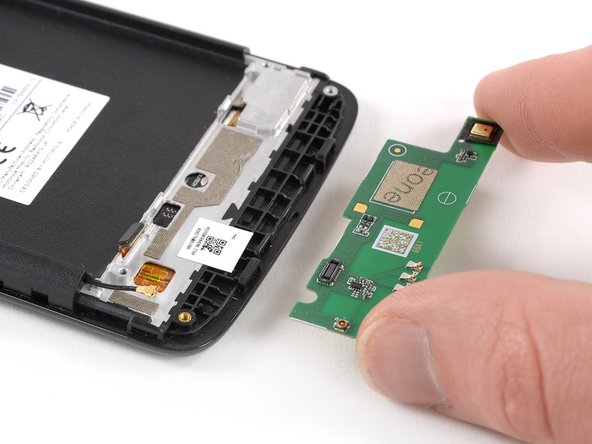
    • Twist the opening pick to lift the daughterboard until you can get a good grip.

    • Remove the daughterboard.

Conclusão

To reassemble your device, follow these instructions in reverse order.

Apply new adhesive where it’s necessary.

Take your e-waste to an R2 or e-Stewards certified recycler.

Repair didn’t go as planned? Check out our Answers community for troubleshooting help.

Dominik Schnabelrauch

Membro desde: 11/23/16

203.632 Reputação

Autoria de 682 guias

Equipe

iFixit Membro de iFixit

Staff

Membros da 135

Autoria de 17.144 guias

0 comentários

Adicione um comentário

Exibir estatísticas:

Últimas 24 horas: 0

Últimos 7 dias: 4

Últimos 30 dias: 5

Duração total: 393