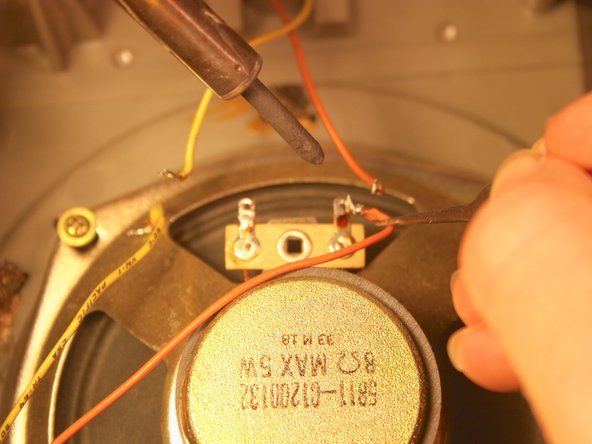
Ir para o conteúdo principal

Montgomery Ward GEN-39500 Subwoofer Replacement

O que você precisa

  1. Montgomery Ward GEN-39500 Subwoofer Replacement, Back Cover: passo 1, imagem 1 %32
    • Remove the nine 35 mm Phillips screws securing the back cover of the case.

  2. Montgomery Ward GEN-39500 Subwoofer Replacement: passo 2, imagem 1 %32
    • Carefully remove the back cover.

    • Soldered wires connect electronics on the back cover to the internal electronics. Be careful not to break any connections.

  3. Montgomery Ward GEN-39500 Subwoofer Replacement: passo 3, imagem 1 %32 Montgomery Ward GEN-39500 Subwoofer Replacement: passo 3, imagem 2 %32
    • Unplug the black and yellow wires connecting the power supply unit to the rest of the electronics:

    • This is not necessarily required. This step is to allow the back cover more movement as you work on the inside of the unit.

  4. Montgomery Ward GEN-39500 Subwoofer Replacement, Subwoofer: passo 4, imagem 1 %32 Montgomery Ward GEN-39500 Subwoofer Replacement, Subwoofer: passo 4, imagem 2 %32
    • Unsolder the wires leading to and from the subwoofer.

  5. Montgomery Ward GEN-39500 Subwoofer Replacement: passo 5, imagem 1 %32
    • Unscrew the four 12.5 mm Phillips screws holding the subwoofer in place.

    • One of the screws holds down a metal cable organizer. For better cable organization after reassembly keep track of this organizer.

  6. Montgomery Ward GEN-39500 Subwoofer Replacement: passo 6, imagem 1 %32
    • Remove the subwoofer.

    • The process is the same for both sides.

Conclusão

To reassemble your device, follow these instructions in reverse order.

Dustin Platt

Membro desde: 04/01/15

931 Reputação

Autoria de 6 guias

Equipe

Cal Poly, Team 12-5, Lancaster Spring 2015 Membro de Cal Poly, Team 12-5, Lancaster Spring 2015

CPSU-LANCASTER-S15S12G5

Membros da 4

Autoria de 13 guias

0 comentários

Adicione um comentário

Exibir estatísticas:

Últimas 24 horas: 0

Últimos 7 dias: 0

Últimos 30 dias: 0

Duração total: 106