Ir para o conteúdo principal

Milwaukee M12 2407-20 Shuttle Spring Plate Replacement

O que você precisa

  1. Milwaukee M12 2407-20 Shuttle Spring Plate Replacement, Outer Casing: passo 1, imagem 1 %32
    • Remove each of the seven 14mm Pan Hd. T-10 ST screws on one side of the housing assembly using the T10 screwdriver.

  2. Milwaukee M12 2407-20 Shuttle Spring Plate Replacement: passo 2, imagem 1 %32
    • Remove metal clip located at the base of the drill, where the battery is to be inserted.

    • You may need to use a spudger if the clip is too difficult to remove with your fingers.

  3. Milwaukee M12 2407-20 Shuttle Spring Plate Replacement, Shuttle Spring Plate: passo 3, imagem 1 %32 Milwaukee M12 2407-20 Shuttle Spring Plate Replacement, Shuttle Spring Plate: passo 3, imagem 2 %32 Milwaukee M12 2407-20 Shuttle Spring Plate Replacement, Shuttle Spring Plate: passo 3, imagem 3 %32
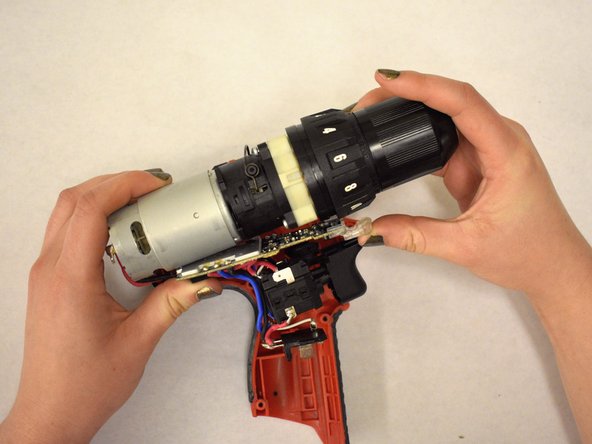
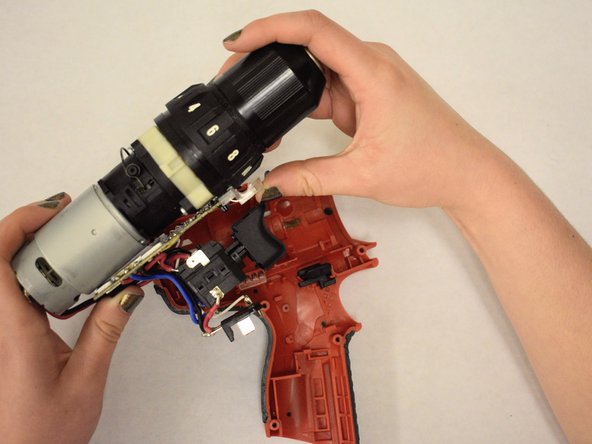
    • Use both hands to lift and remove the gear case assembly from the shell casing.

    • Set the gear case assembly aside.

  4. Milwaukee M12 2407-20 Shuttle Spring Plate Replacement: passo 4, imagem 1 %32 Milwaukee M12 2407-20 Shuttle Spring Plate Replacement: passo 4, imagem 2 %32
    • Remove the forward/reversing shuttle to gain access to the spring plate.

  5. Milwaukee M12 2407-20 Shuttle Spring Plate Replacement: passo 5, imagem 1 %32
    • Remove the spring plate and insert replacement spring plate.

Conclusão

To reassemble your device, follow these instructions in reverse order.

2 outras pessoas executaram este guia.

0 comentários

Adicione um comentário

Exibir estatísticas:

Últimas 24 horas: 0

Últimos 7 dias: 4

Últimos 30 dias: 16

Duração total: 1,243