Introdução
This guide will walk through the steps to replace the gear case assembly on the Milwaukee M12 2407-20.
O que você precisa
-
-
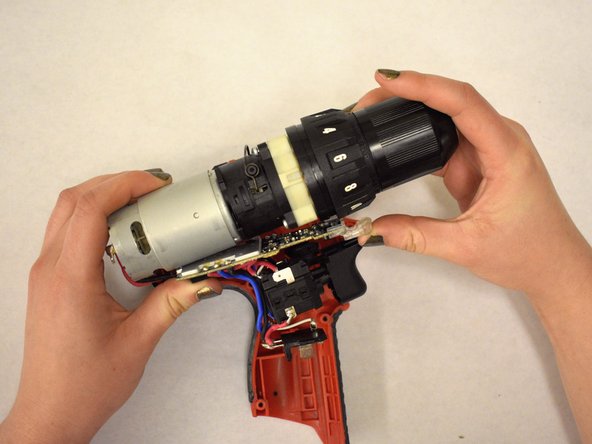
Remove each of the seven 14mm Pan Hd. T-10 ST screws on one side of the housing assembly using the T10 screwdriver.
-
-
-
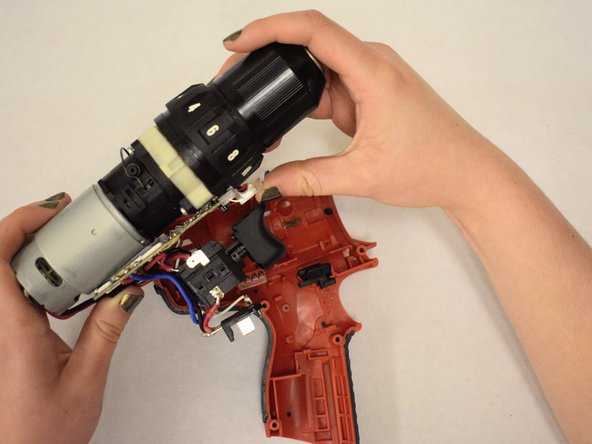
Use both hands to remove the gear case assembly from the casing.
-
Set the assembly aside.
-
-


To reassemble your device, follow these instructions in reverse order.
To reassemble your device, follow these instructions in reverse order.
Cancelar: não concluí este guia.
Uma outra pessoa concluiu este guia.
Equipe

Appalachian State University, Team S2-G1, Menagarishvili Spring 2019 Membro de Appalachian State University, Team S2-G1, Menagarishvili Spring 2019
APSU-MENAGARISHVILI-S19S2G1
Membros da 2
Autoria de 5 guias
4 comentários
So, the last step says:
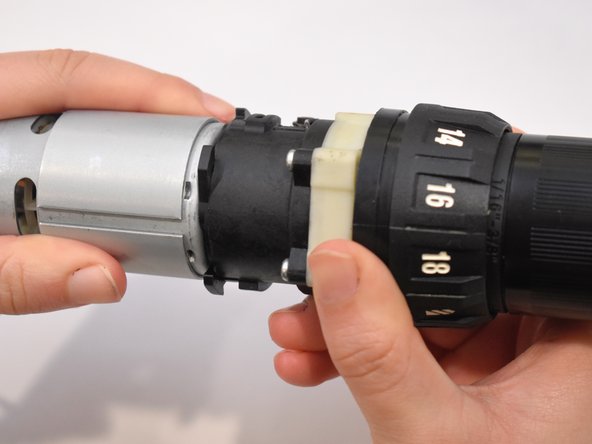
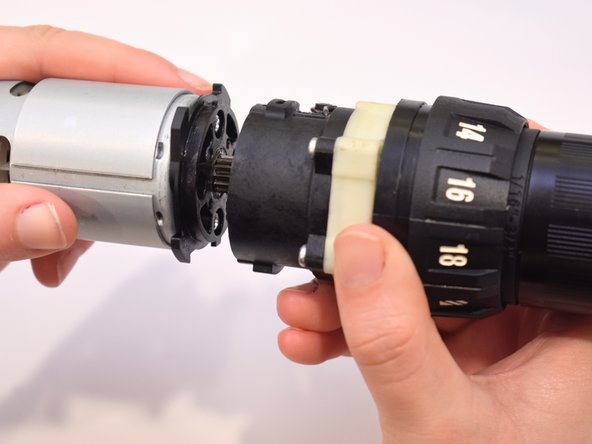
“Remove the gear case assembly from the keyless chuck, taking care not to allow the gears inside the unit to shift or become dislodged.
Use your finger to hold the gear plate in place when you remove the assembly. This will keep the gears from falling out.”
BUT THAT’S IT!
It doesn’t say anything about how to get a new gear case assembly. Just how to remove it.
The link that sent me to this page said it would tell me how to REPLACE the gear case assembly.
But it only tells us how to REMOVE it.
No link or info regarding replacement. Grrrrr.
Hi Jay! We had to do this for a project for one of our classes. We were instructed not to include any of that information by our instructor and by iFixit. I apologize for the inconvenience. It bothered me too, I promise. If you Have the replacement part just follow these steps in reverse order to reassemble. I’ll see if I can find a link to a replacement part for you and I’ll get back to you.
The instruction in step 4 to have the assembly horizontal is absolutely wrong and TERRIBLE advice. The gears all fell out the back. Luckily I am replacing the entire gear box and clutch assembly. Otherwise I would have had to completely clean and repack the grease on all of the individual parts after I was lucky enough to find all the gears that rolled into other rooms leaving trails of bearing grease. What s crap tutorial.