Esta versão pode conter edições incorretas. Mude para o último instantâneo verificado.
O que você precisa
-
Este passo não foi traduzido. Ajude a traduzi-lo
-
Remove each of the seven 14mm Pan Hd. T-10 ST screws on one side of the housing assembly using the T10 screwdriver.
-
-
Este passo não foi traduzido. Ajude a traduzi-lo
-
Remove metal clip located at the base of the drill, where the battery is to be inserted.
-
-
-
Este passo não foi traduzido. Ajude a traduzi-lo
-
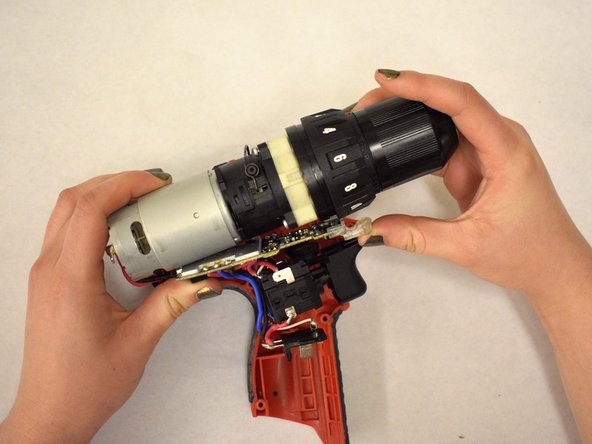
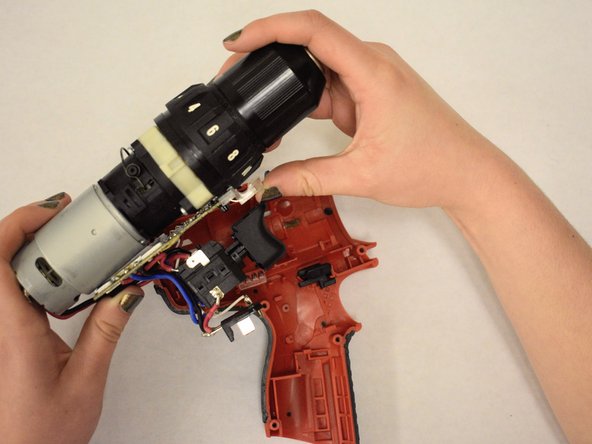
Use both hands to lift and remove the gear case assembly from the shell casing.
-
Set the gear case assembly aside.
-
-
Este passo não foi traduzido. Ajude a traduzi-lo
-
While holding the shell in one hand, pull the end of the broken forward/reverse shuttle out of the casing.
-
Set the broken forward/reverse shuttle aside.
-
Cancelar: não concluí este guia.
2 outras pessoas executaram este guia.


