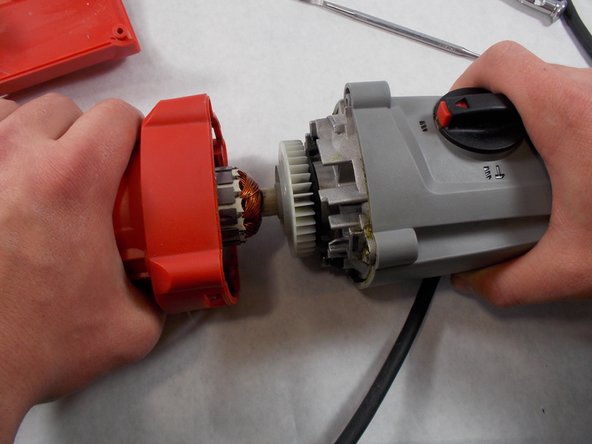
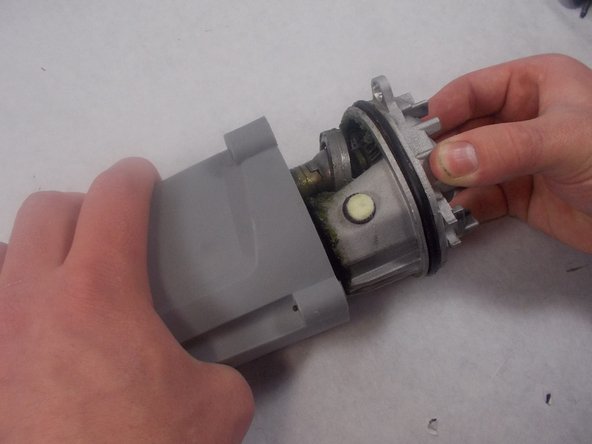
Ir para o conteúdo principal

Milwaukee 5262-21 Diaphragm Assembly with Bushing Replacement

O que você precisa

  1. Milwaukee 5262-21 Diaphragm Assembly with Bushing Replacement, Housing Assembly: passo 1, imagem 1 %32
    • Remove the ten 19mm T20 Torx screws shown in red.

  2. Milwaukee 5262-21 Diaphragm Assembly with Bushing Replacement: passo 2, imagem 1 %32
    • Remove the red Housing Assembly by lifting it up off of the tool.

  3. Milwaukee 5262-21 Diaphragm Assembly with Bushing Replacement, Reduction Gear Assembly: passo 3, imagem 1 %32 Milwaukee 5262-21 Diaphragm Assembly with Bushing Replacement, Reduction Gear Assembly: passo 3, imagem 2 %32
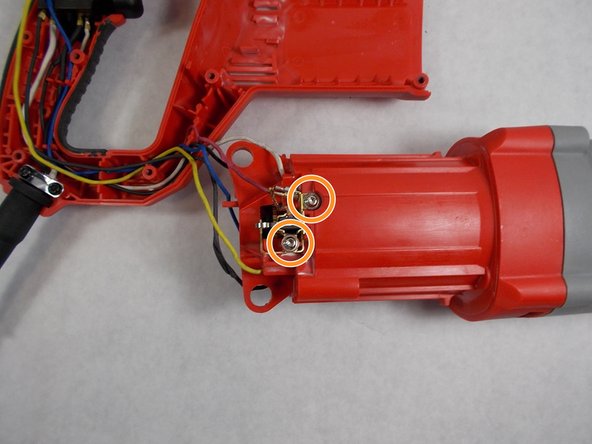
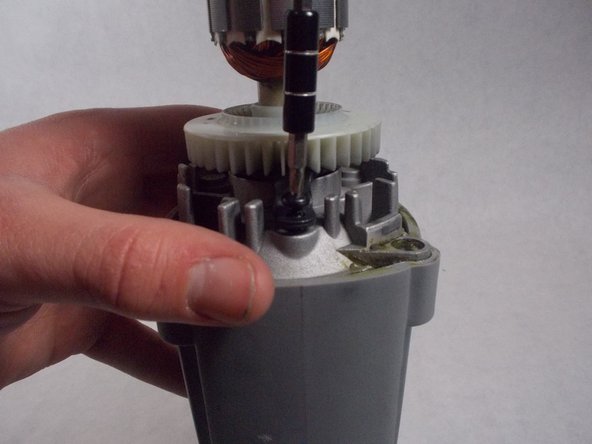
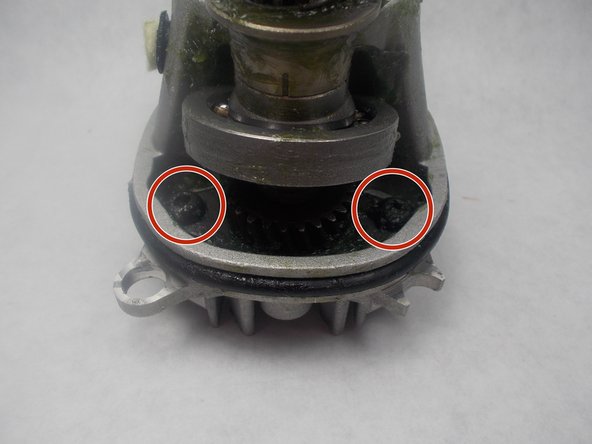
    • Remove the two 10mm T-10 Torx screws that attach the top brush holders to the motor housing.

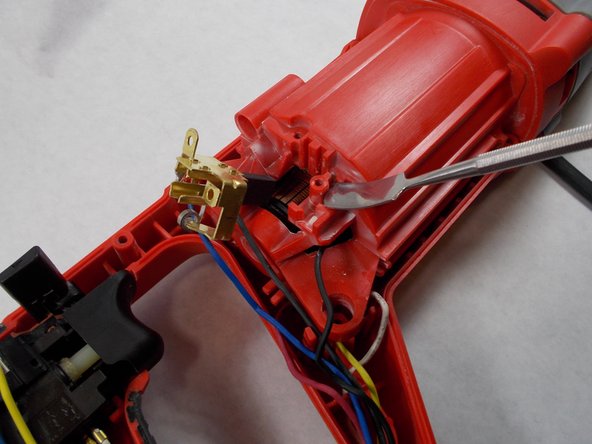
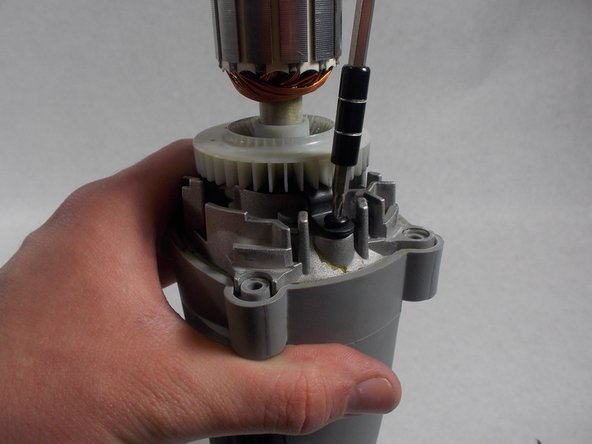
    • Remove the two 10mm T-10 Torx screws that attach the bottom brush holders to the motor housing.

  4. Milwaukee 5262-21 Diaphragm Assembly with Bushing Replacement: passo 4, imagem 1 %32 Milwaukee 5262-21 Diaphragm Assembly with Bushing Replacement: passo 4, imagem 2 %32
    • Using a metal spudger, pry off each brush holder.

  5. Milwaukee 5262-21 Diaphragm Assembly with Bushing Replacement: passo 5, imagem 1 %32 Milwaukee 5262-21 Diaphragm Assembly with Bushing Replacement: passo 5, imagem 2 %32 Milwaukee 5262-21 Diaphragm Assembly with Bushing Replacement: passo 5, imagem 3 %32
    • Remove the four 37mm T20 Torx screws shown in red.

  6. Milwaukee 5262-21 Diaphragm Assembly with Bushing Replacement: passo 6, imagem 1 %32 Milwaukee 5262-21 Diaphragm Assembly with Bushing Replacement: passo 6, imagem 2 %32
    • Pull the front portion of the tool out from the motor housing.

  7. Milwaukee 5262-21 Diaphragm Assembly with Bushing Replacement: passo 7, imagem 1 %32 Milwaukee 5262-21 Diaphragm Assembly with Bushing Replacement: passo 7, imagem 2 %32 Milwaukee 5262-21 Diaphragm Assembly with Bushing Replacement: passo 7, imagem 3 %32
    • Remove the two 11.5mm T10 Torx screws shown in red.

  8. Milwaukee 5262-21 Diaphragm Assembly with Bushing Replacement: passo 8, imagem 1 %32 Milwaukee 5262-21 Diaphragm Assembly with Bushing Replacement: passo 8, imagem 2 %32
    • Pull the 120V armature assembly out of the diaphragm assembly.

  9. Milwaukee 5262-21 Diaphragm Assembly with Bushing Replacement: passo 9, imagem 1 %32 Milwaukee 5262-21 Diaphragm Assembly with Bushing Replacement: passo 9, imagem 2 %32
    • Using a metal spudger, pry the diaphgram assembly out of the gear case.

  10. Milwaukee 5262-21 Diaphragm Assembly with Bushing Replacement: passo 10, imagem 1 %32 Milwaukee 5262-21 Diaphragm Assembly with Bushing Replacement: passo 10, imagem 2 %32
    • Now that you have loosened the diaphragm, you can now pull it out of the gear case.

  11. Milwaukee 5262-21 Diaphragm Assembly with Bushing Replacement: passo 11, imagem 1 %32 Milwaukee 5262-21 Diaphragm Assembly with Bushing Replacement: passo 11, imagem 2 %32 Milwaukee 5262-21 Diaphragm Assembly with Bushing Replacement: passo 11, imagem 3 %32
    • The diaphragm assembly will be lathered in grease. In order to move forward, you may want to give it a wipe down to remove any extra grease.

    • After removing some grease (if needed), remove the two 15mm T20 Torx screws shown in red.

  12. Milwaukee 5262-21 Diaphragm Assembly with Bushing Replacement: passo 12, imagem 1 %32 Milwaukee 5262-21 Diaphragm Assembly with Bushing Replacement: passo 12, imagem 2 %32 Milwaukee 5262-21 Diaphragm Assembly with Bushing Replacement: passo 12, imagem 3 %32
    • Now pull the reduction gear assembly up and out of the diaphragm.

  13. Milwaukee 5262-21 Diaphragm Assembly with Bushing Replacement, Diaphragm Assembly with Bushing: passo 13, imagem 1 %32 Milwaukee 5262-21 Diaphragm Assembly with Bushing Replacement, Diaphragm Assembly with Bushing: passo 13, imagem 2 %32
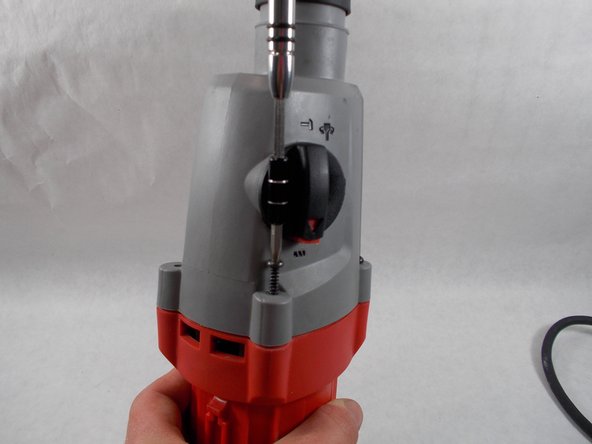
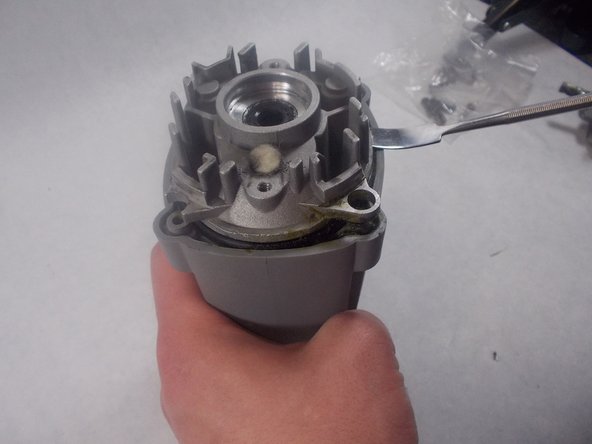
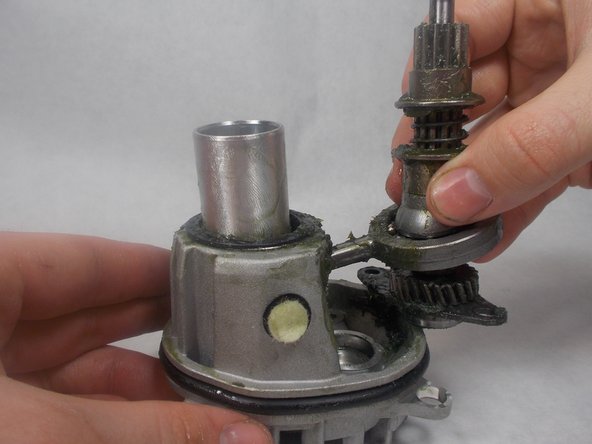
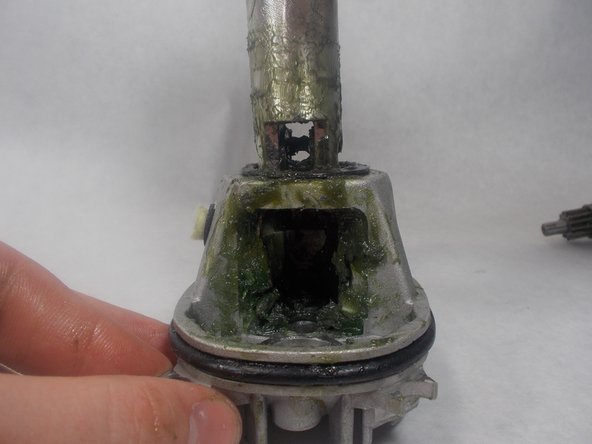
    • Remove the metal piston from the diaphragm assembly.

  14. Milwaukee 5262-21 Diaphragm Assembly with Bushing Replacement: passo 14, imagem 1 %32 Milwaukee 5262-21 Diaphragm Assembly with Bushing Replacement: passo 14, imagem 2 %32 Milwaukee 5262-21 Diaphragm Assembly with Bushing Replacement: passo 14, imagem 3 %32
    • Using a metal spudger, pry the o-ring off of the assembly.

Conclusão

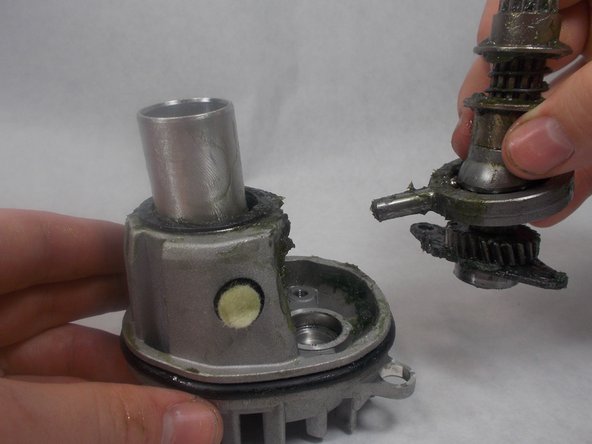
To reassemble your device, follow these instructions in reverse order.

2 outras pessoas executaram este guia.

Payton Parker

Membro desde: 03/08/19

534 Reputação

Autoria de 2 guias

Equipe

Um comentário

to reasemble .

Which is the correct position of the Shift knob assembly ?

Javier Martinez - Responder

Adicione um comentário

Exibir estatísticas:

Últimas 24 horas: 0

Últimos 7 dias: 1

Últimos 30 dias: 7

Duração total: 1,004