Esta versão pode conter edições incorretas. Mude para o último instantâneo verificado.
O que você precisa
-
Este passo não foi traduzido. Ajude a traduzi-lo
-
Open your hood.
-
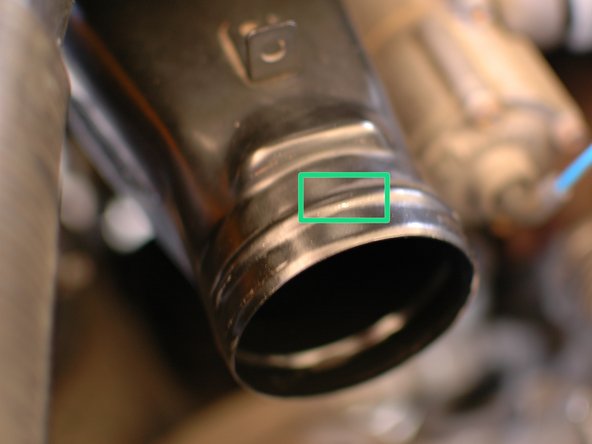
Find the turbo elbow, just in front of the air filter housing, attached to its lower outlet.
-
-
Este passo não foi traduzido. Ajude a traduzi-lo
-
Use a 10mm socket and ratcheting wrench to loosen the clamp on the top portion of the turbo elbow.
-
Then repeat this on the lower clamp.
-
-
Este passo não foi traduzido. Ajude a traduzi-lo
-
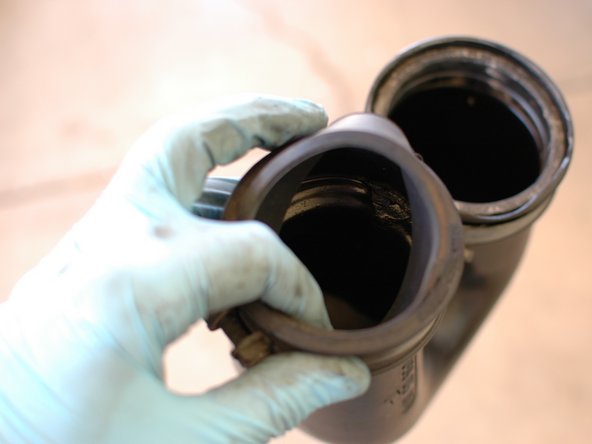
The turbo elbow can now be pulled off.
-
Start by inspecting the upper seal. As you can see, this one was installed improperly. It was pushed back in to the elbow during installation. This is typical, and due to a Mercedes design issue.
-
-
-
Este passo não foi traduzido. Ajude a traduzi-lo
-
Allow a brief discussion of the design issue...
-
The seal for the upper elbow has a groove built in to it.
-
The neck on the air filter housing where this seal goes has a matching ridge.
-
This prevents the new seal from easily slipping on to the neck and it often gets pushed back in to the elbow, preventing a proper seal.
-
A potential fix for this will be addressed later in the guide.
-
-
Este passo não foi traduzido. Ajude a traduzi-lo
-
Remove the upper seal now. Needle nose pliers work well for this.
-
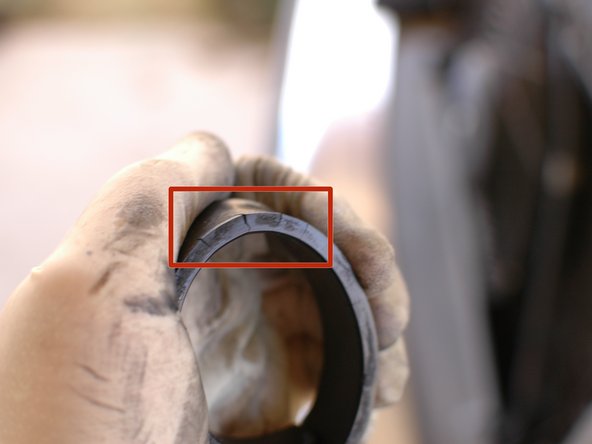
As you can see, the old seal was deformed due to its improper installation.
-
-
Este passo não foi traduzido. Ajude a traduzi-lo
-
Now remove the lower elbow seal.
-
The old one on this car was so old and brittle it would not bend for removal. It had to be broken in half using a needle nose pliers.
-
Notice that the unbroken side of the old seal shows visible cracks when squeezed.
-
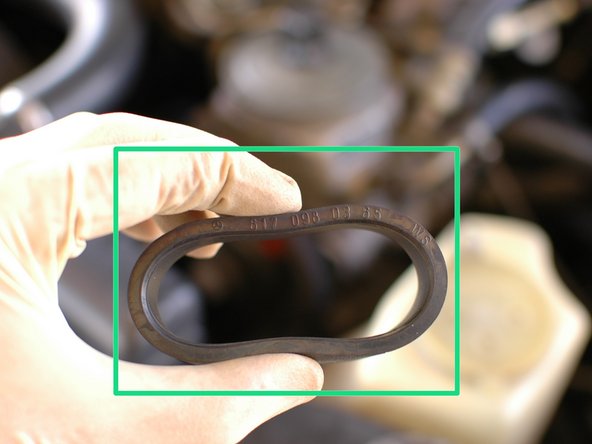
Compare this with the new seal.
-
-
Este passo não foi traduzido. Ajude a traduzi-lo
-
Now it's time to install the new seals.
-
One trick that seems to work to make the upper seal easier to install is to cut off the raised lip on the upper elbow. This lip seems to be of dubious value, and causes a lot of trouble.
-
It can be cut off with a sharp razor blade, though be careful when doing this.
-
As you can see, after modification the new upper seal sits in the upper end of the elbow easily. It will still seal well when clamped down as the lip is not part of the sealing surface.
-
-
Este passo não foi traduzido. Ajude a traduzi-lo
-
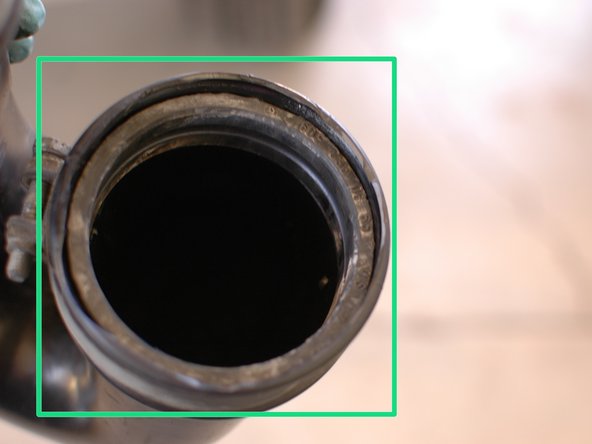
Now install the new lower elbow seal.
-
It needs to be squeezed to fit it in to the opening on the elbow to get it past the lip.
-
This end is much easier to install on the turbo since the seal and turbo inlet are both smooth.
-
-
Este passo não foi traduzido. Ajude a traduzi-lo
-
It's now time to re-install the elbow. It should simply push on. It can help to leave a bit of the upper seal showing out of the end of the upper elbow end as you slip it on.
-
Now just tighten down the clamps and you're ready to roll!
-


Cancelar: não concluí este guia.
4 outras pessoas executaram este guia.

Equipe

Um comentário
Is it common to have oil pooling in this elbow? Maybe my oil separator is not doing its thing. Or maybe i have too much blow by. Either way, how much is an acceptable amount of oil here?