Introdução
The injector hard lines deliver fuel from the injection pump to the injectors are very high pressures; well over 1000 psi! The smallest hair line crack in the metal line will lead to fuel leaks. In such a situation they will need to be replaced.
Beyond that, not much goes wrong with the hard lines, but it's good to learn how to remove and install the lines so you can pull them off to more easily do other jobs like replacing your glow plugs.
O que você precisa
-
-
Begin by marking the hard lines. Each one goes in only one location, it will make it easier to re-install the lines or to install your new lines if you mark where each shaped line goes on the injection pump/injectors.
-
-
-
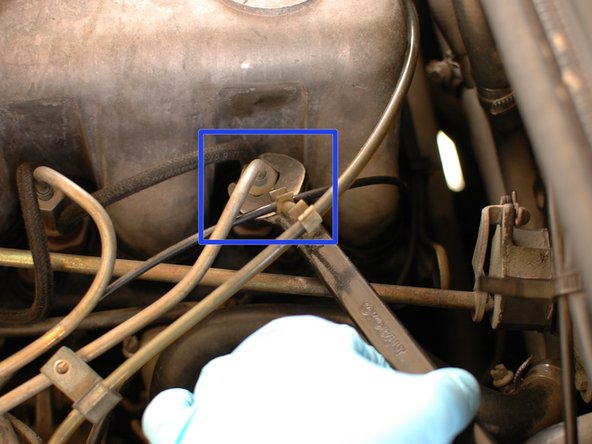
Then begin removing the clamps that hold adjacent hard lines together.
-
You'll use a 8mm socket on top of the bolt that holds the clamps together, and a 8mm box end wrench on the bottom nut that the bolt goes in to.
-
Go slowly with this and be careful to not drop the nuts or clamp pieces as they can fall behind the injection pump. It's not impossible to get them out, but it can be difficult.
-
The second picture shows the hard lines with all of the clamps removed. Be sure to re-install all of the clamps on the lines; they help prevent the lines from vibrating excessively. The vibration is what tends to cause them to crack!
-
-


To reassemble your device, follow these instructions in reverse order.
To reassemble your device, follow these instructions in reverse order.
Cancelar: não concluí este guia.
5 outras pessoas executaram este guia.

Equipe

2 comentários
do you need to bleed the lines after you put them back on?